Workflow
Workflow can carry out automated customer interaction, leads nurtured, customer follow-up, and improve the efficiency of accurate marketing. The rules of the workflows should be set in advance. Customers will trigger the process when the conditions are met, then the system can interact with the customers automatically.
1. Workflow Lists
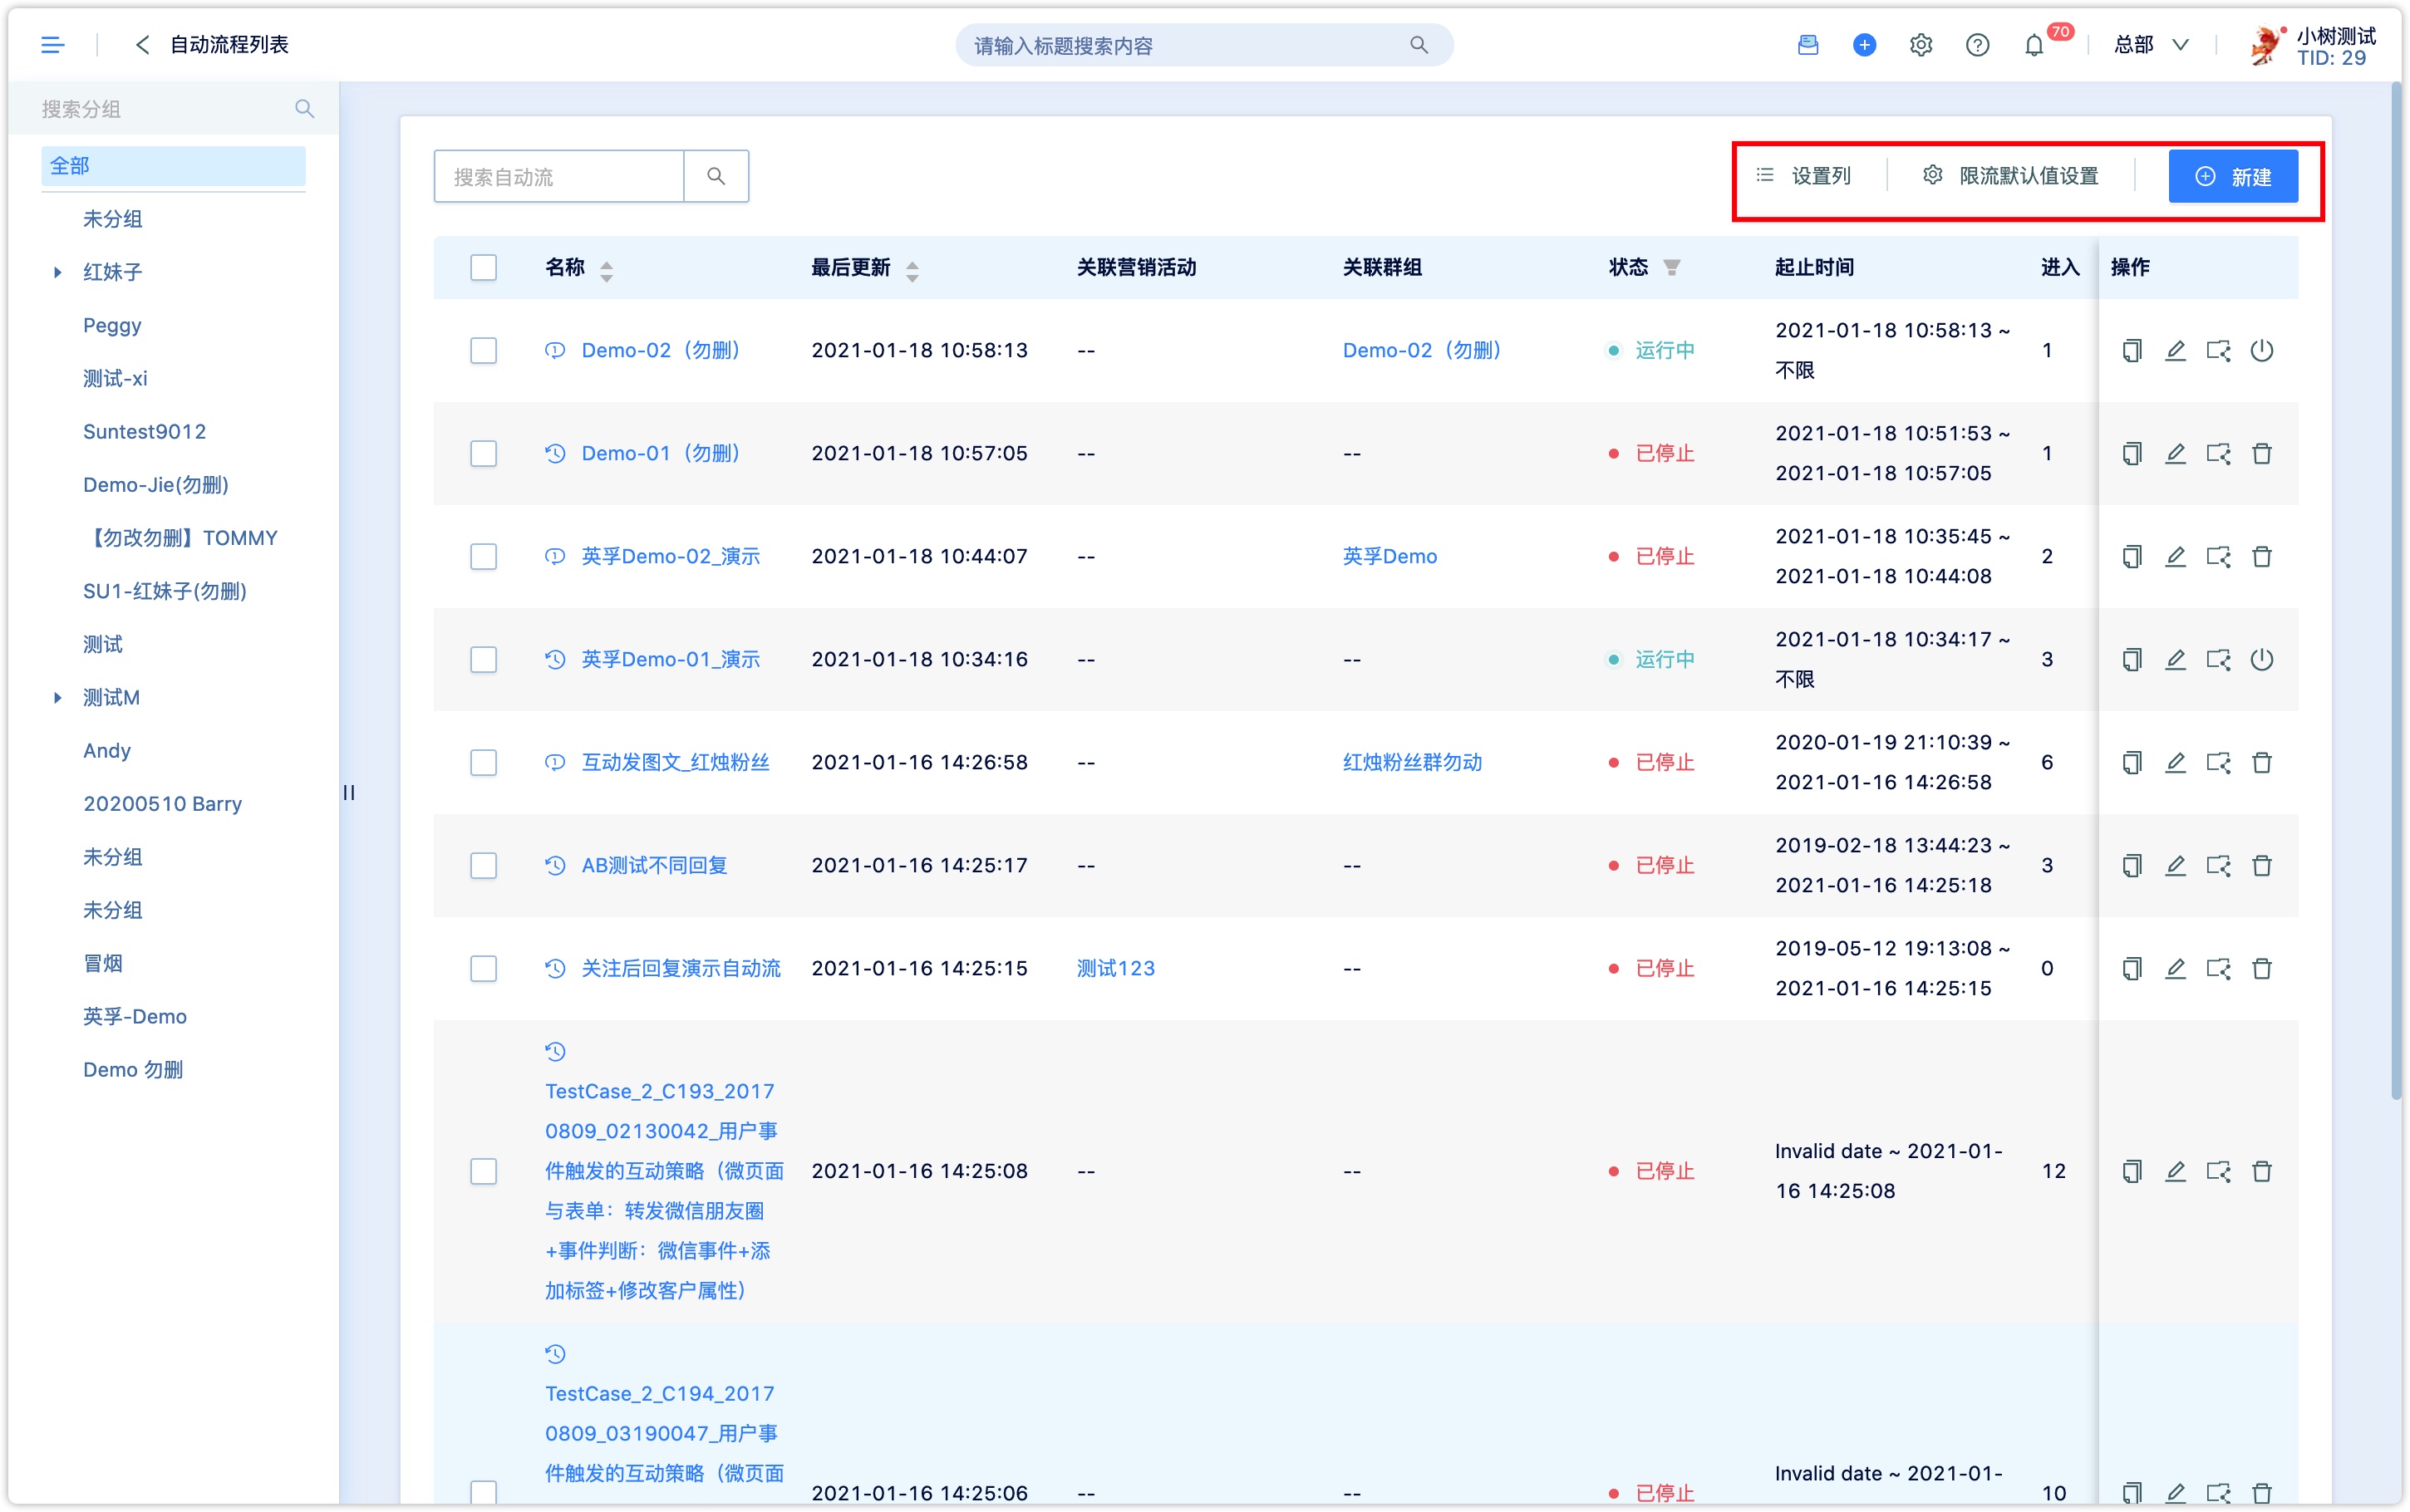
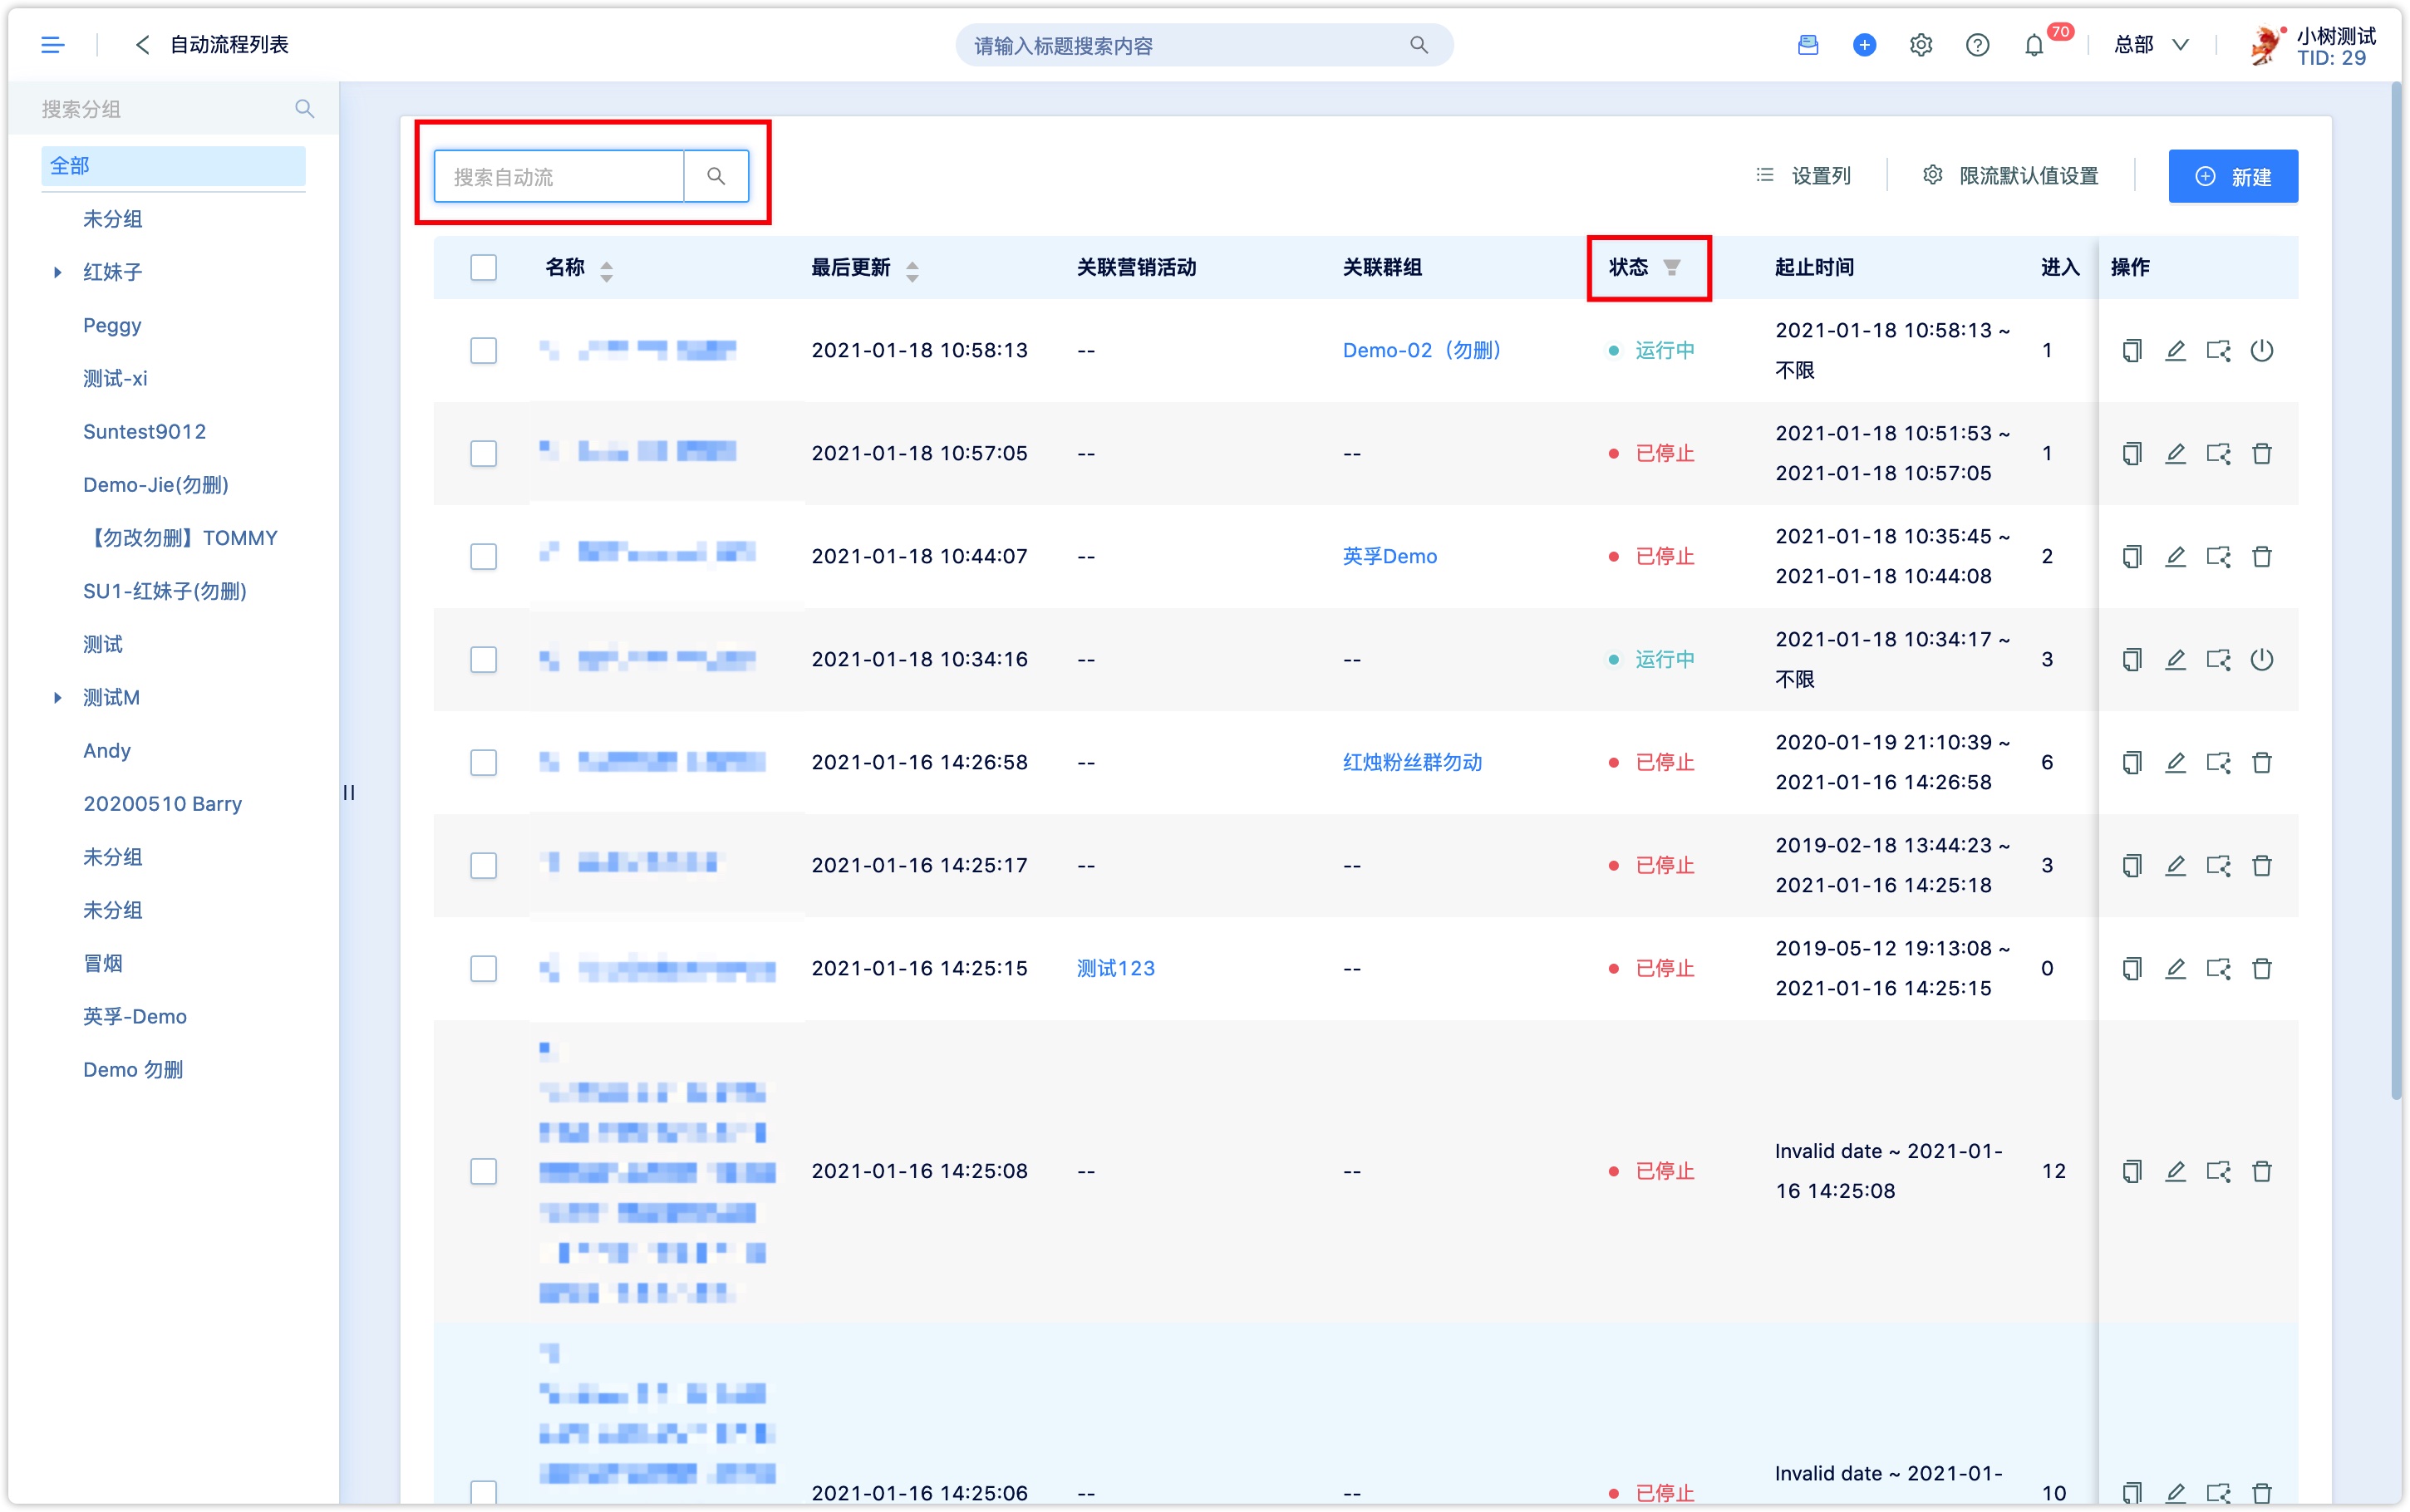
Click 【Marketing】-【Workflow】to enter the workflow interface. First, you can view the list and grouping of workflow that have been built. In the upper right corner of the page, there are three buttons: 【set column】, 【default setting of current limit】, and 【New】.
Click 【Set column】, you can choose to adjust columns that need to be displayed on the workflow page.

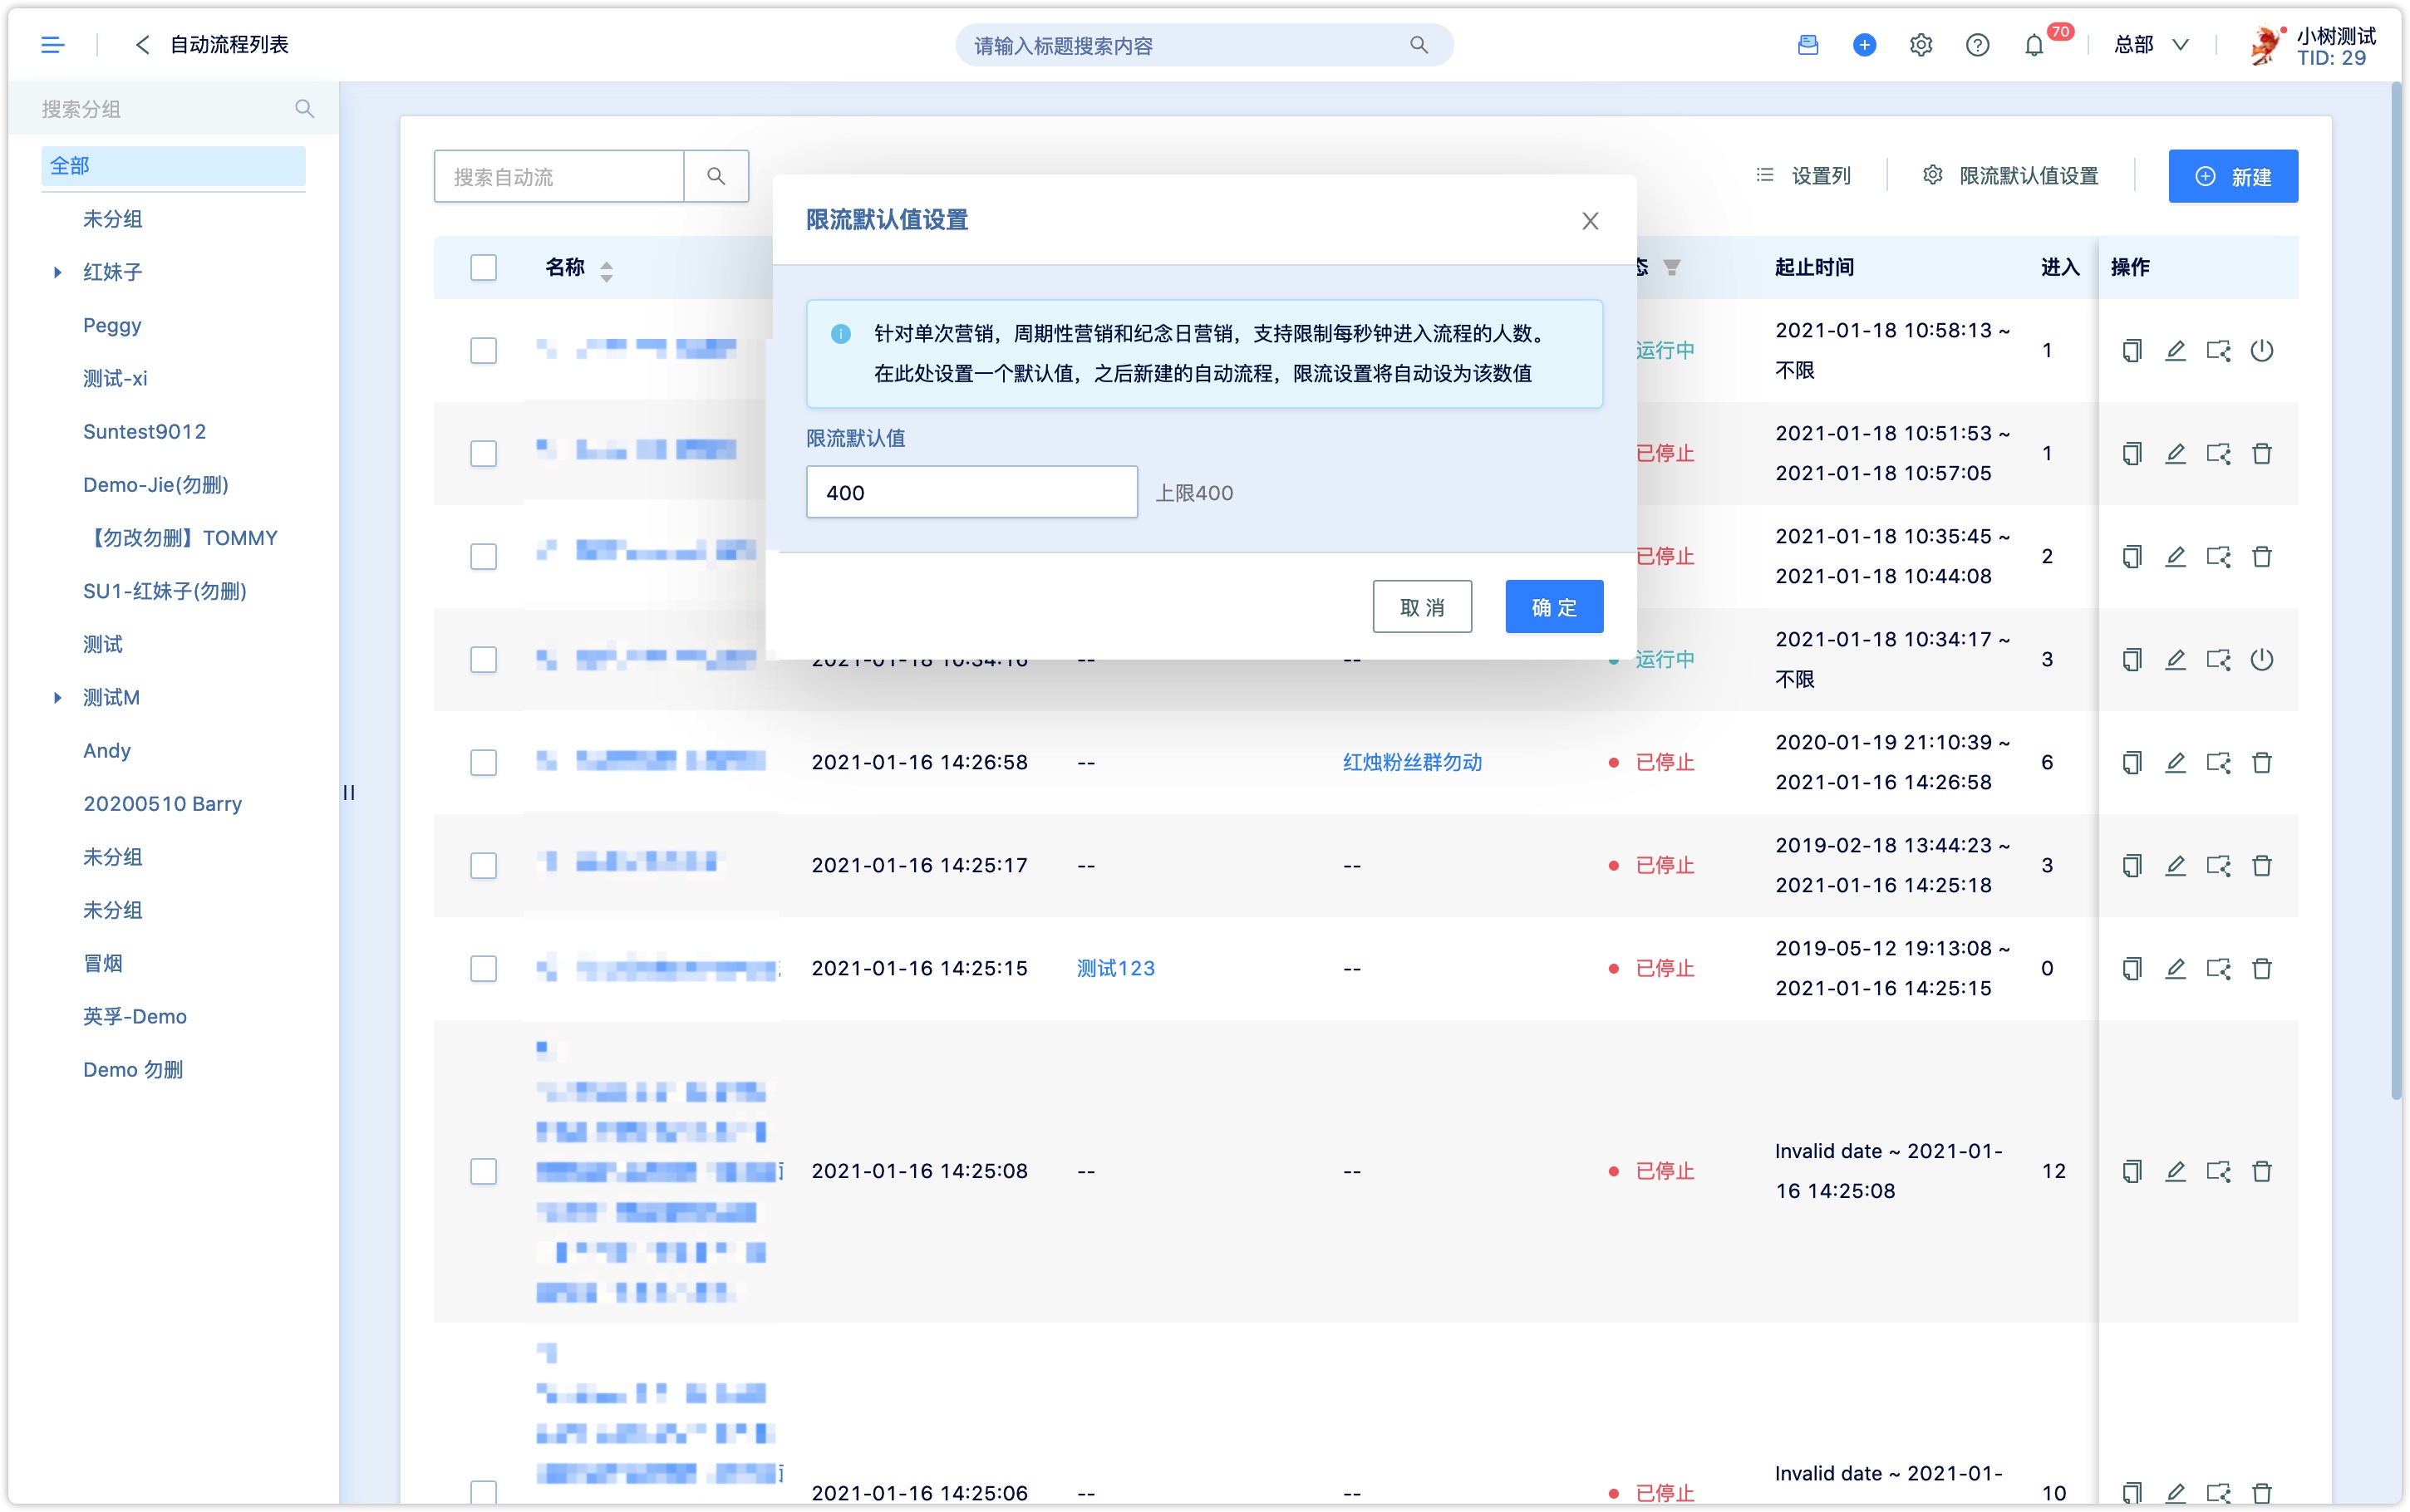
Click 【Default setting of current- limiting】 to limit the number of people entering the process per second.
In the following columns, what needs to be explained is the 【Status】 of workflow, which has six statuses.
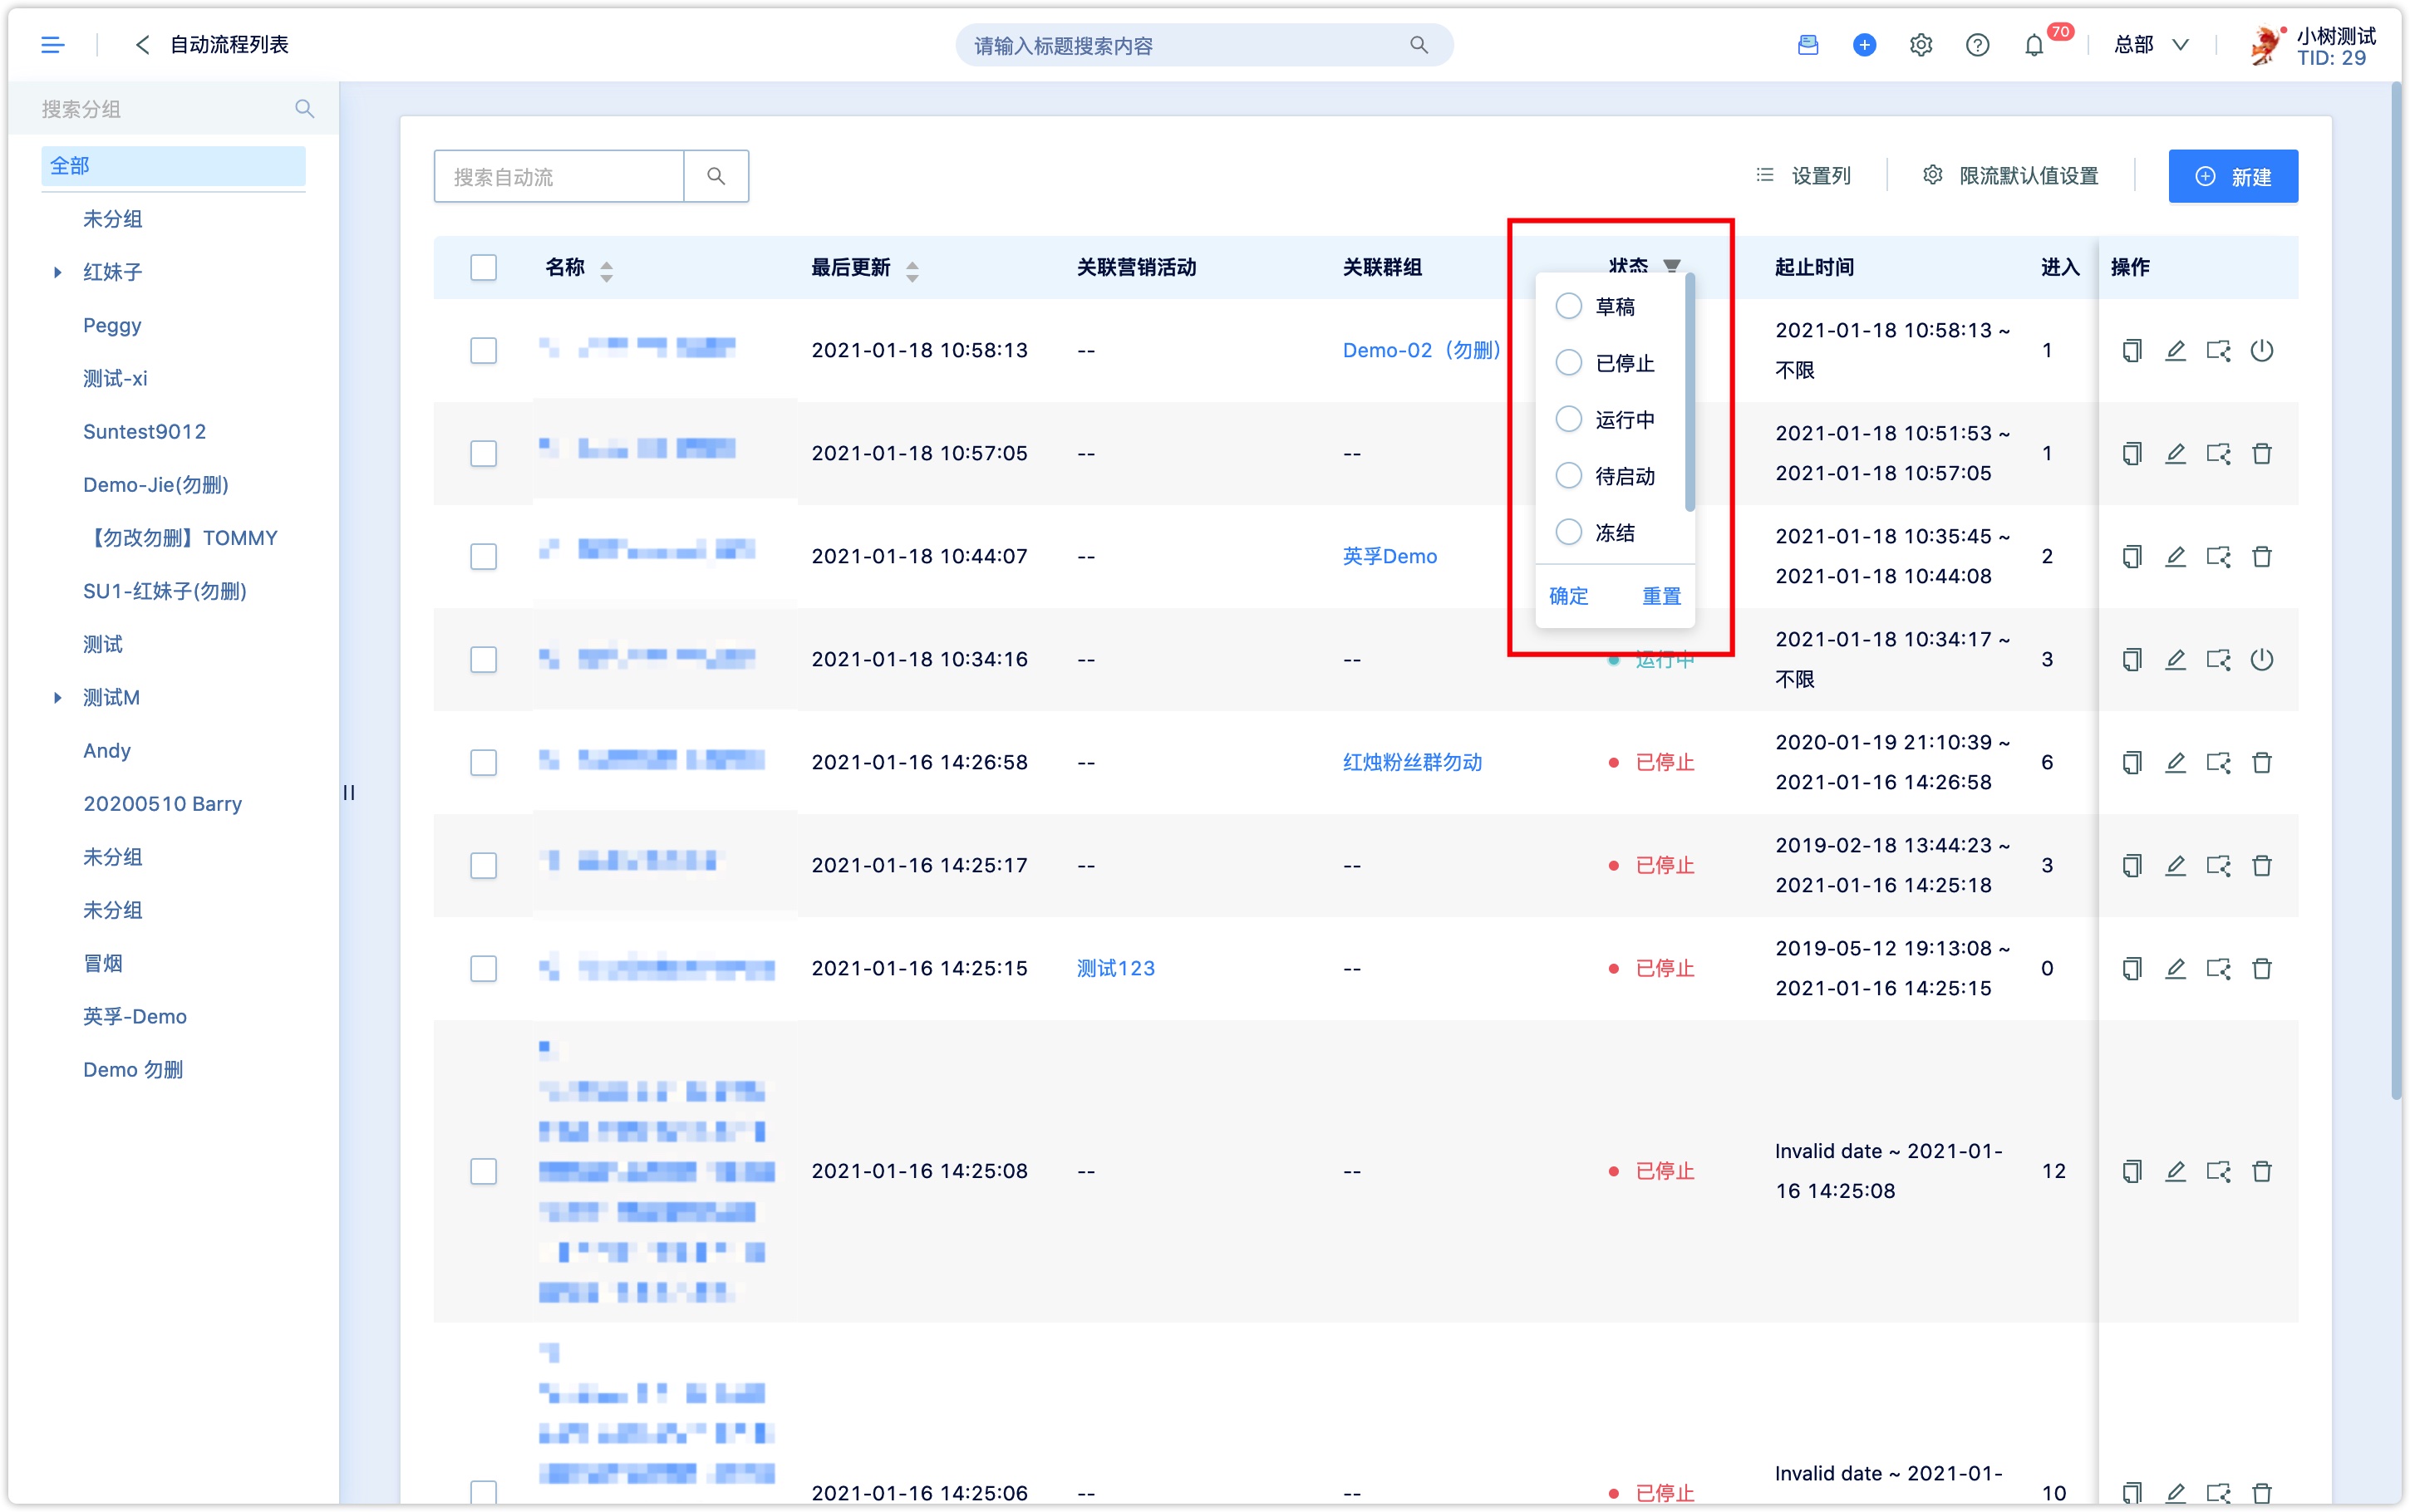
Draft: Edited and saved workflows.
Stopped: Stop the process after starting the process.
Running: Process started, the flow is running.
Ready to start: Workflow can set the startup time and this status means the flow has not yet reached the startup time.
Freeze: Expired tenants their workflows will be frozen automatically.
Invalidated: Workflow will become invalid after it has been stopped for 30 days.
You can quickly find the workflows through the status filtering, or you can directly search the title keywords to find the corresponding workflow.
There is an upper limit for the startup status of a workflow. For more information, please refer to the prompt in the account. Each startup process will remind you of the remaining number of launchers.

There are four actions to choose from the action bar on the right:
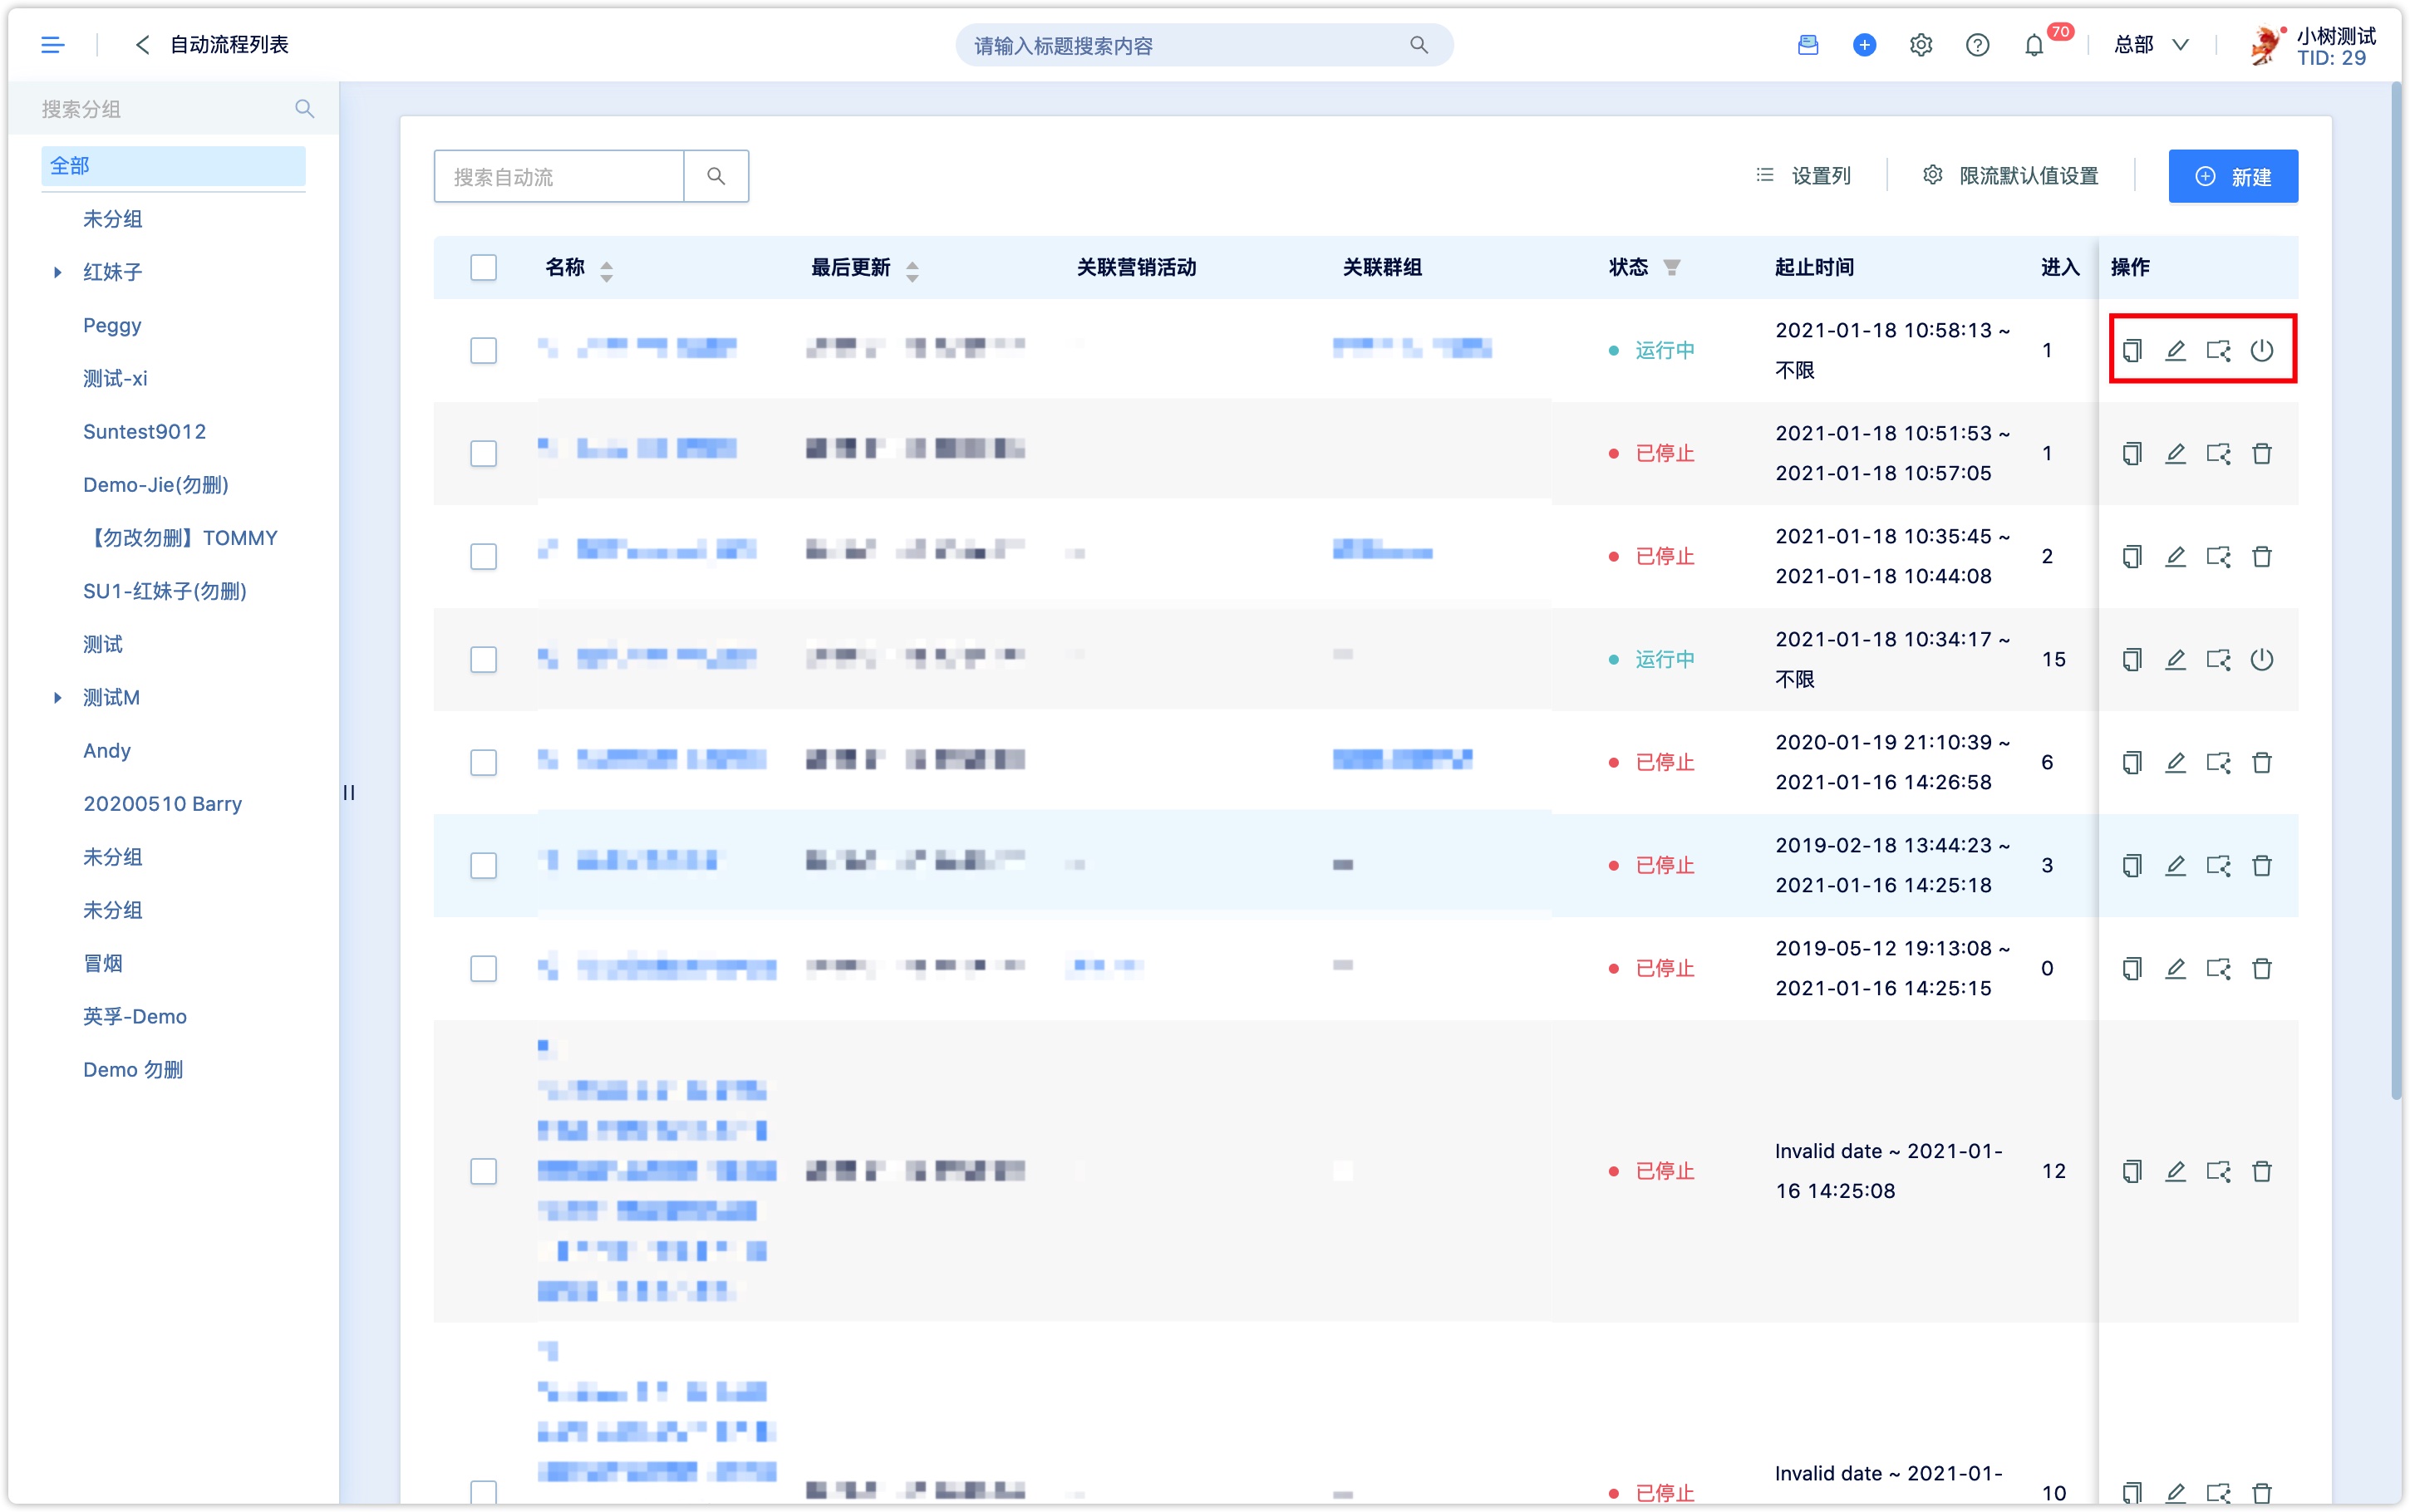
Copy: Copy a workflow that has been created.
Diting: You can edit and modify the workflow.
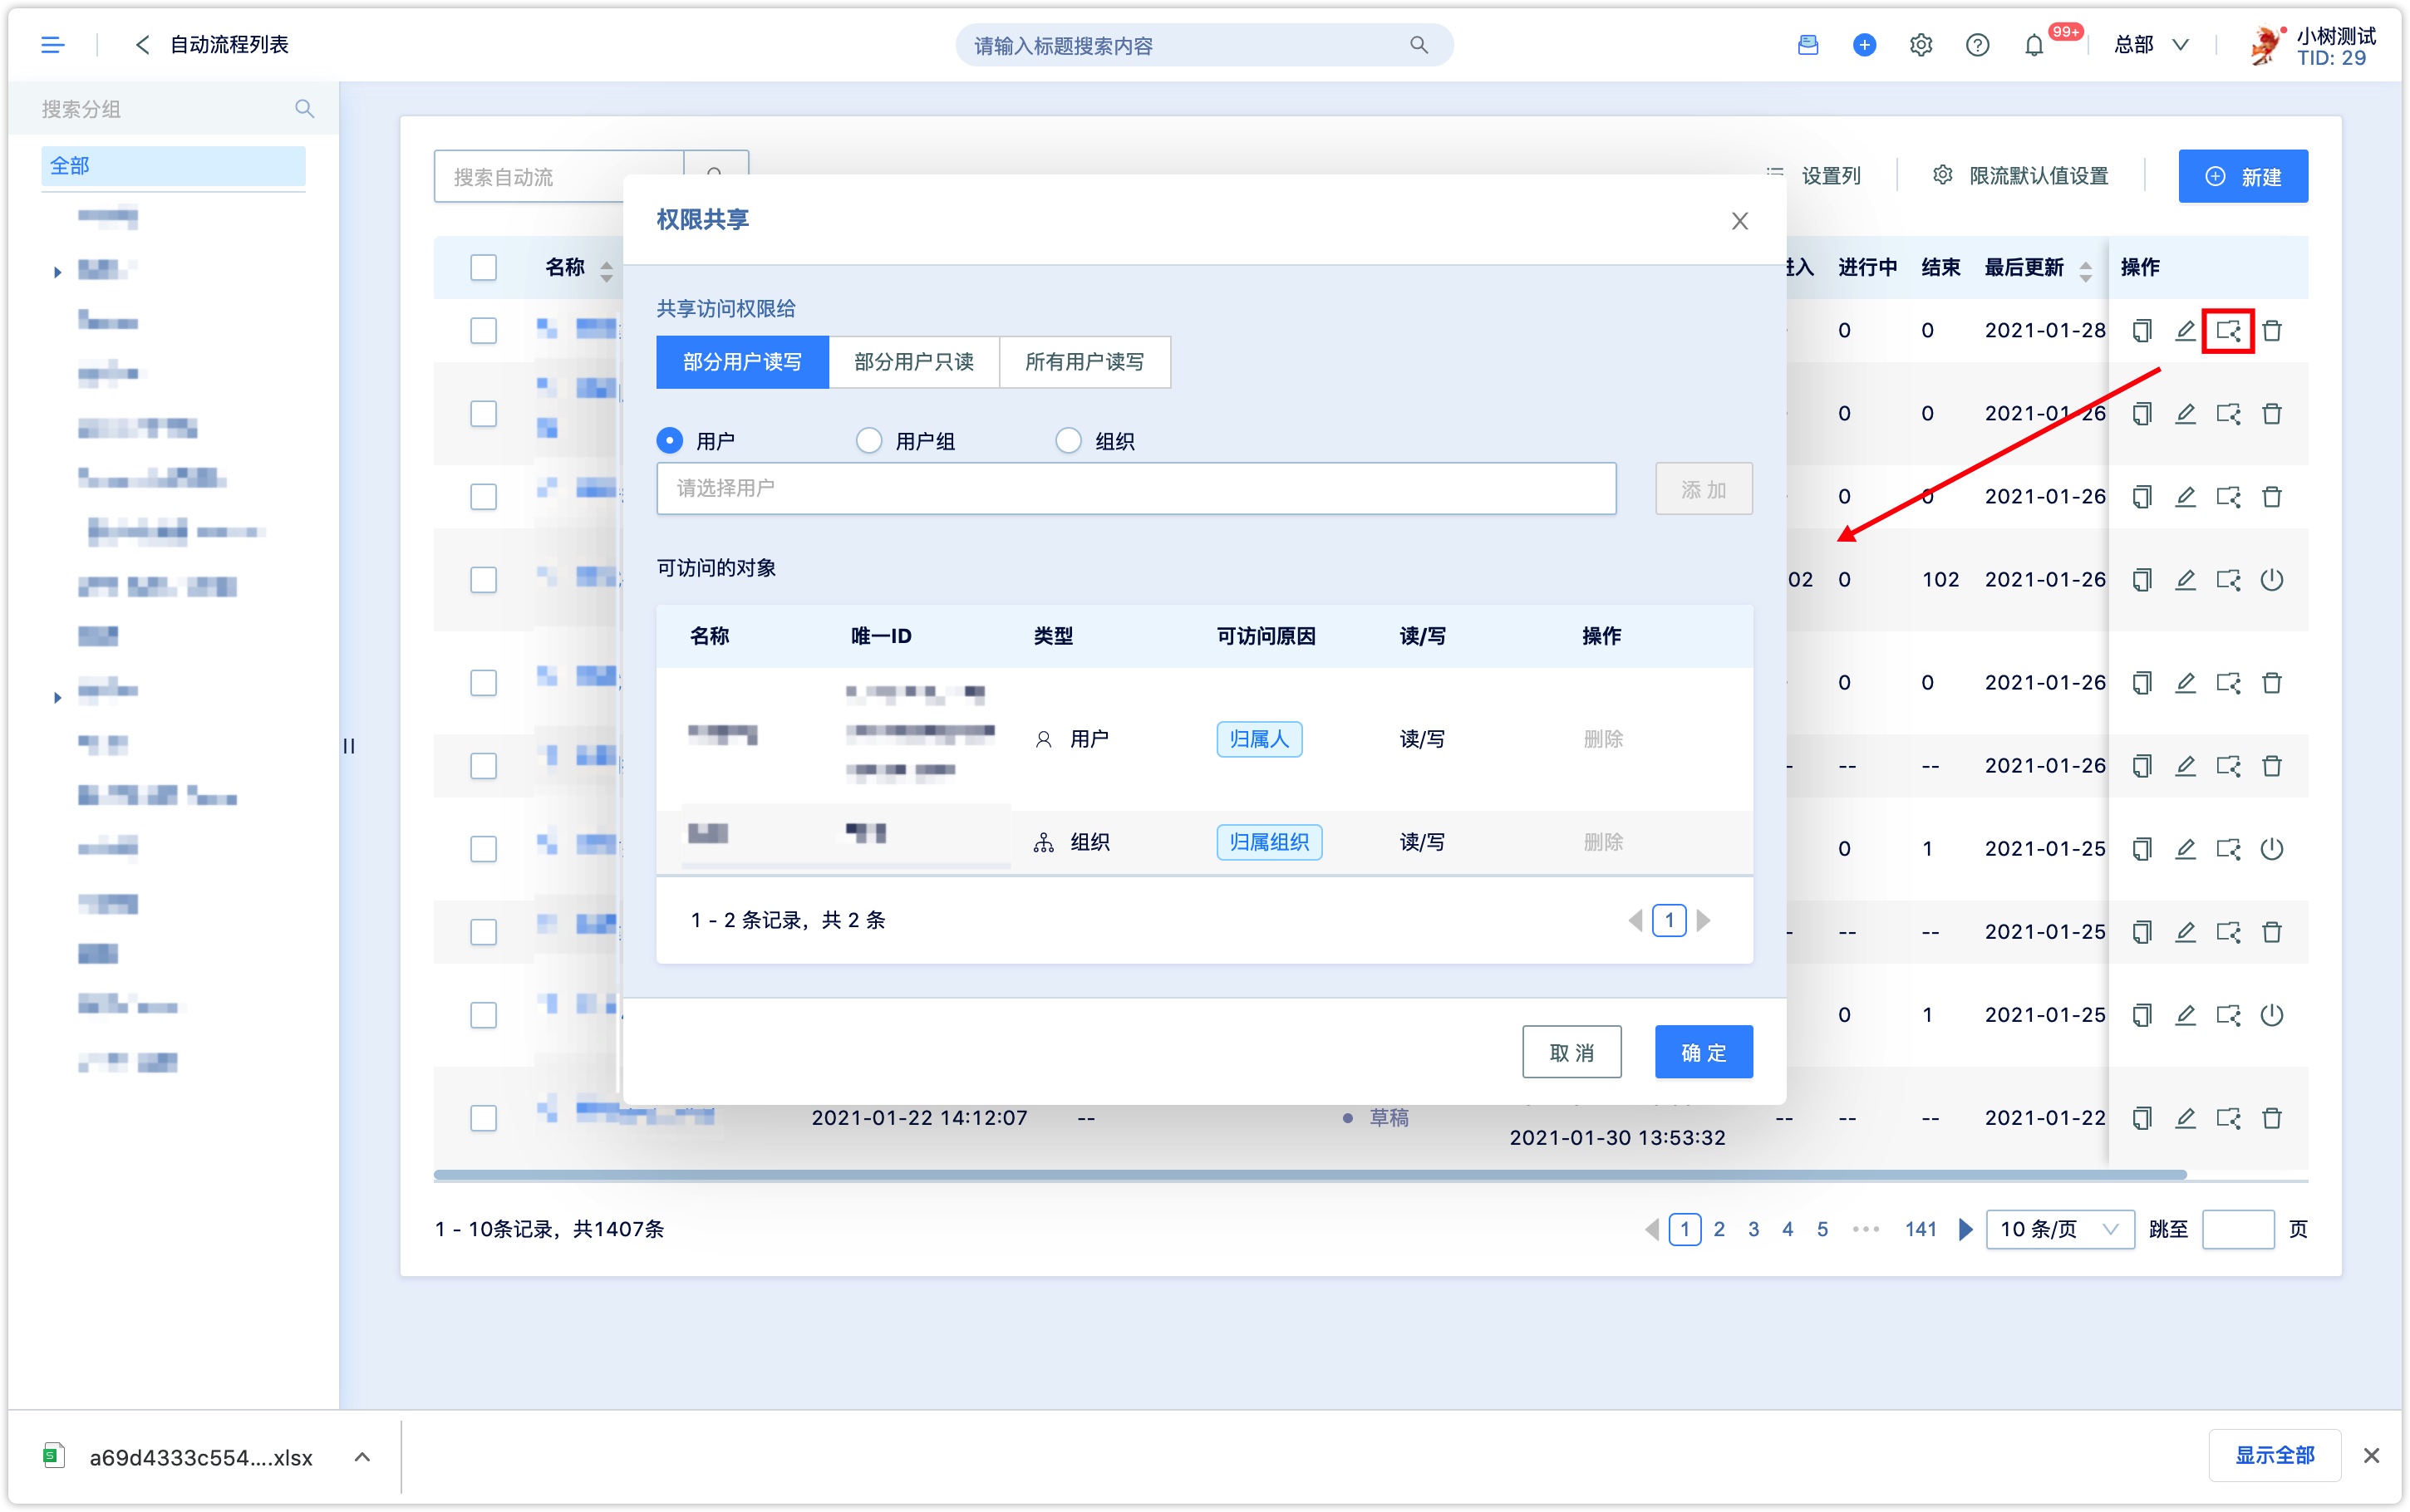
Permission sharing: You can choose to share permissions with selected users and limit the permissions of selected users.
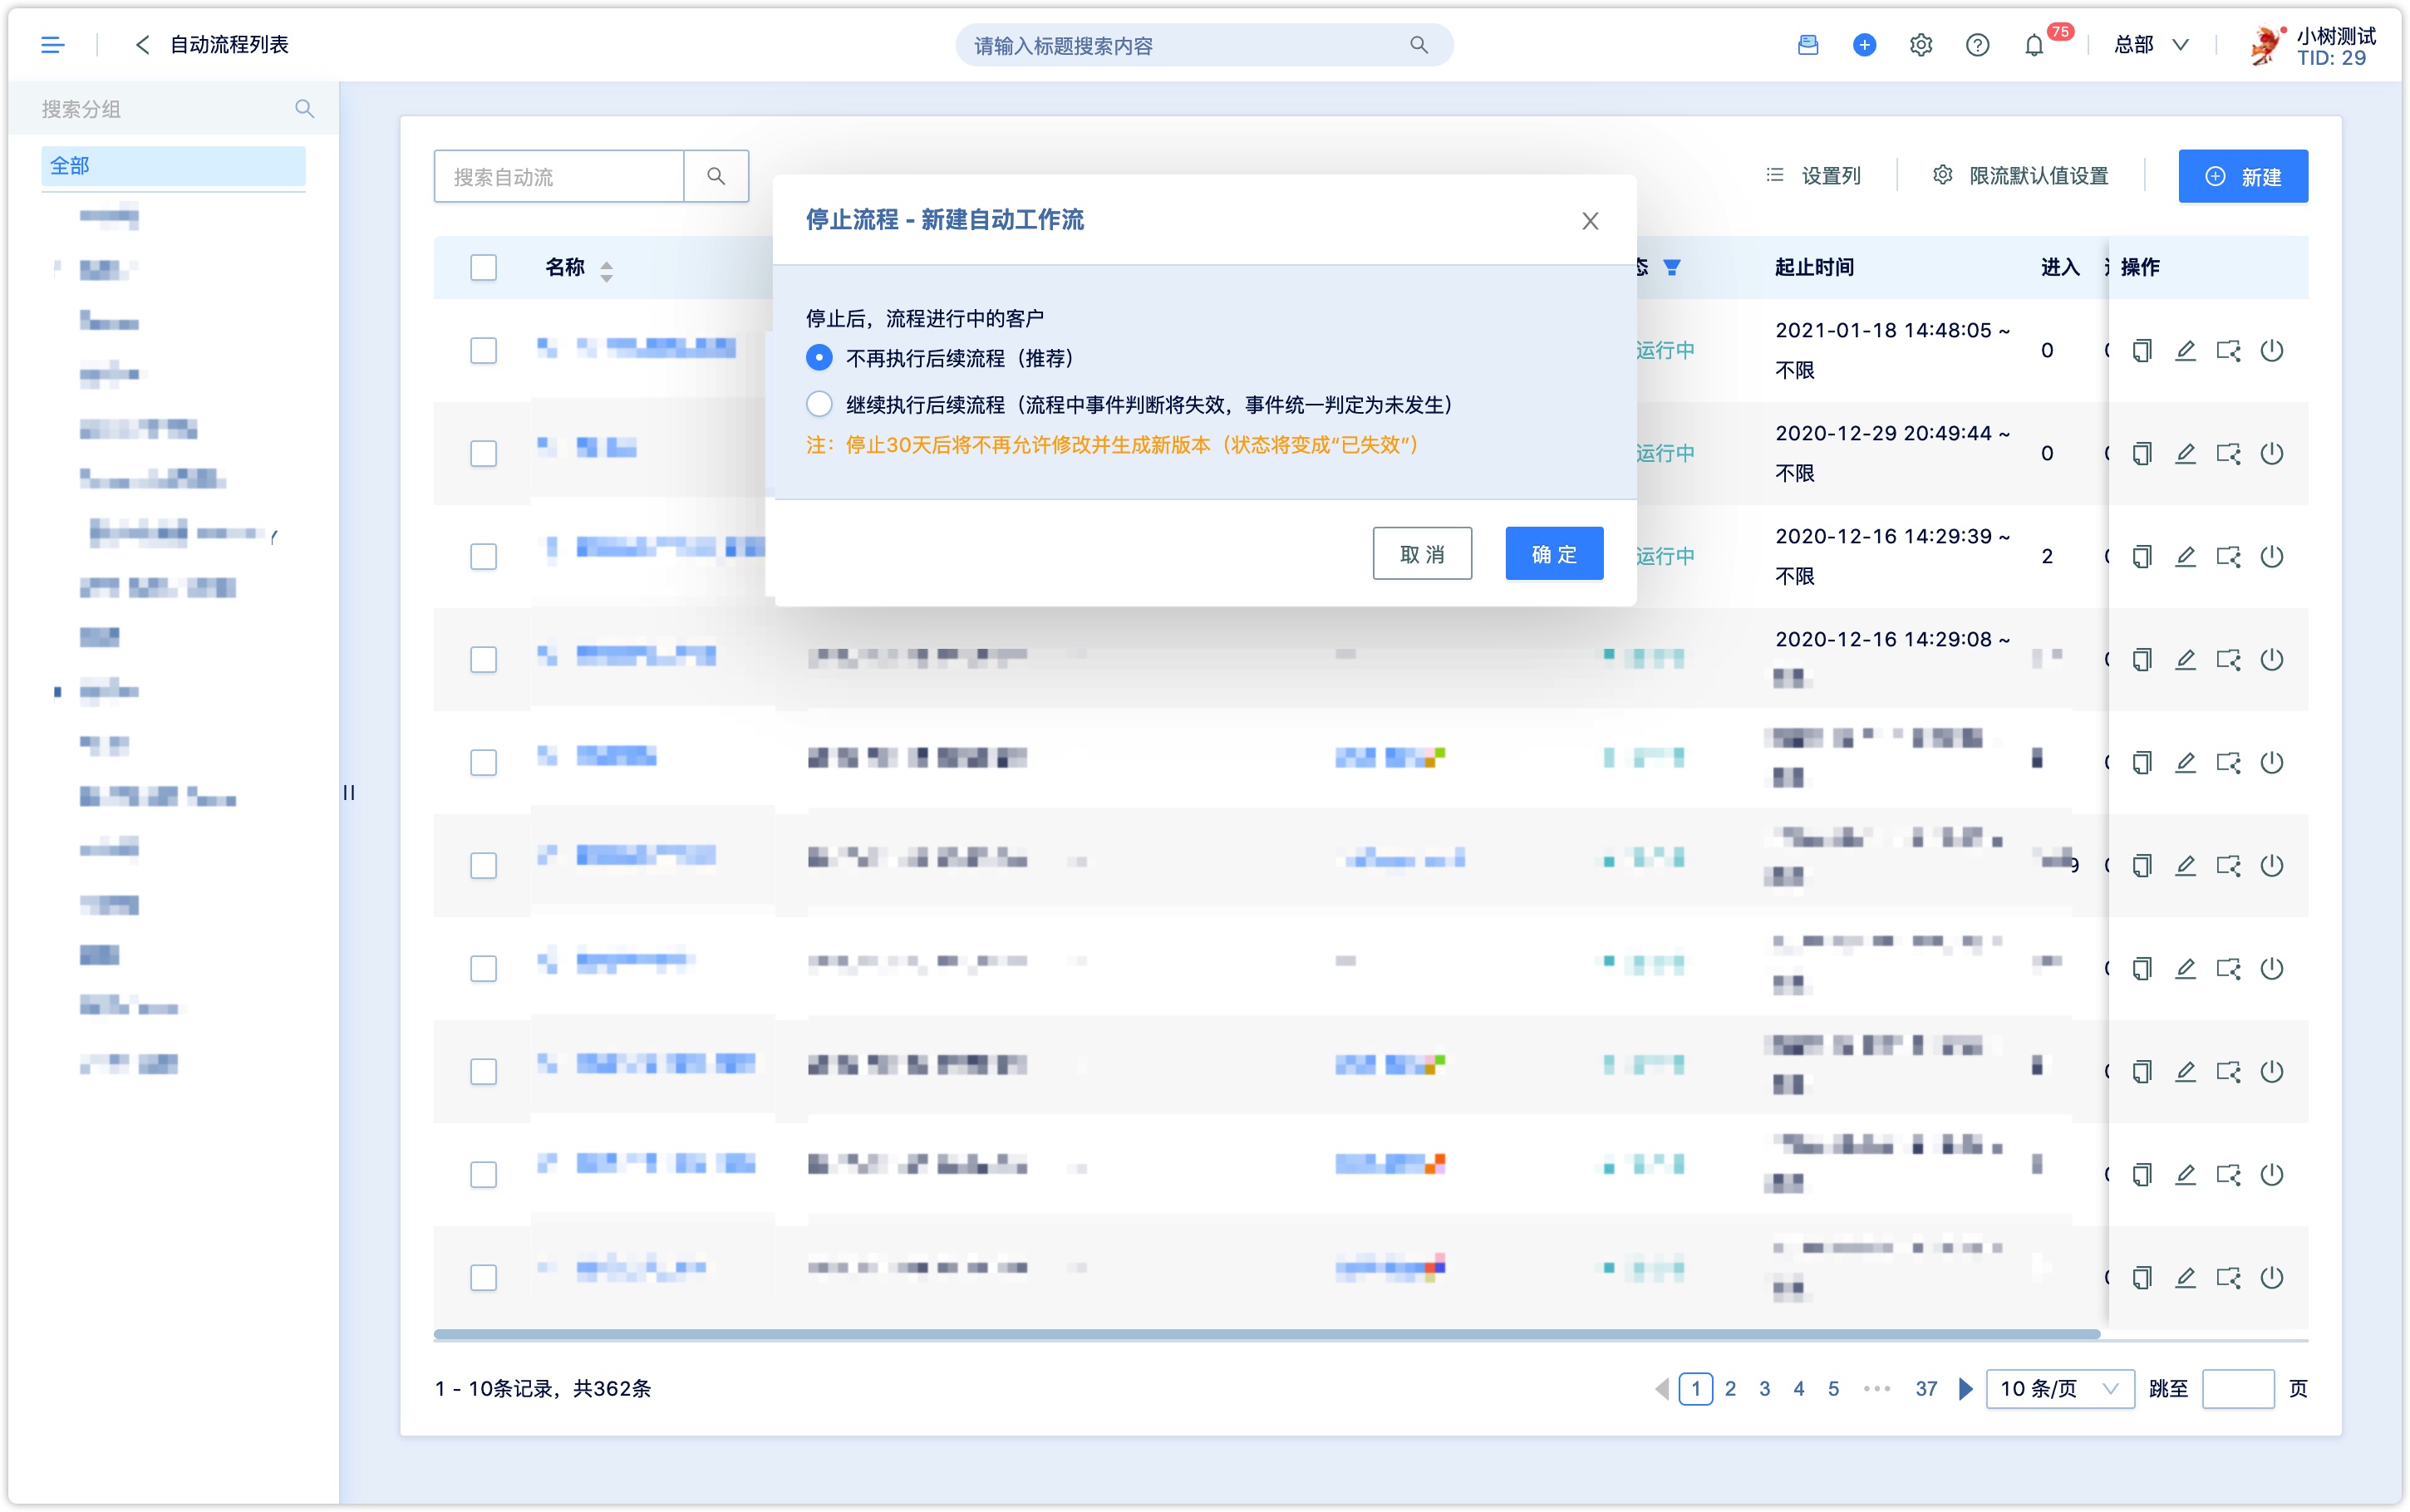
Stop: You can stop the workflow manually.
2. Create new workflow
Click 【New】 to start a new workflow. There are two ways to create a new workflow: select a template to modify the workflow or edit a blank workflow.
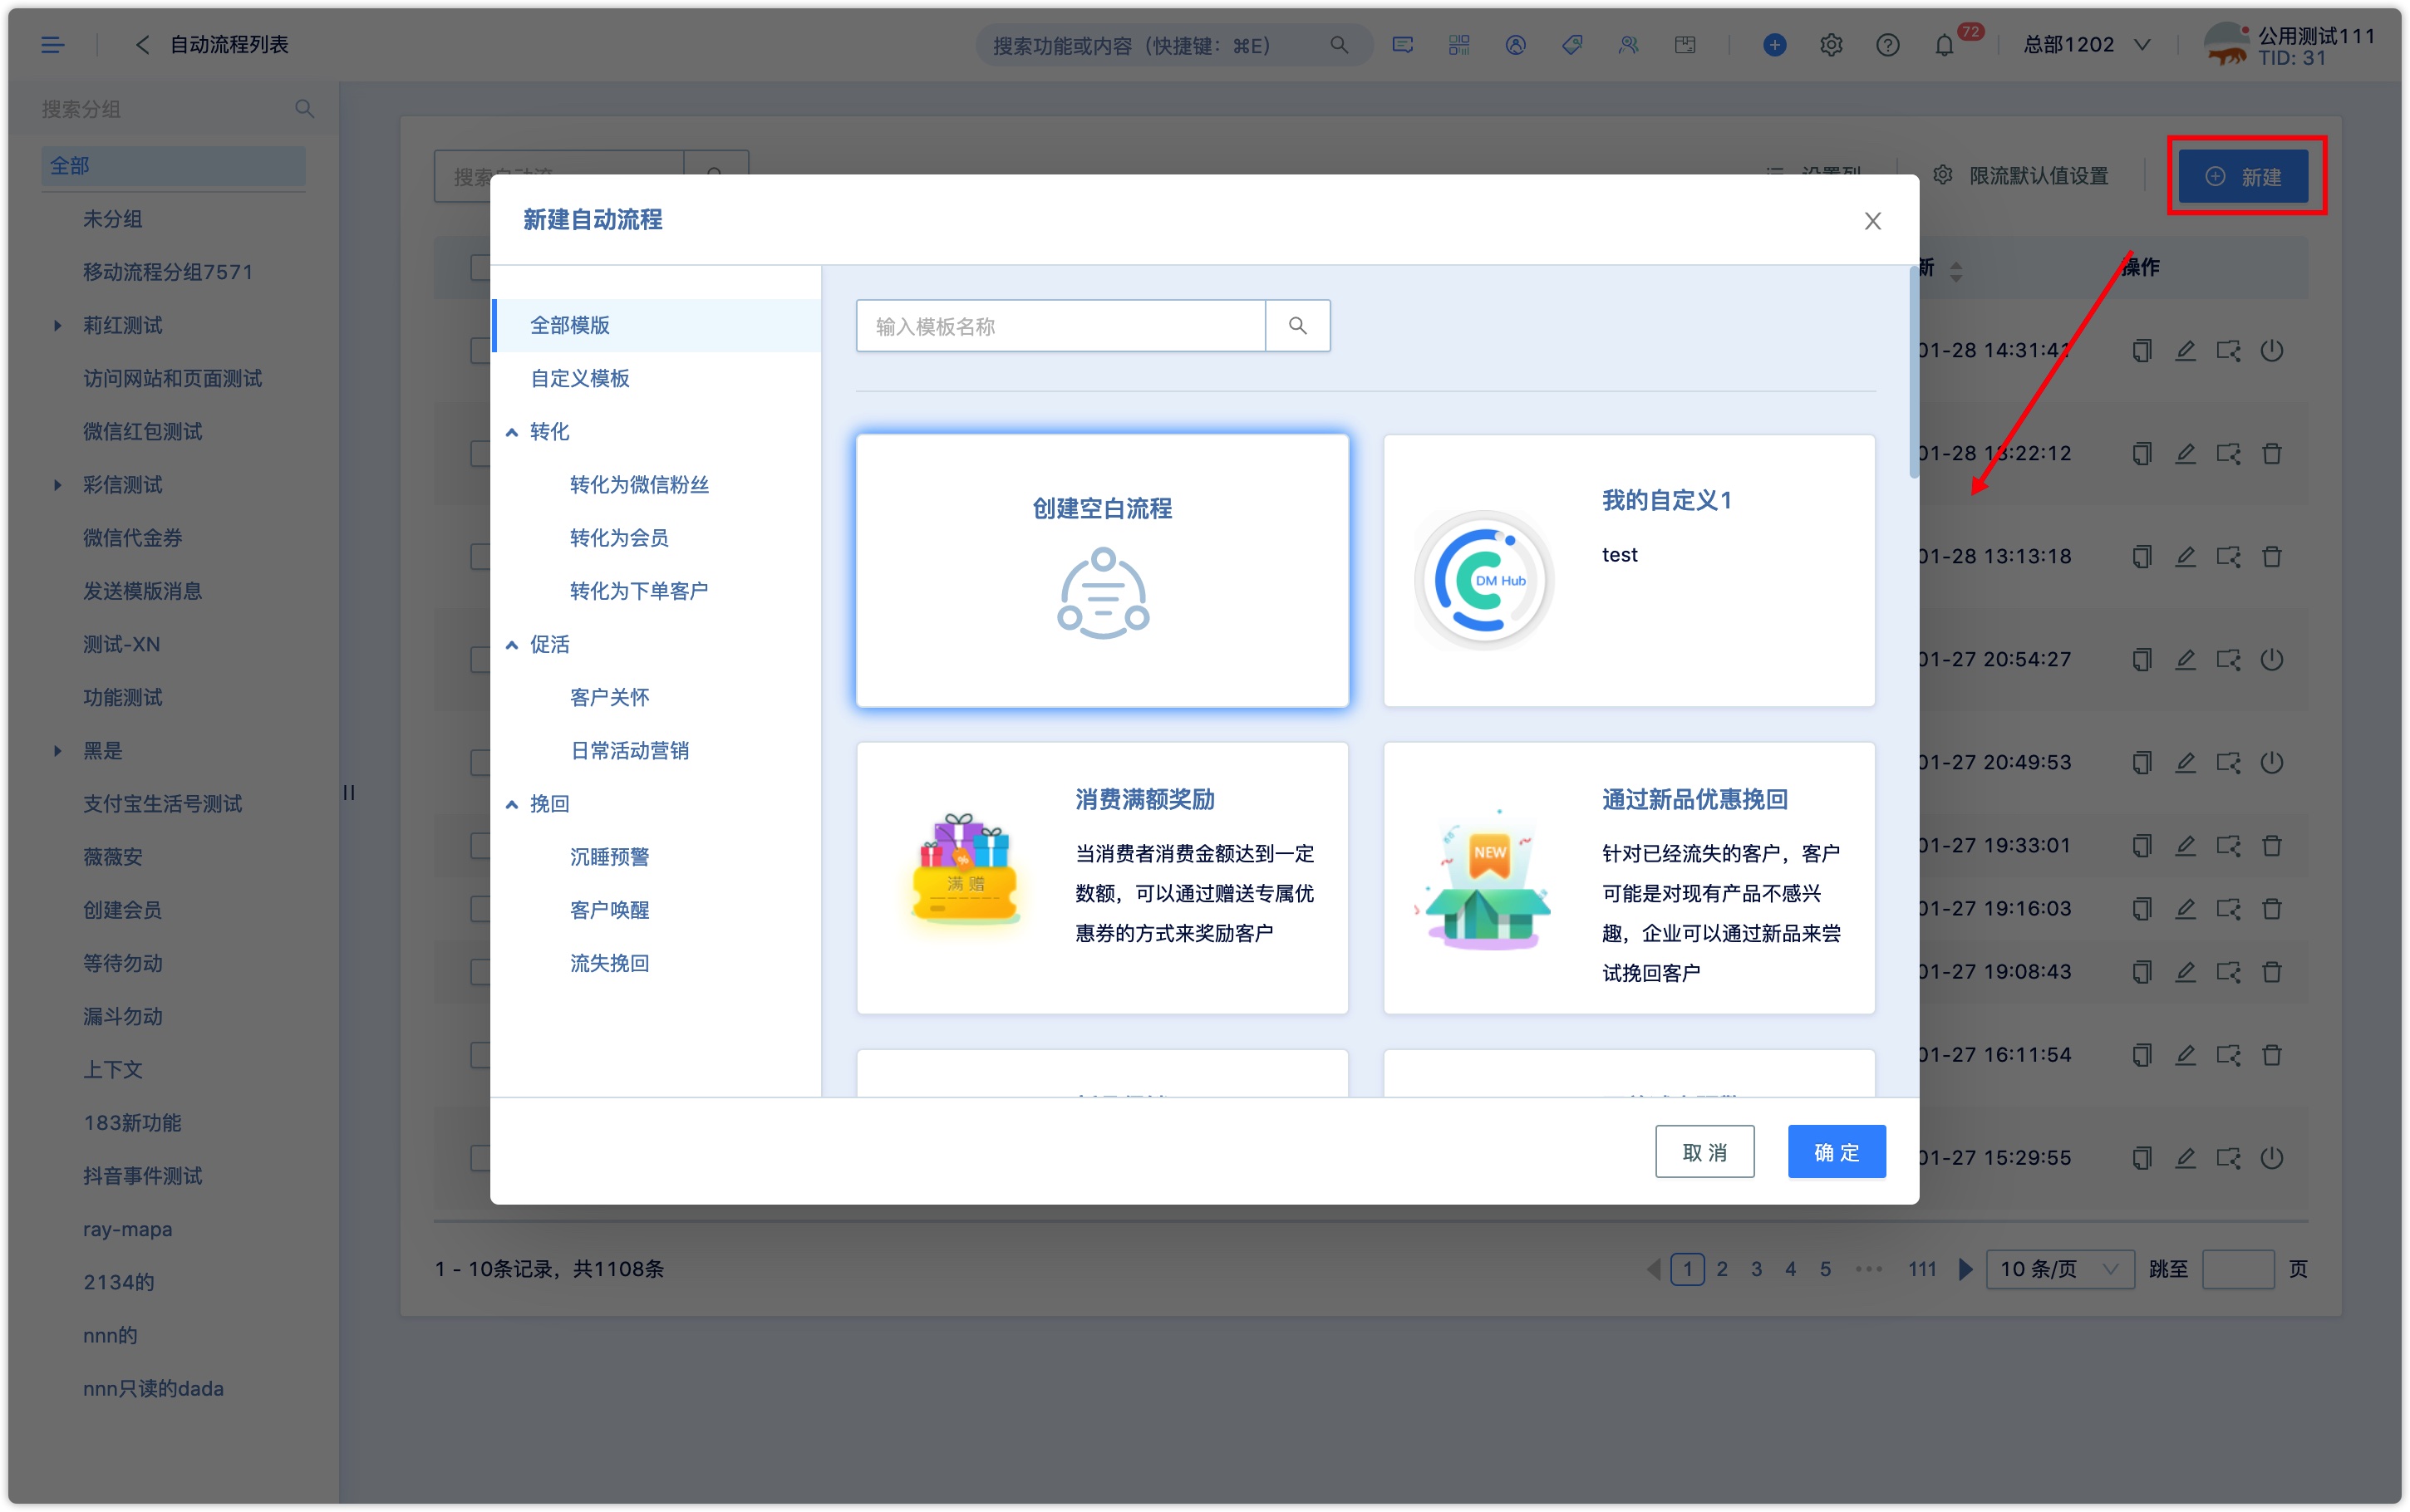
Modify from the selected template workflow
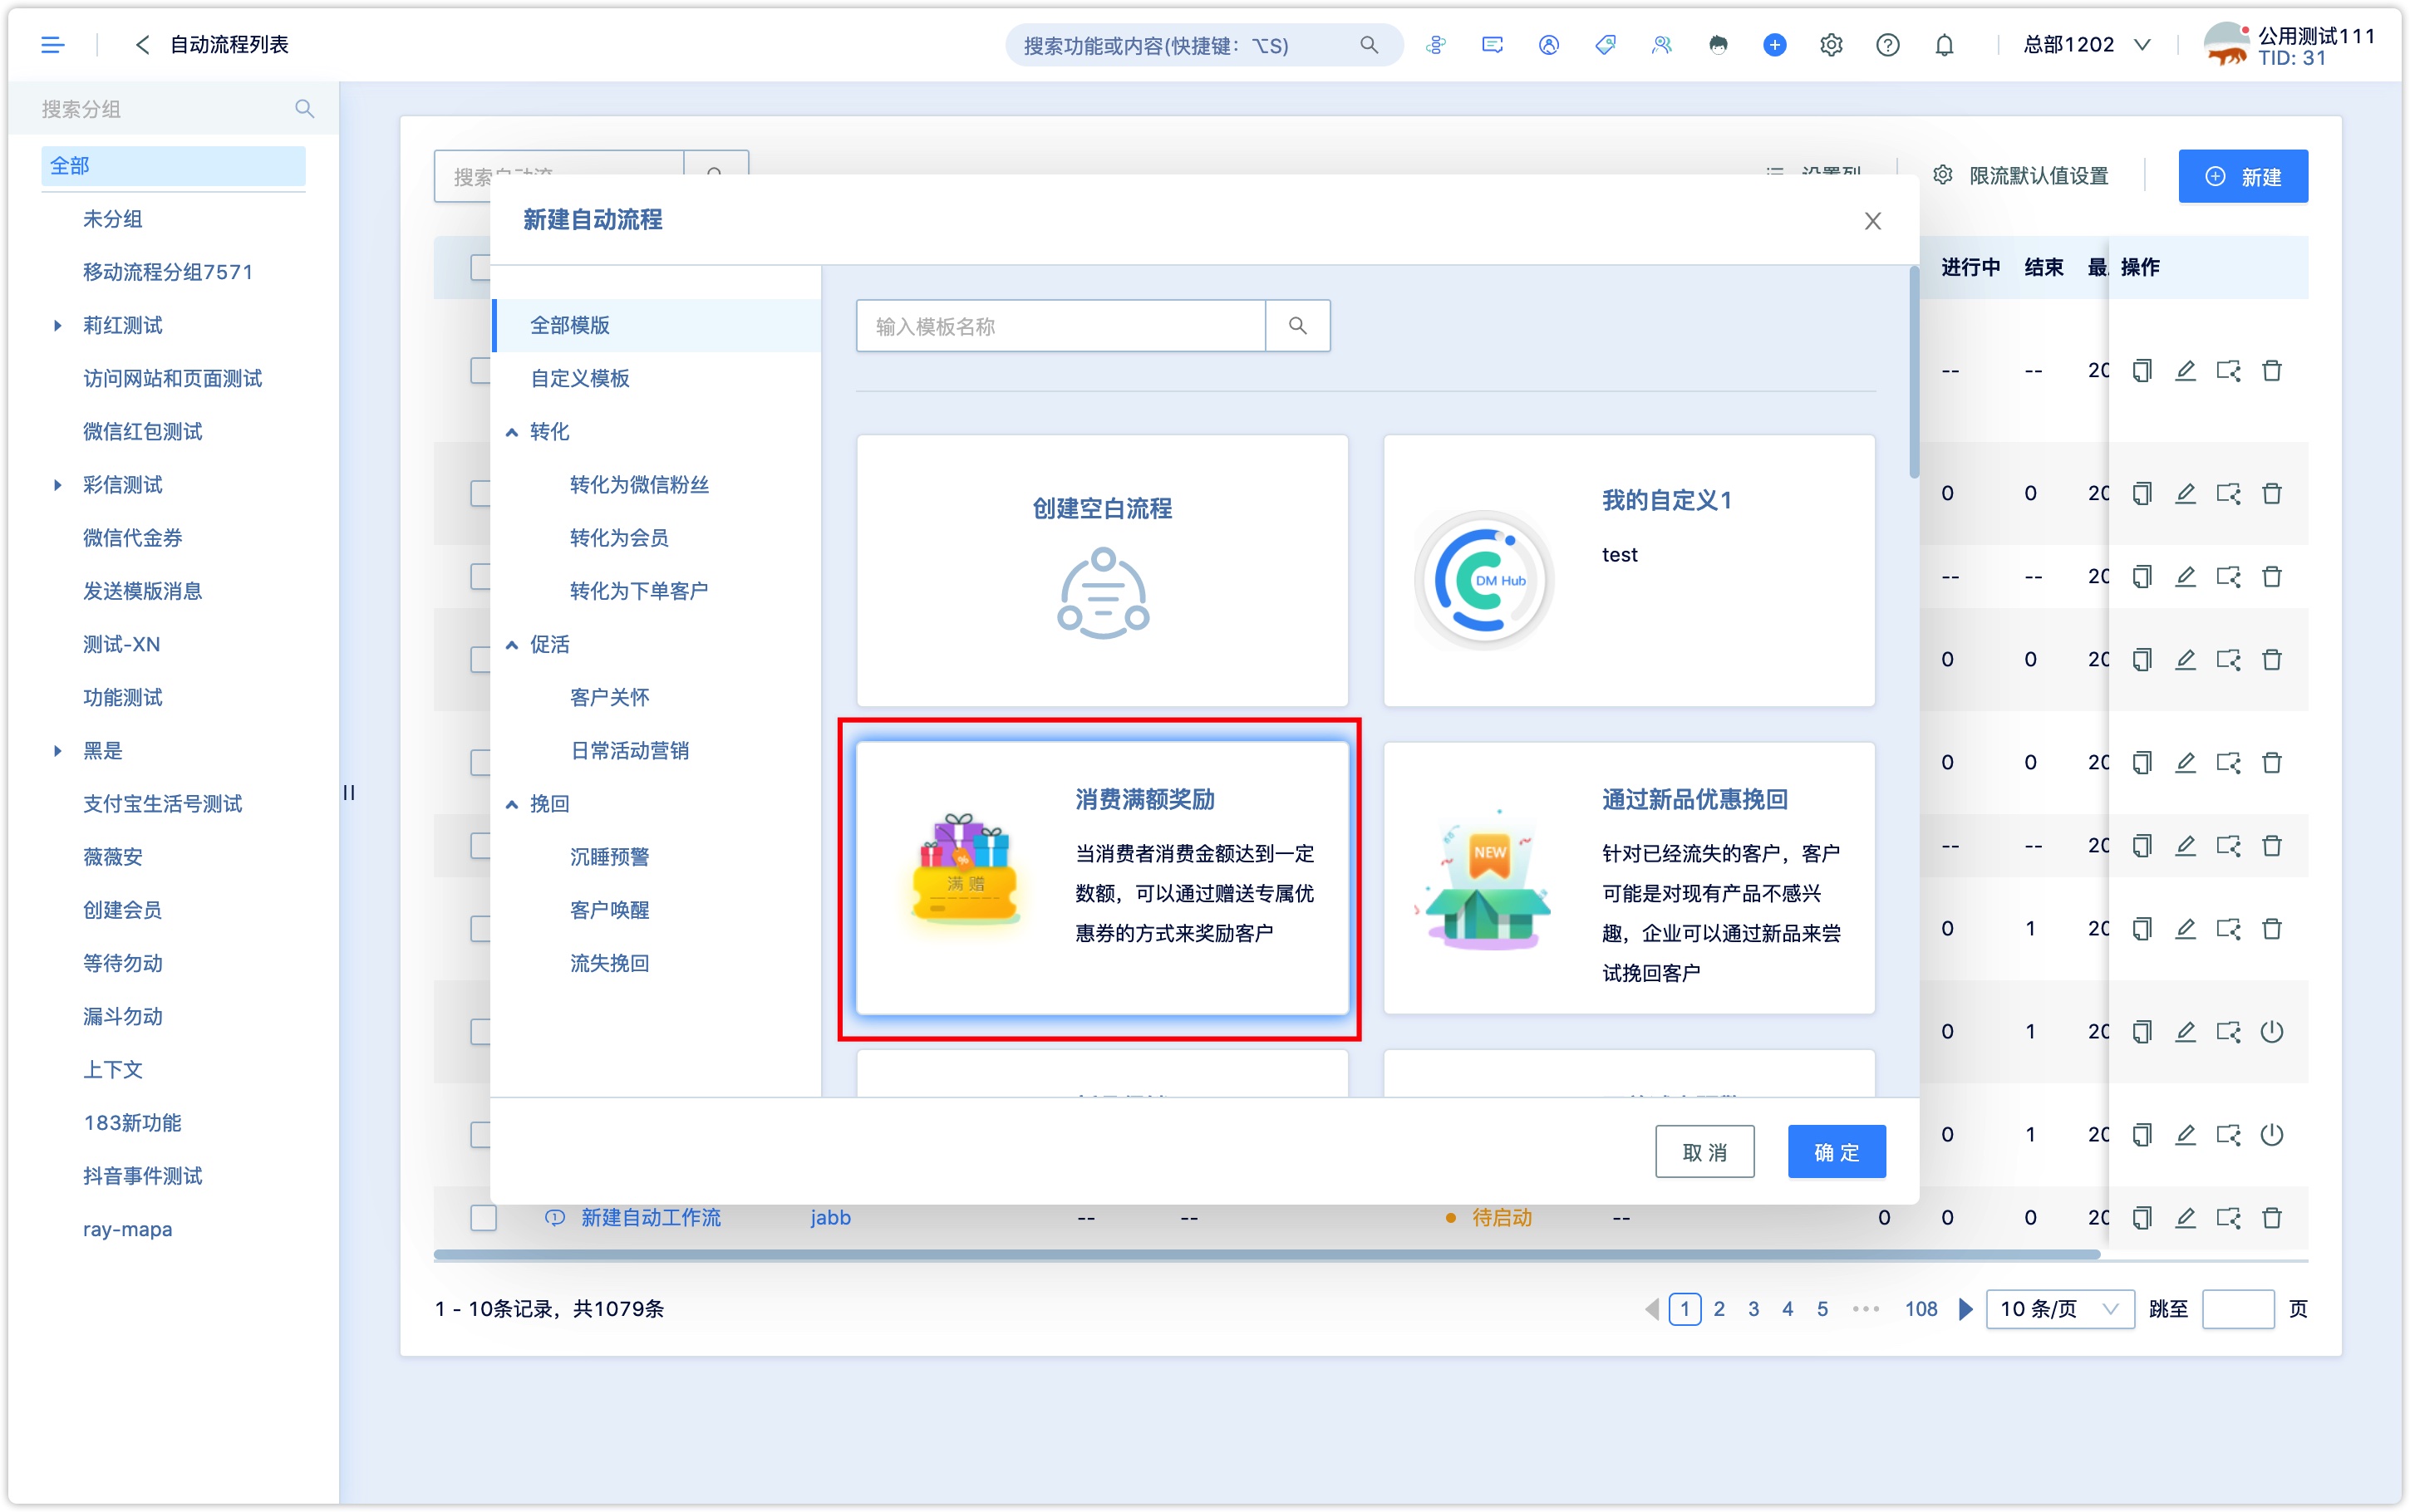
As shown in the image, you can select one of the preset flow templates to modify and edit to suit your marketing scenario. Or create a new workflow of your own.
Select a template to modify as shown in the image below. If the current application scenario is that the amount of consumer consumption reaches the target amount, and you want to reward customers with exclusive discounts, you can select the "full consumption reward" template and modify it according to specific needs:
2.1 Workflows start condition
- Click 【Create Blank flow】 to enter the workflow setting interface.
- Choose the appropriate start condition, and four start conditions can be set:
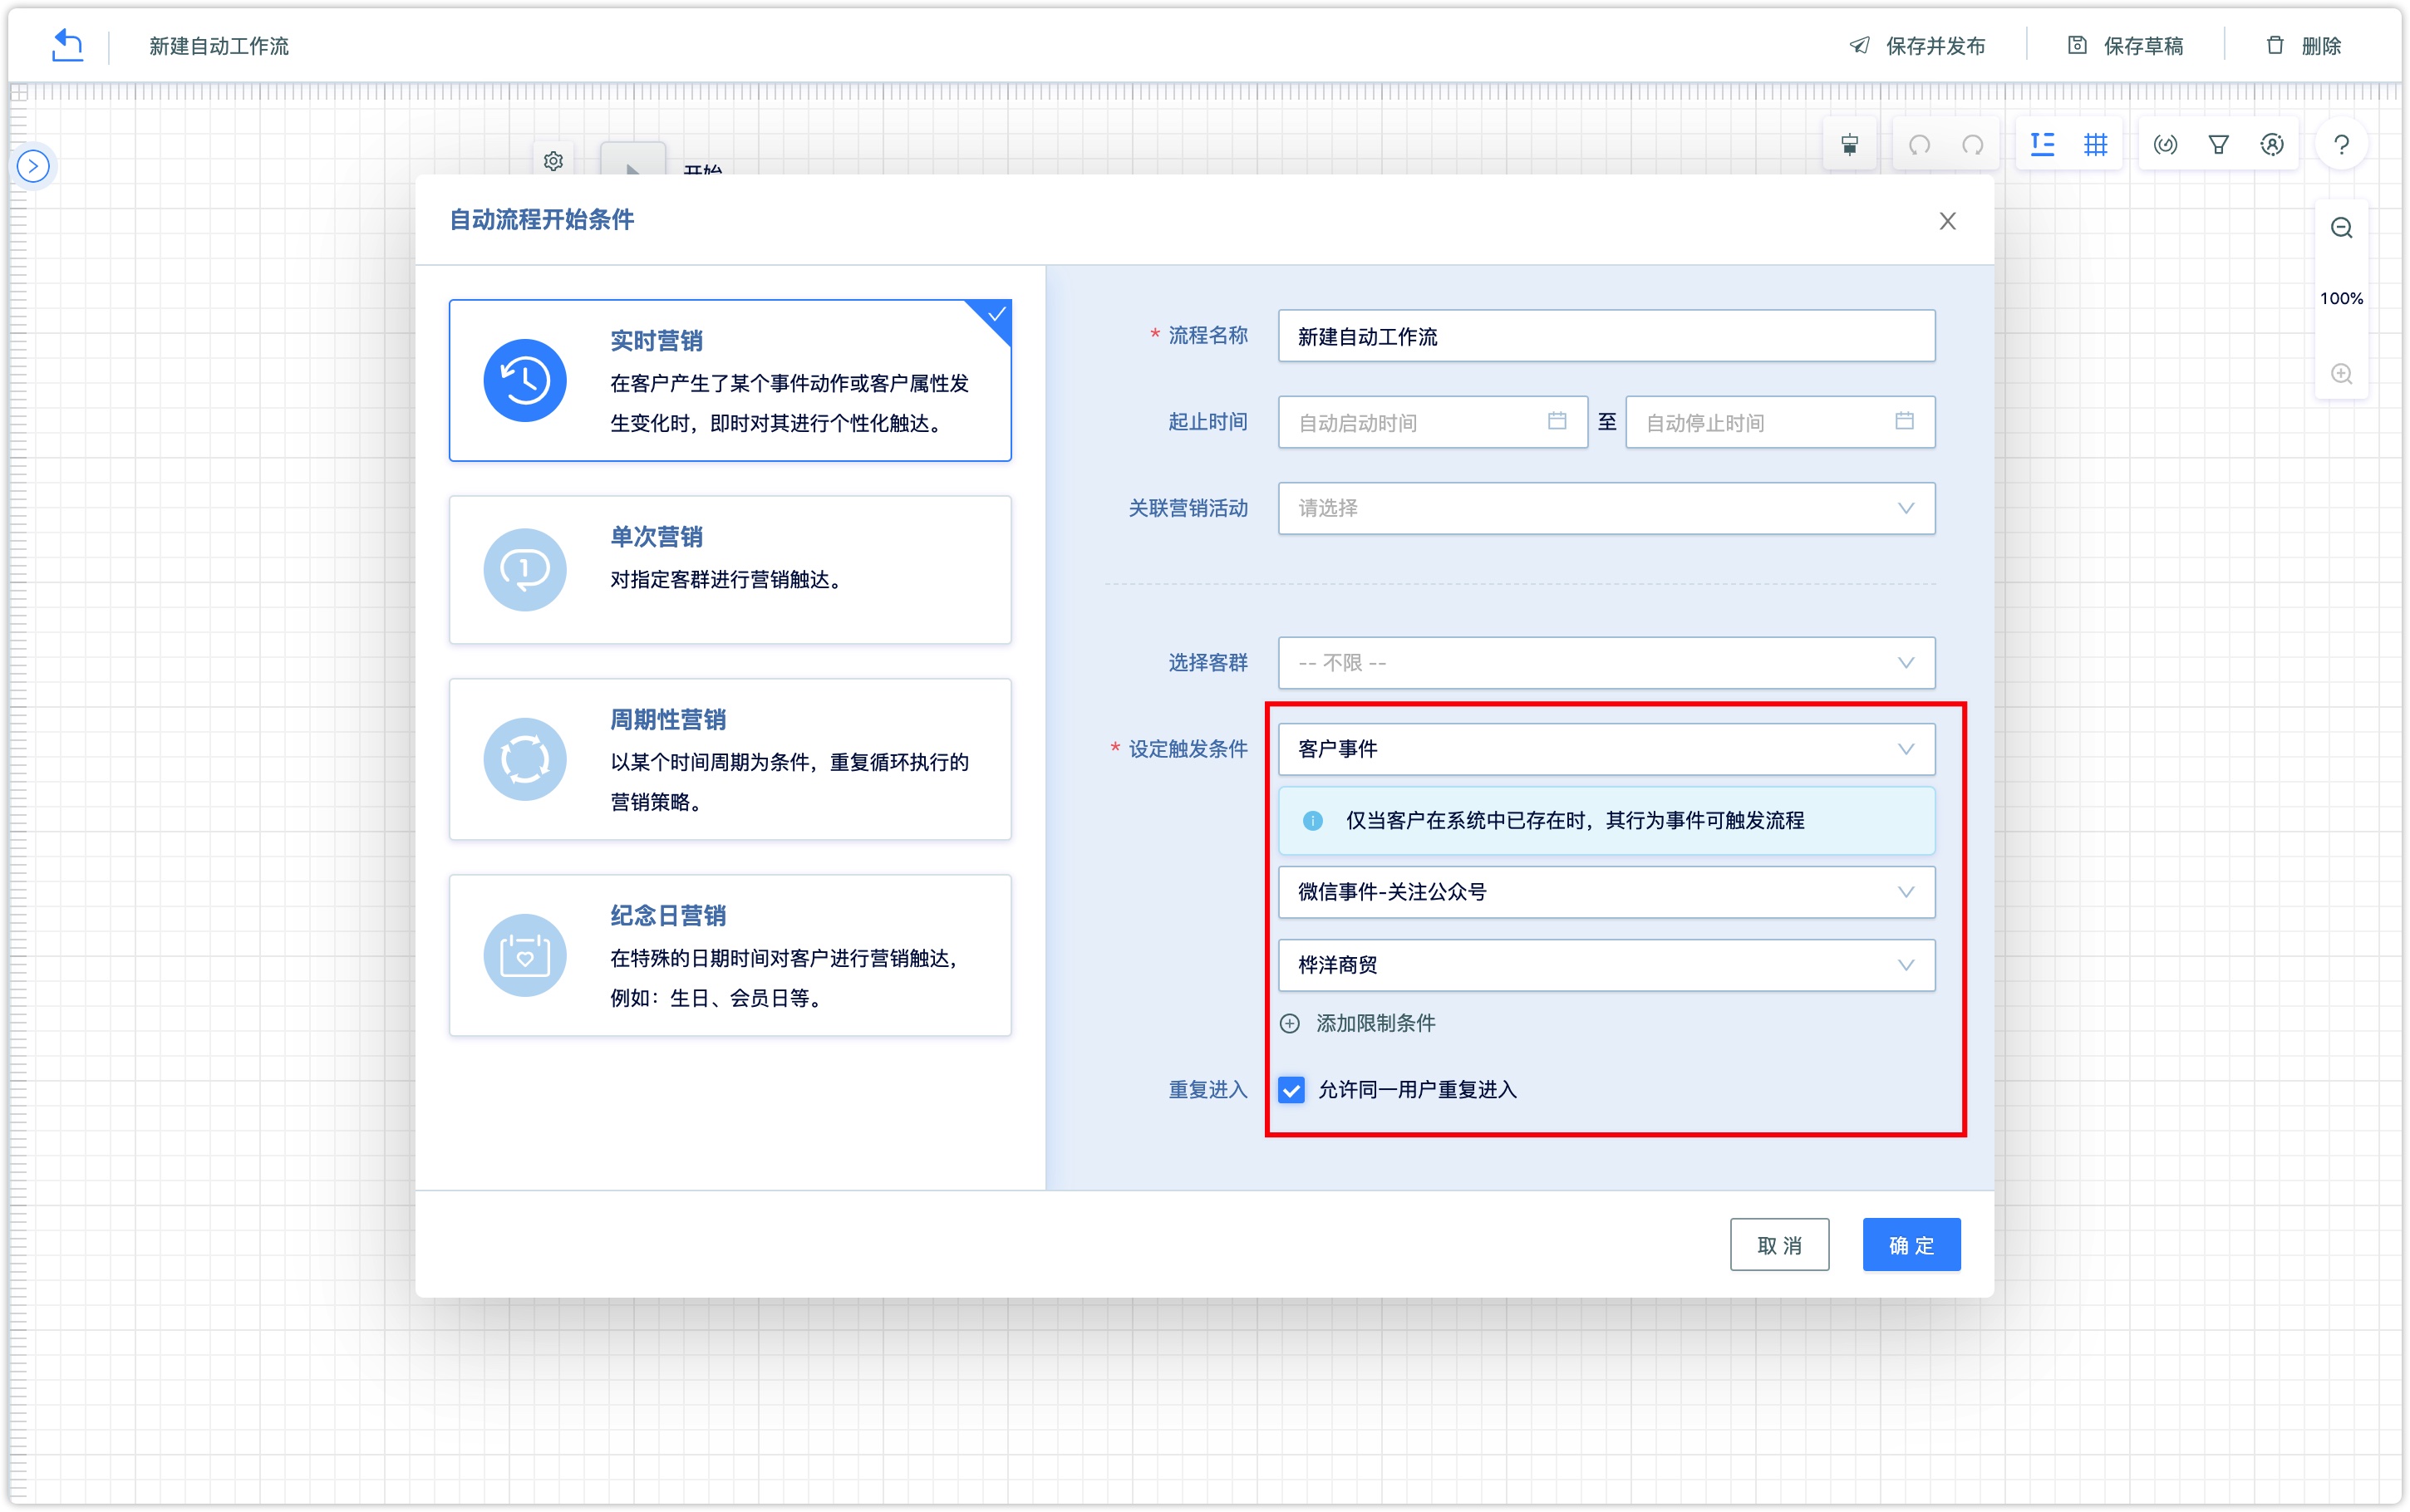
2.1.1 Real-time marketing
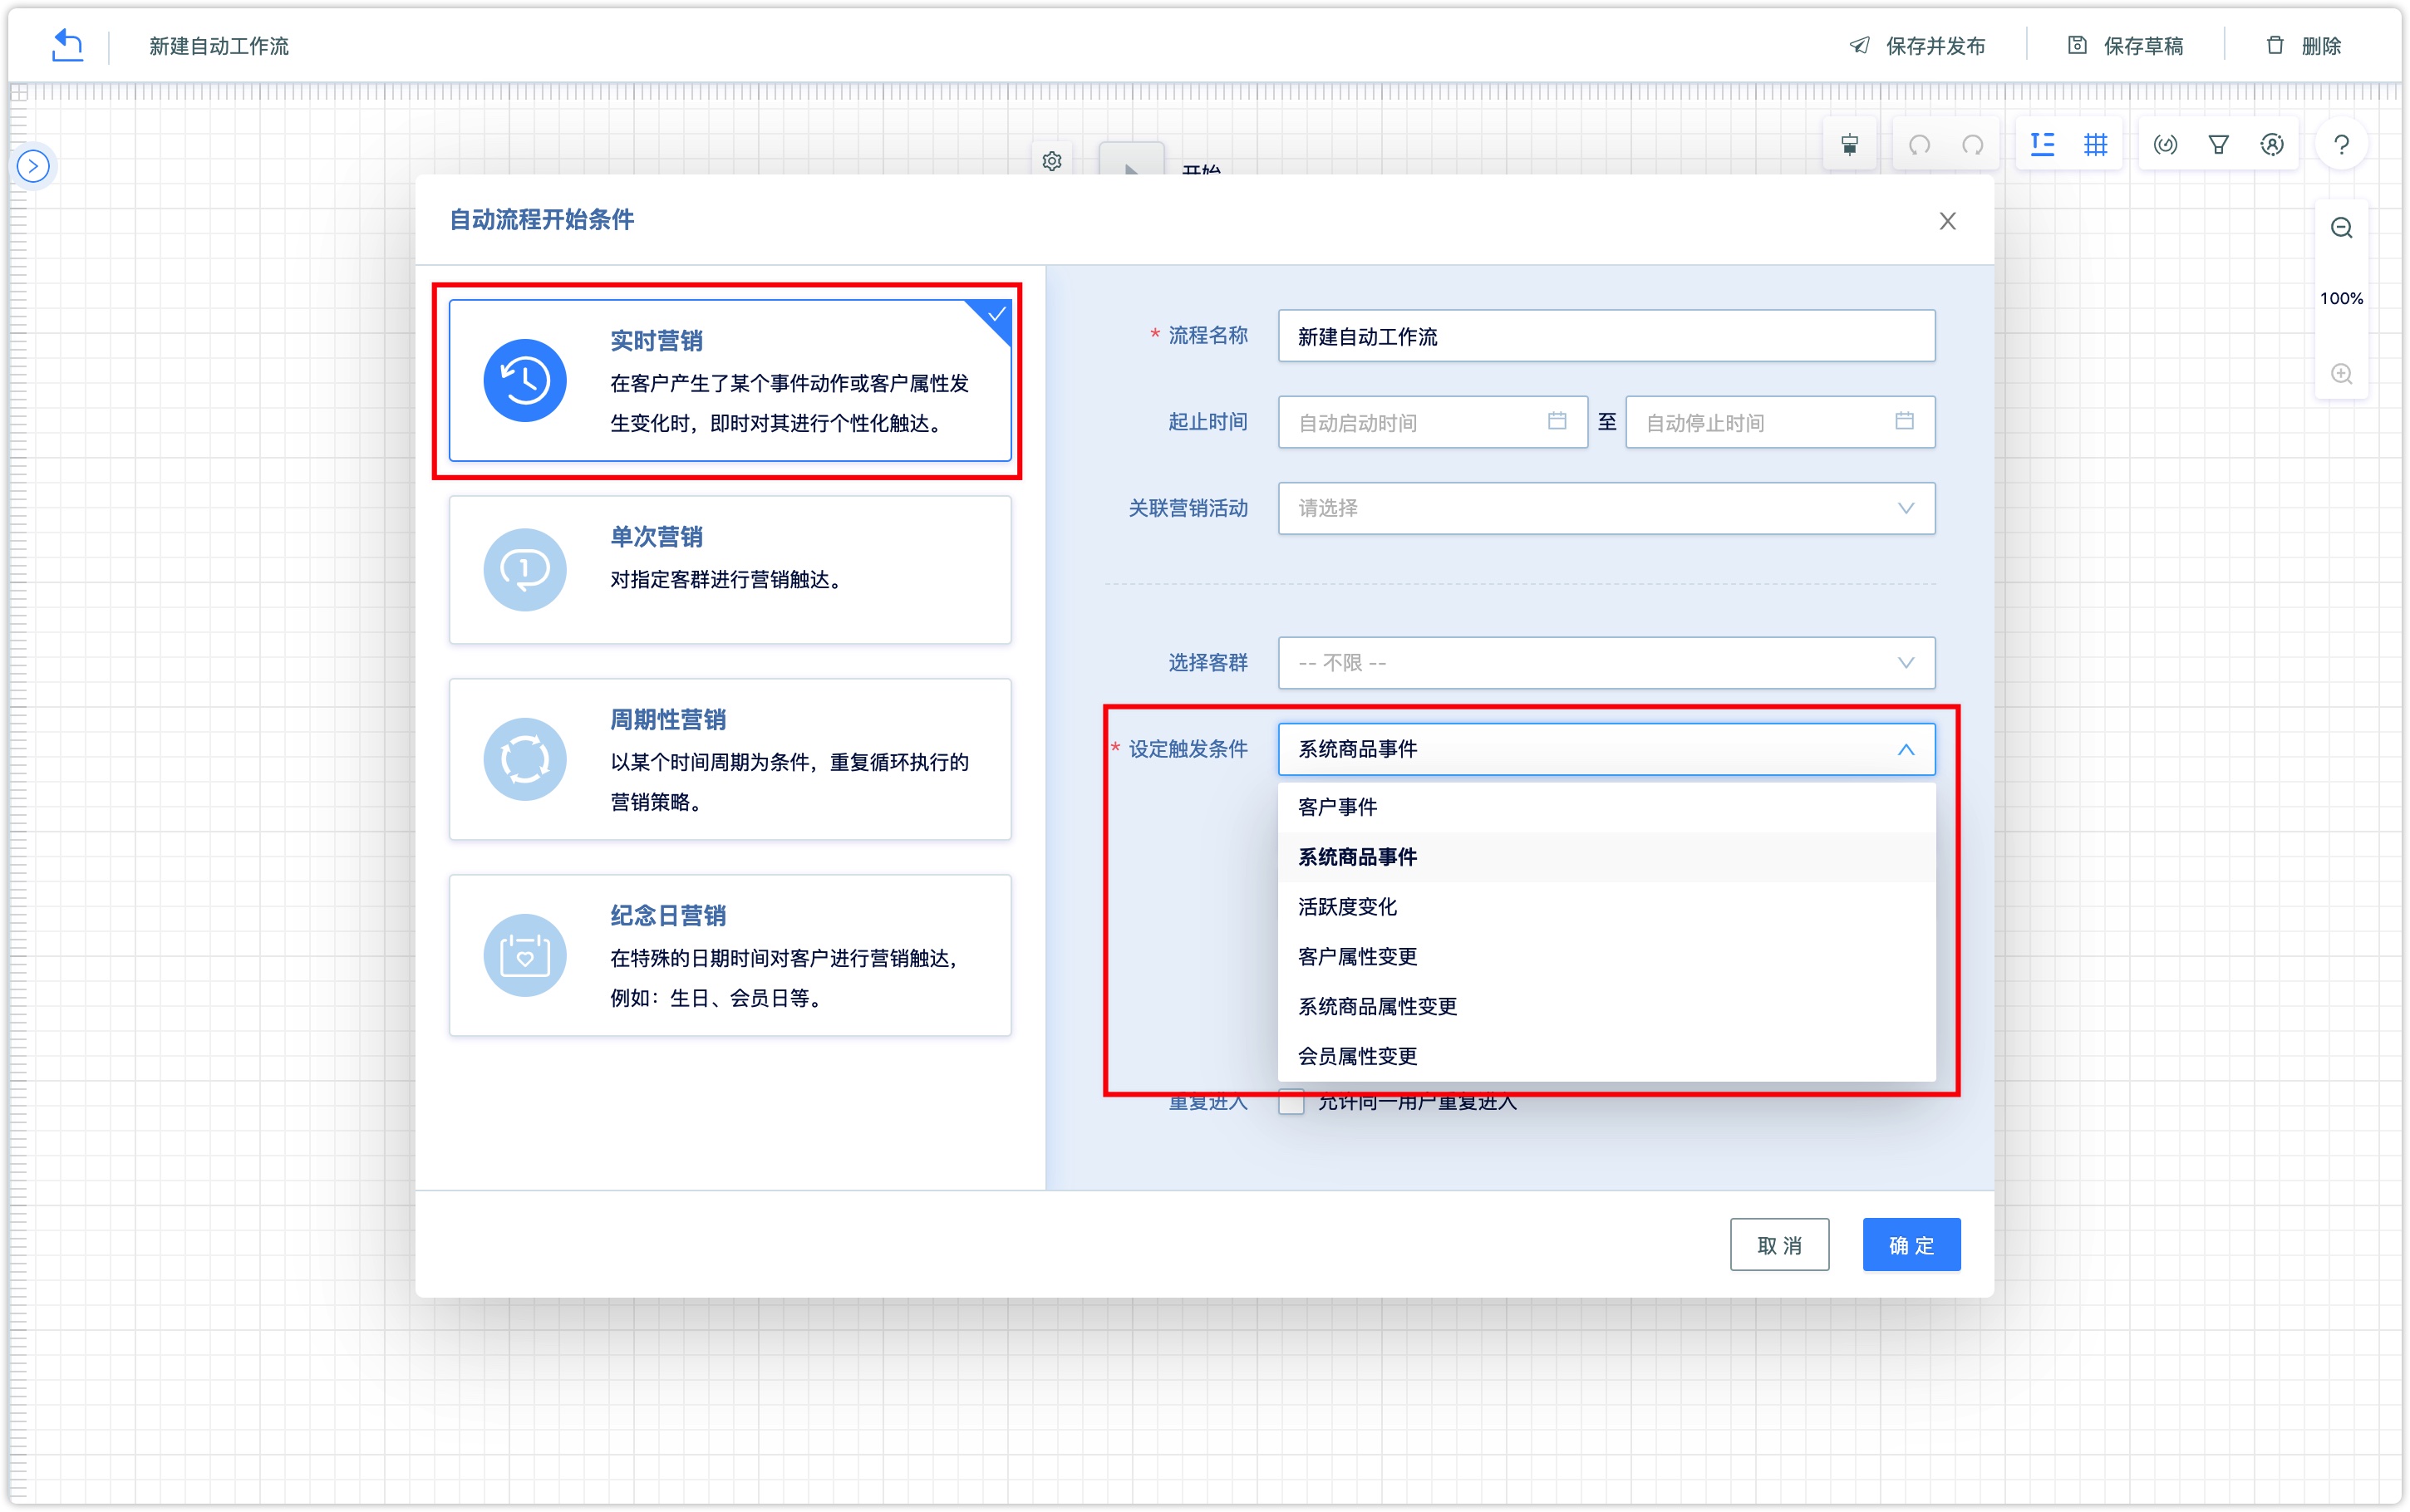
It means that the trigger condition set in the starting condition triggered by the customer in the system, the customer will enter the workflow.
The trigger condition includes six types: Customer event, system merchandise event, activity change, customer attribute change, system merchandise attribute change, and member attribute change.
Customer event: The customer has a specific action that can be recorded by a certain system, such as following the official account event, leaving a message to the official account, etc.
System merchandise event: The customer has purchased goods and services or canceled orders and other commodity-related events.
Activity change: Customer activity rises or falls to a certain score.
Customer attribute change: If the customer attribute changes, for example, if the setting——gender is female, the process will be triggered only when the gender of the customer attribute changes to female.
System merchandise attribute change: Filter the system merchandise attribute change by setting conditions. For example, the transaction price of a commodity is lower than the trigger condition of a certain value.
Member attribute change: When the member attribute changes, such as The process can be triggered when the member province is equal to a certain province.
(Note:1. Workflows start and stop time setting, if the start time is set, then the stop time also needs to be set; 2. If check 【allow the same user to enter repeatedly】, it will allow the same user to enter repeatedly. Once this option is checked and the workflow has been saved, the automatic process cannot be changed. If this option is not checked and the workflow has been saved, the automatic process also cannot be changed.)2.1.2 Single Marketing
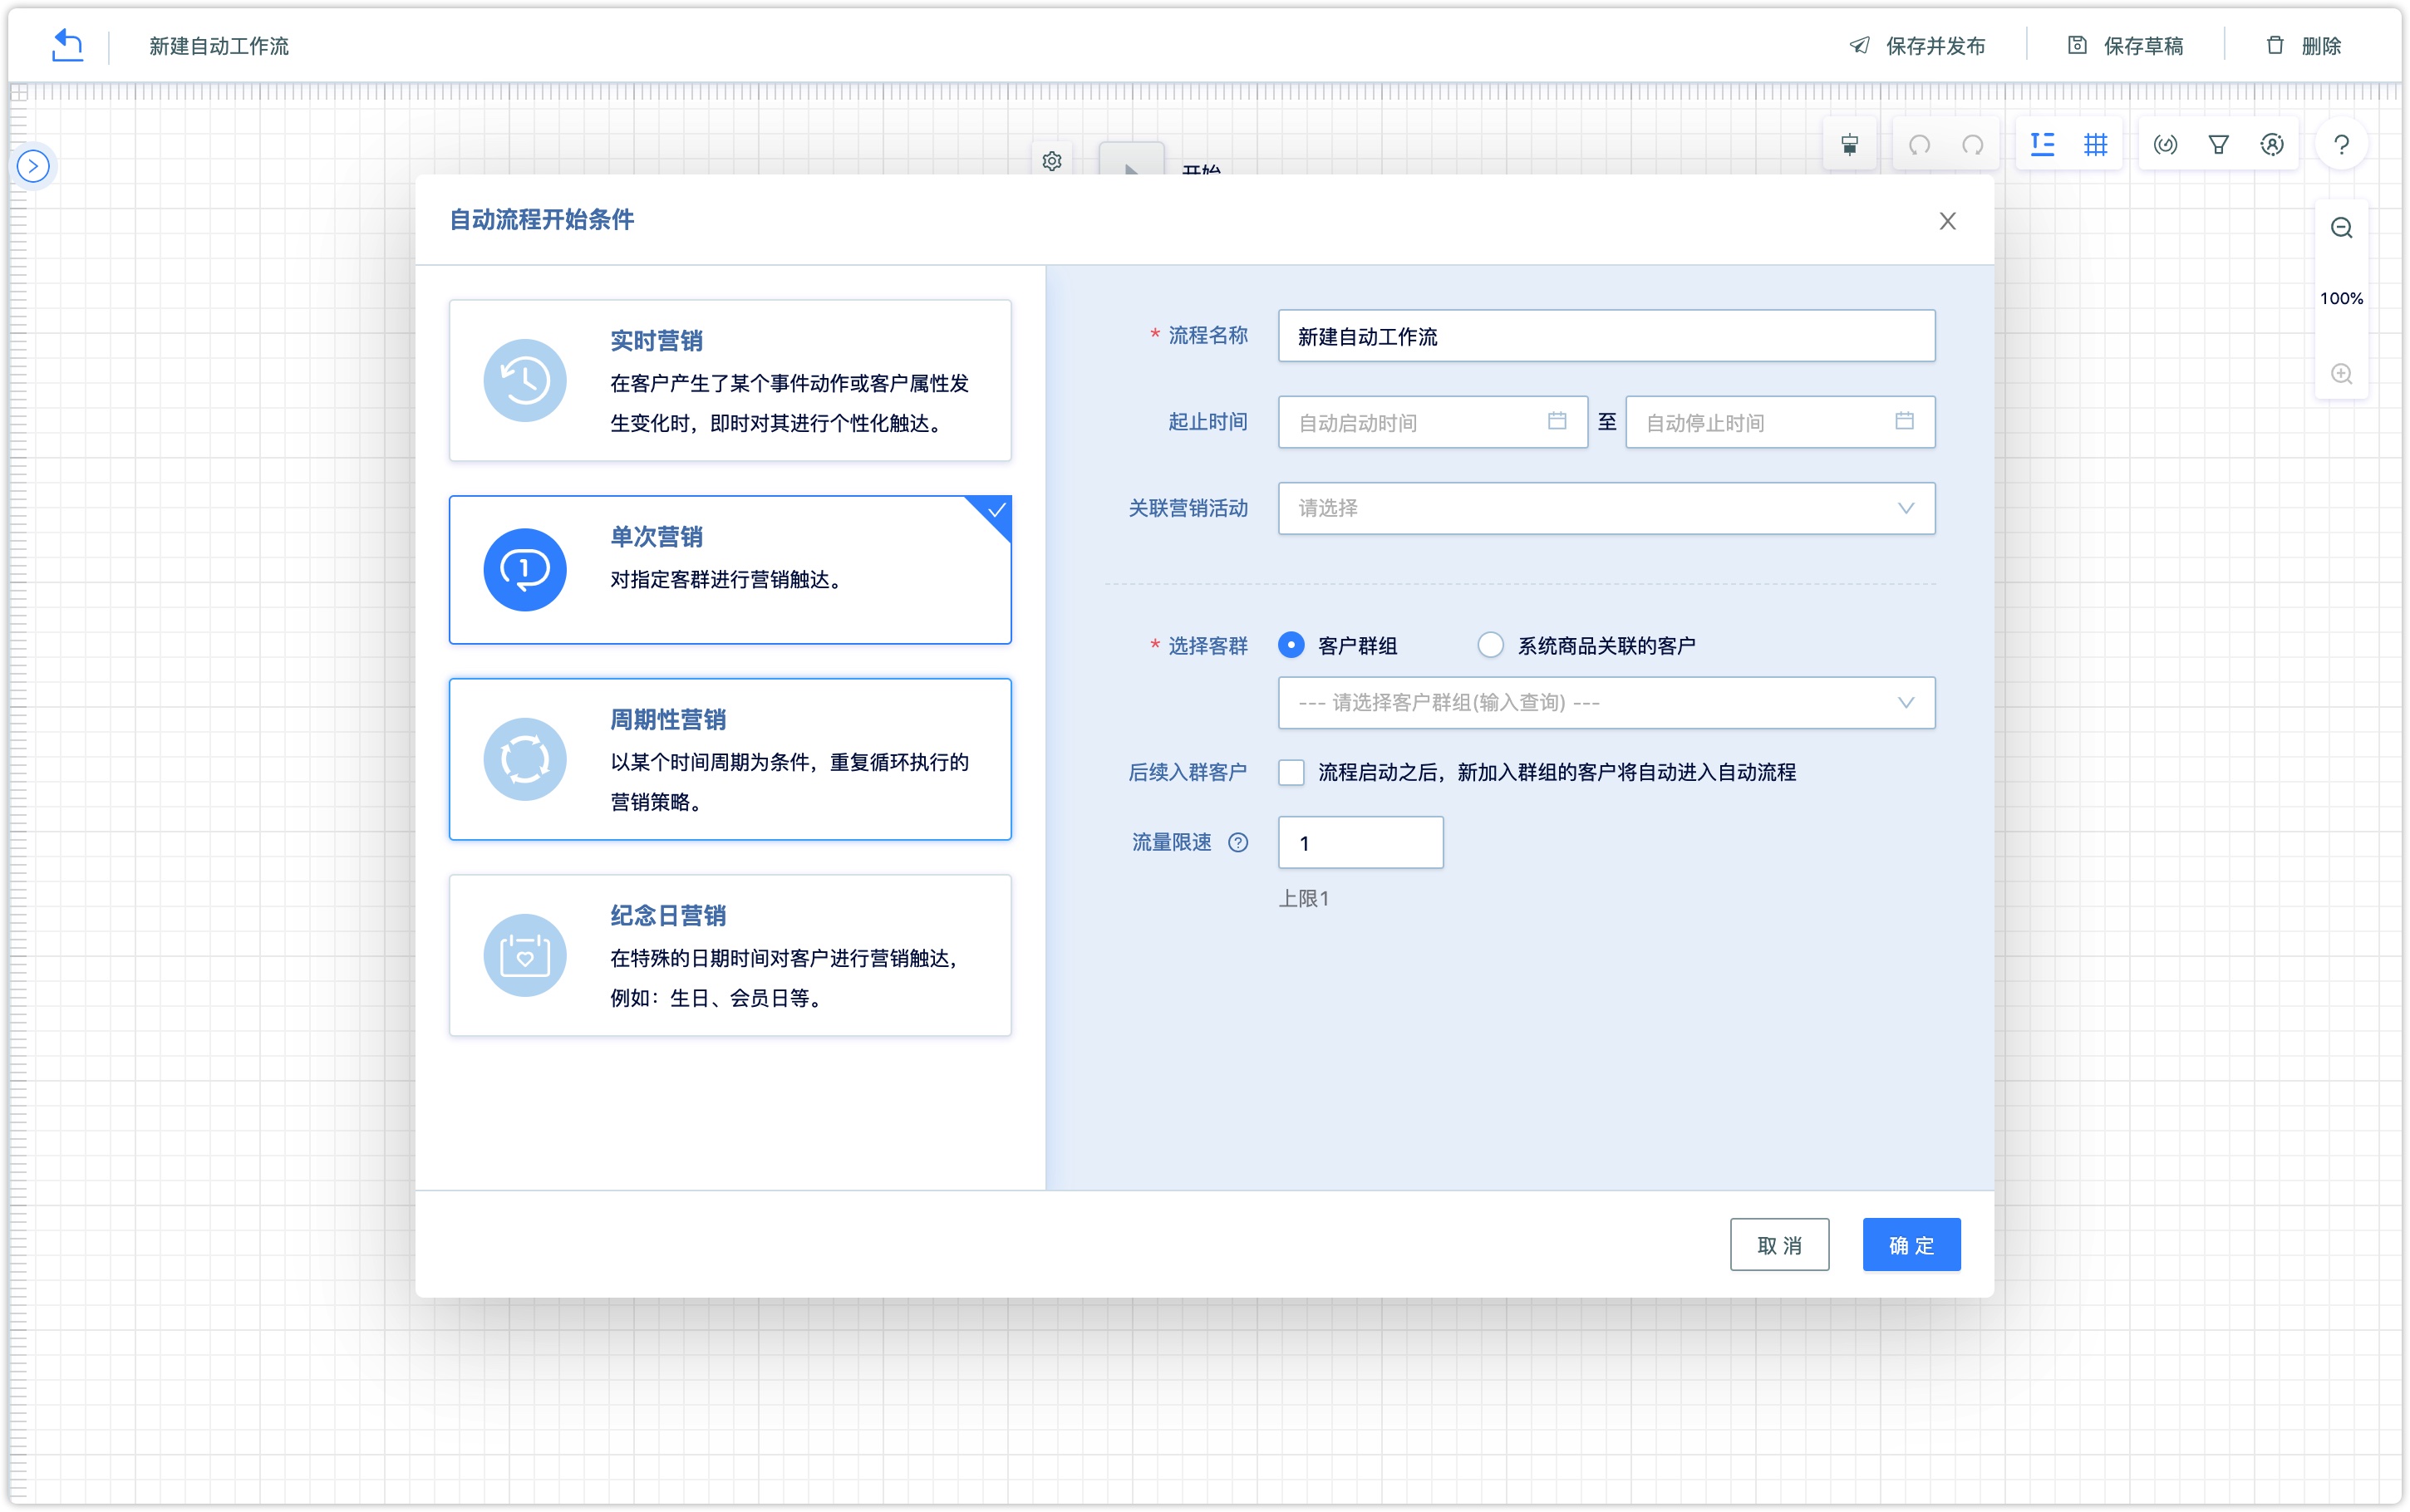
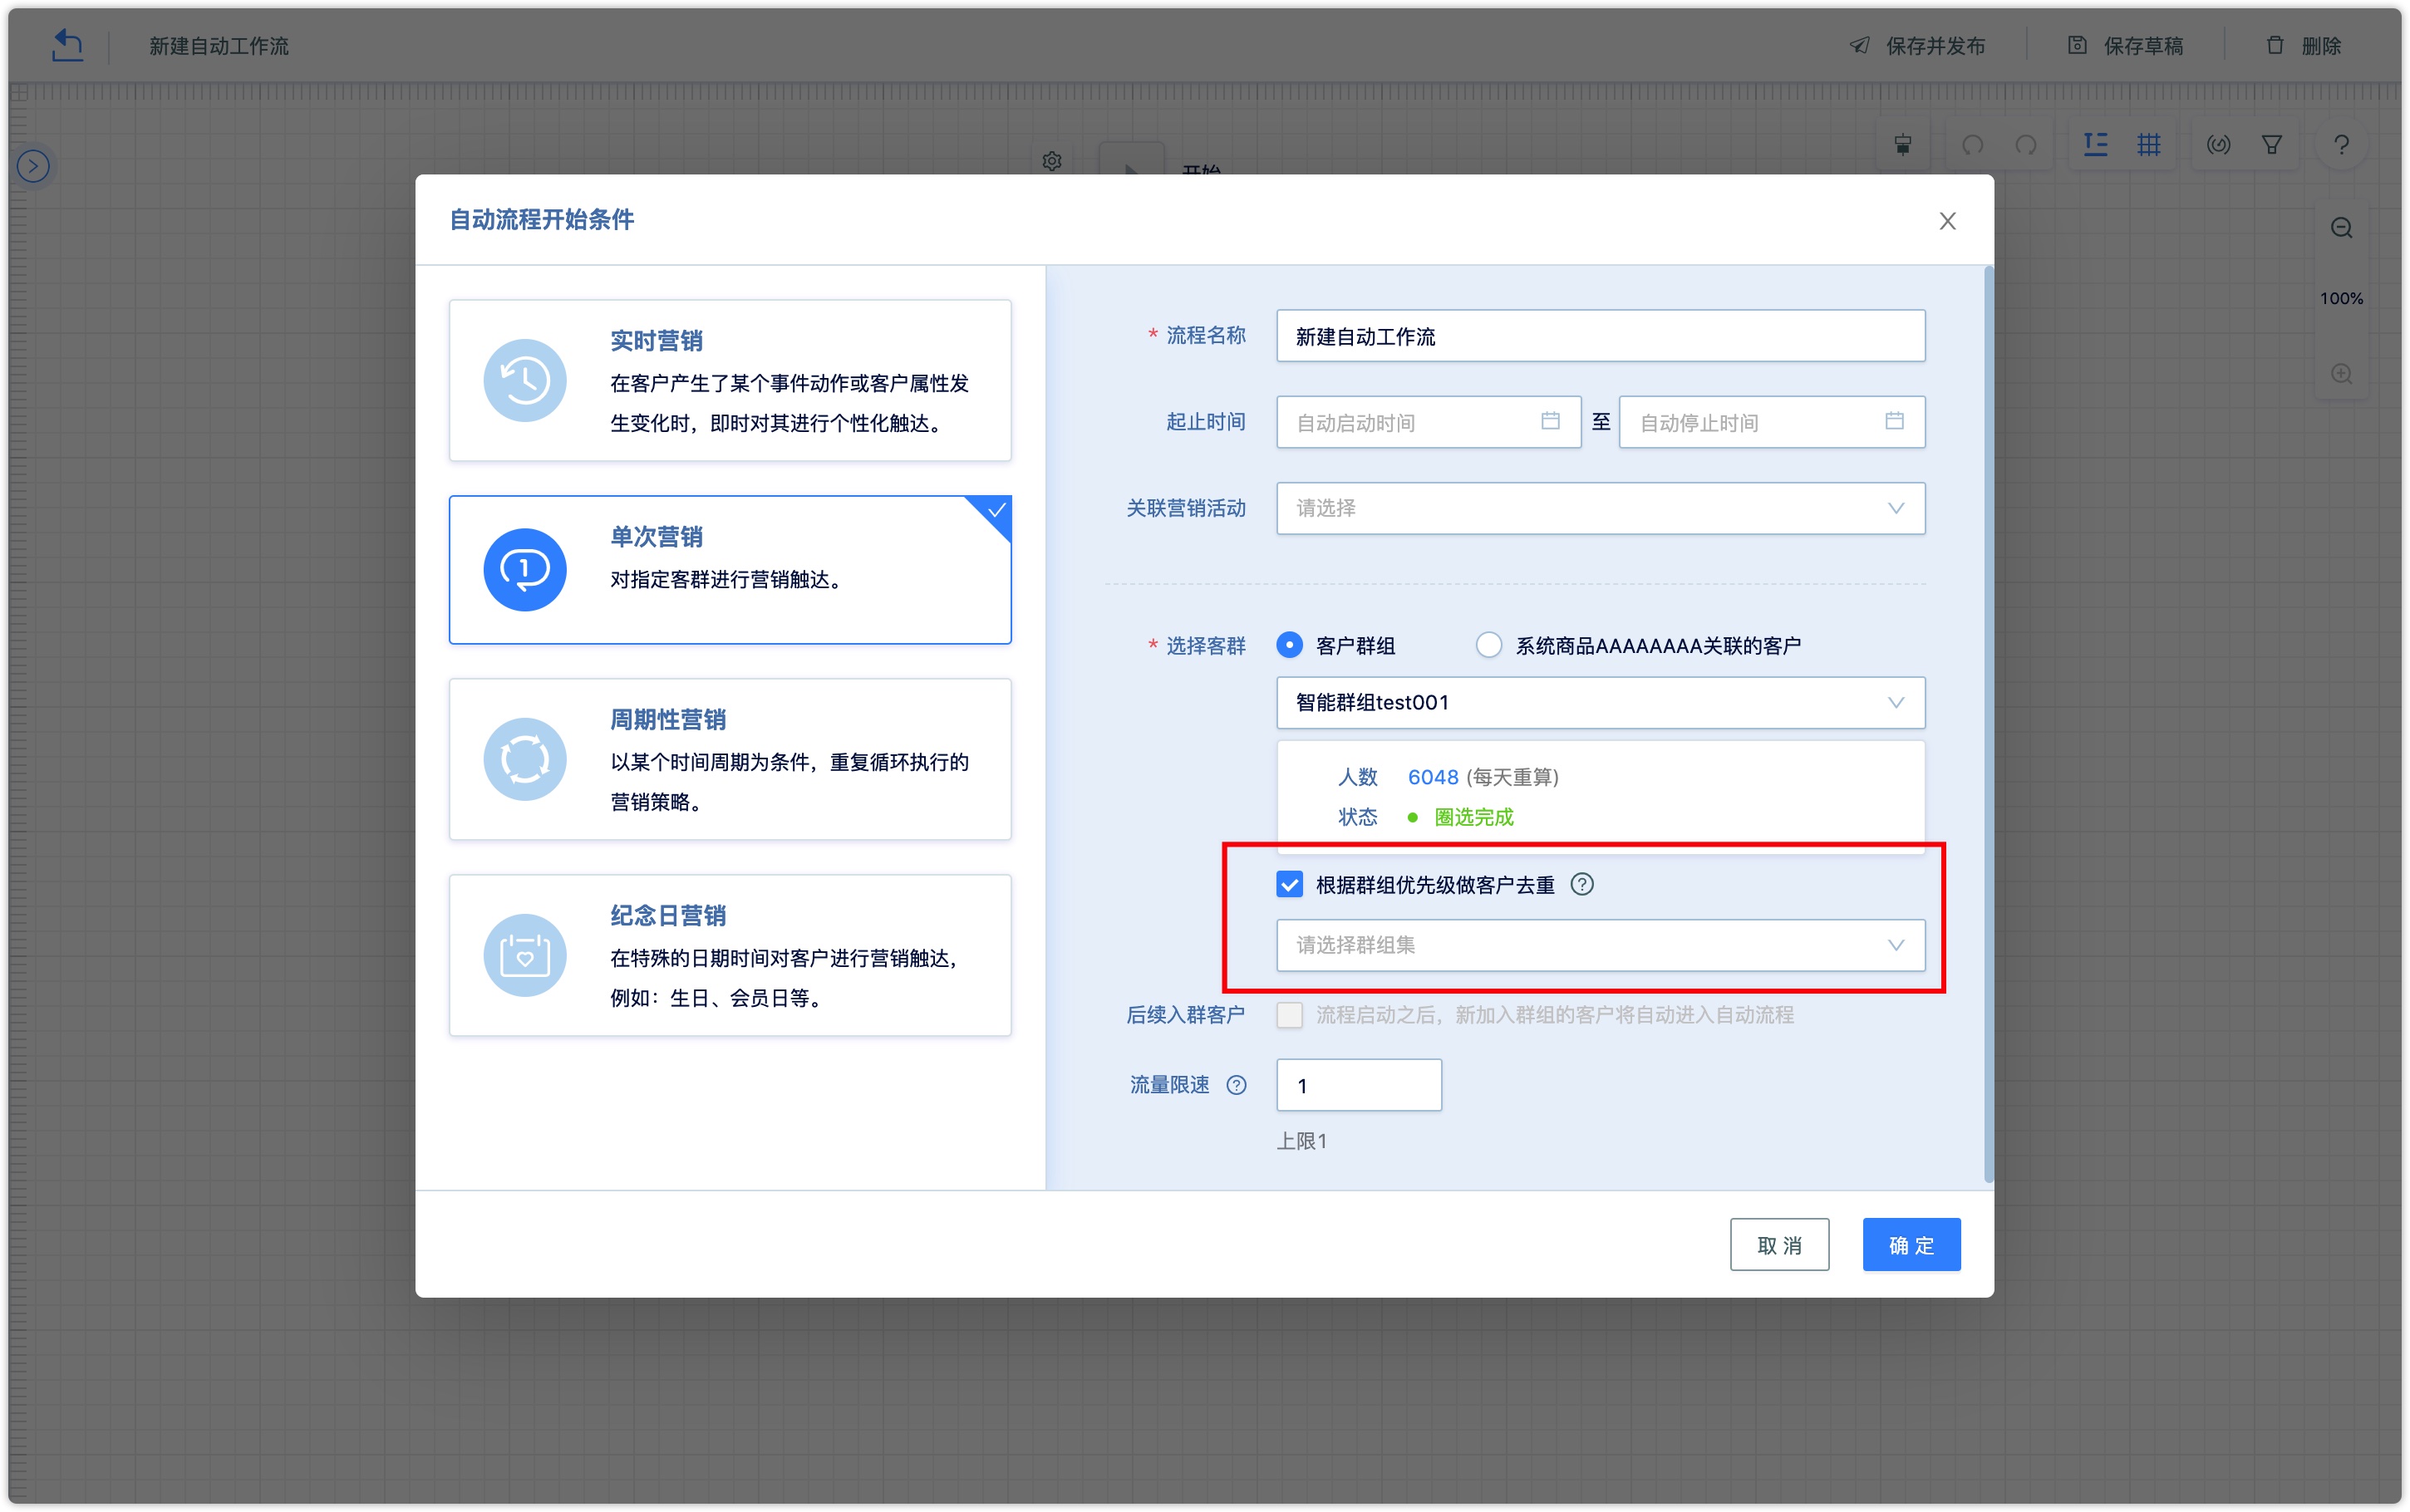
Refers to the implement a series of marketing actions of a specified group of people. When a group is selected, as long as the customers in that group enter the process. Customers who are already in the group will enter the flow, after the process started, customers who are new in the group will also enter the process.
Check "Customer de-duplication according to group priority" to filter out customers in higher priority groups.
2.1.3 Cyclical Marketing
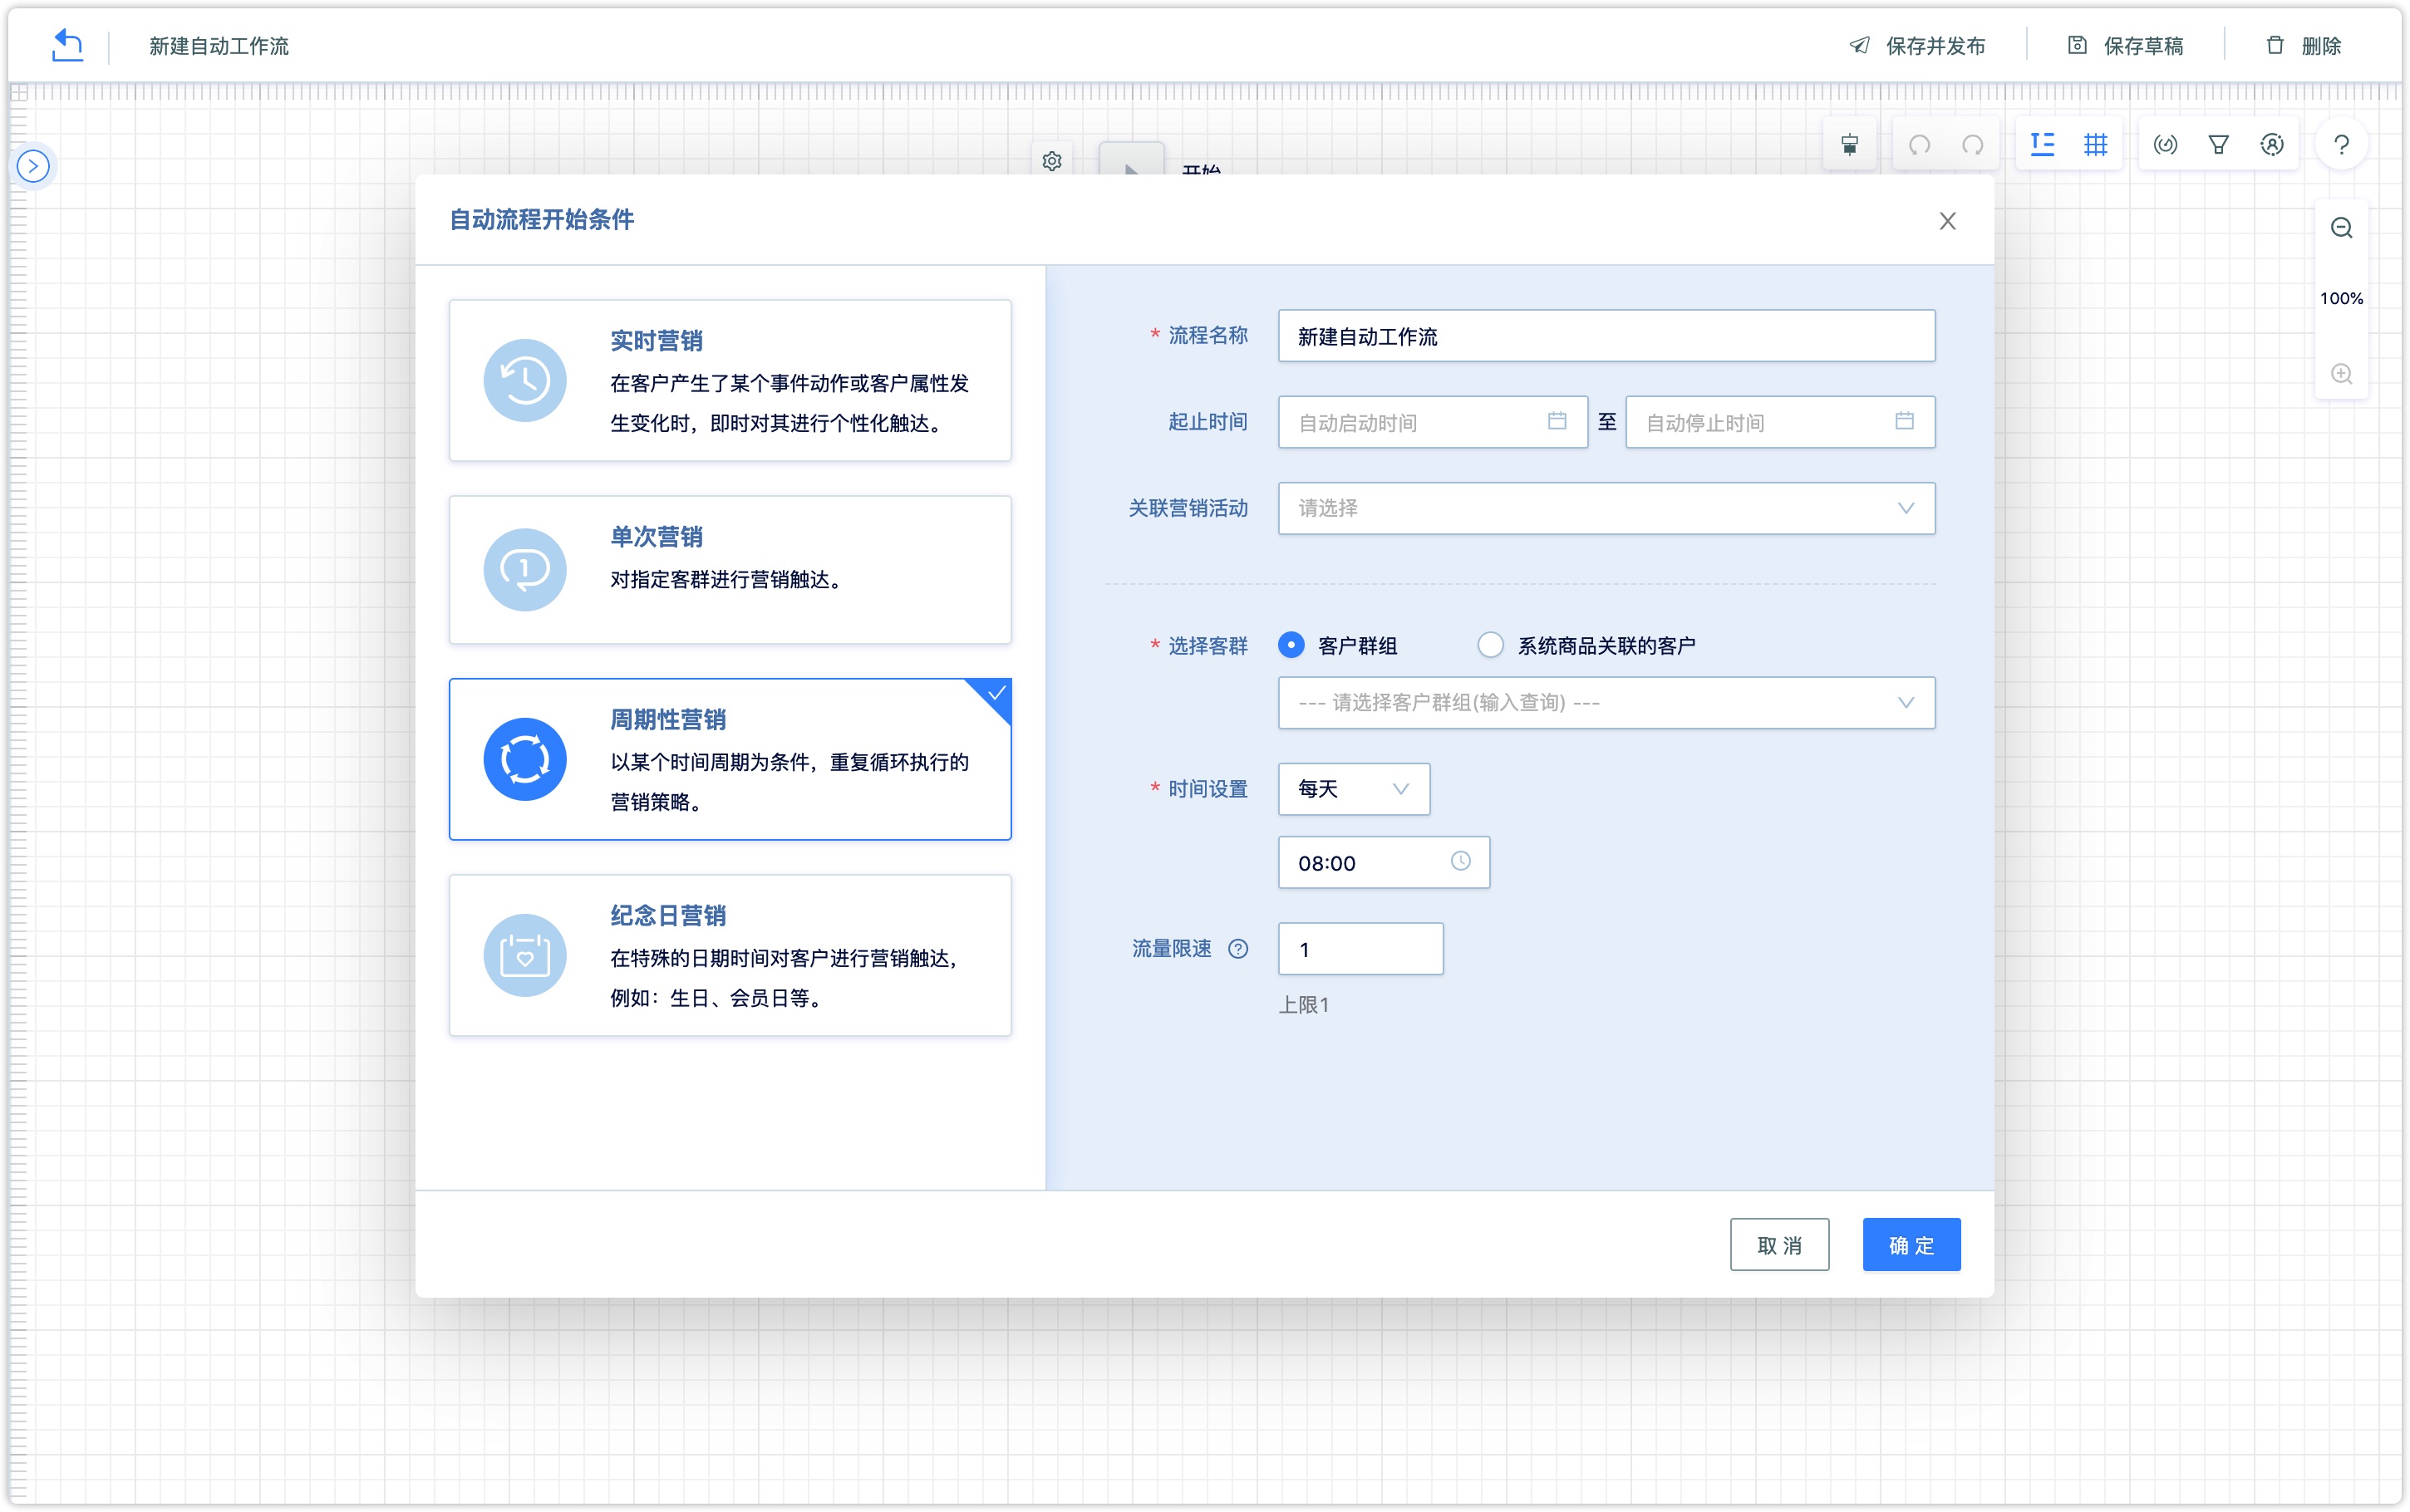
This function can be targeted at a group of customers and carry out periodic push in a daily or weekly, monthly marketing action.
2.1.4 Anniversary Marketing
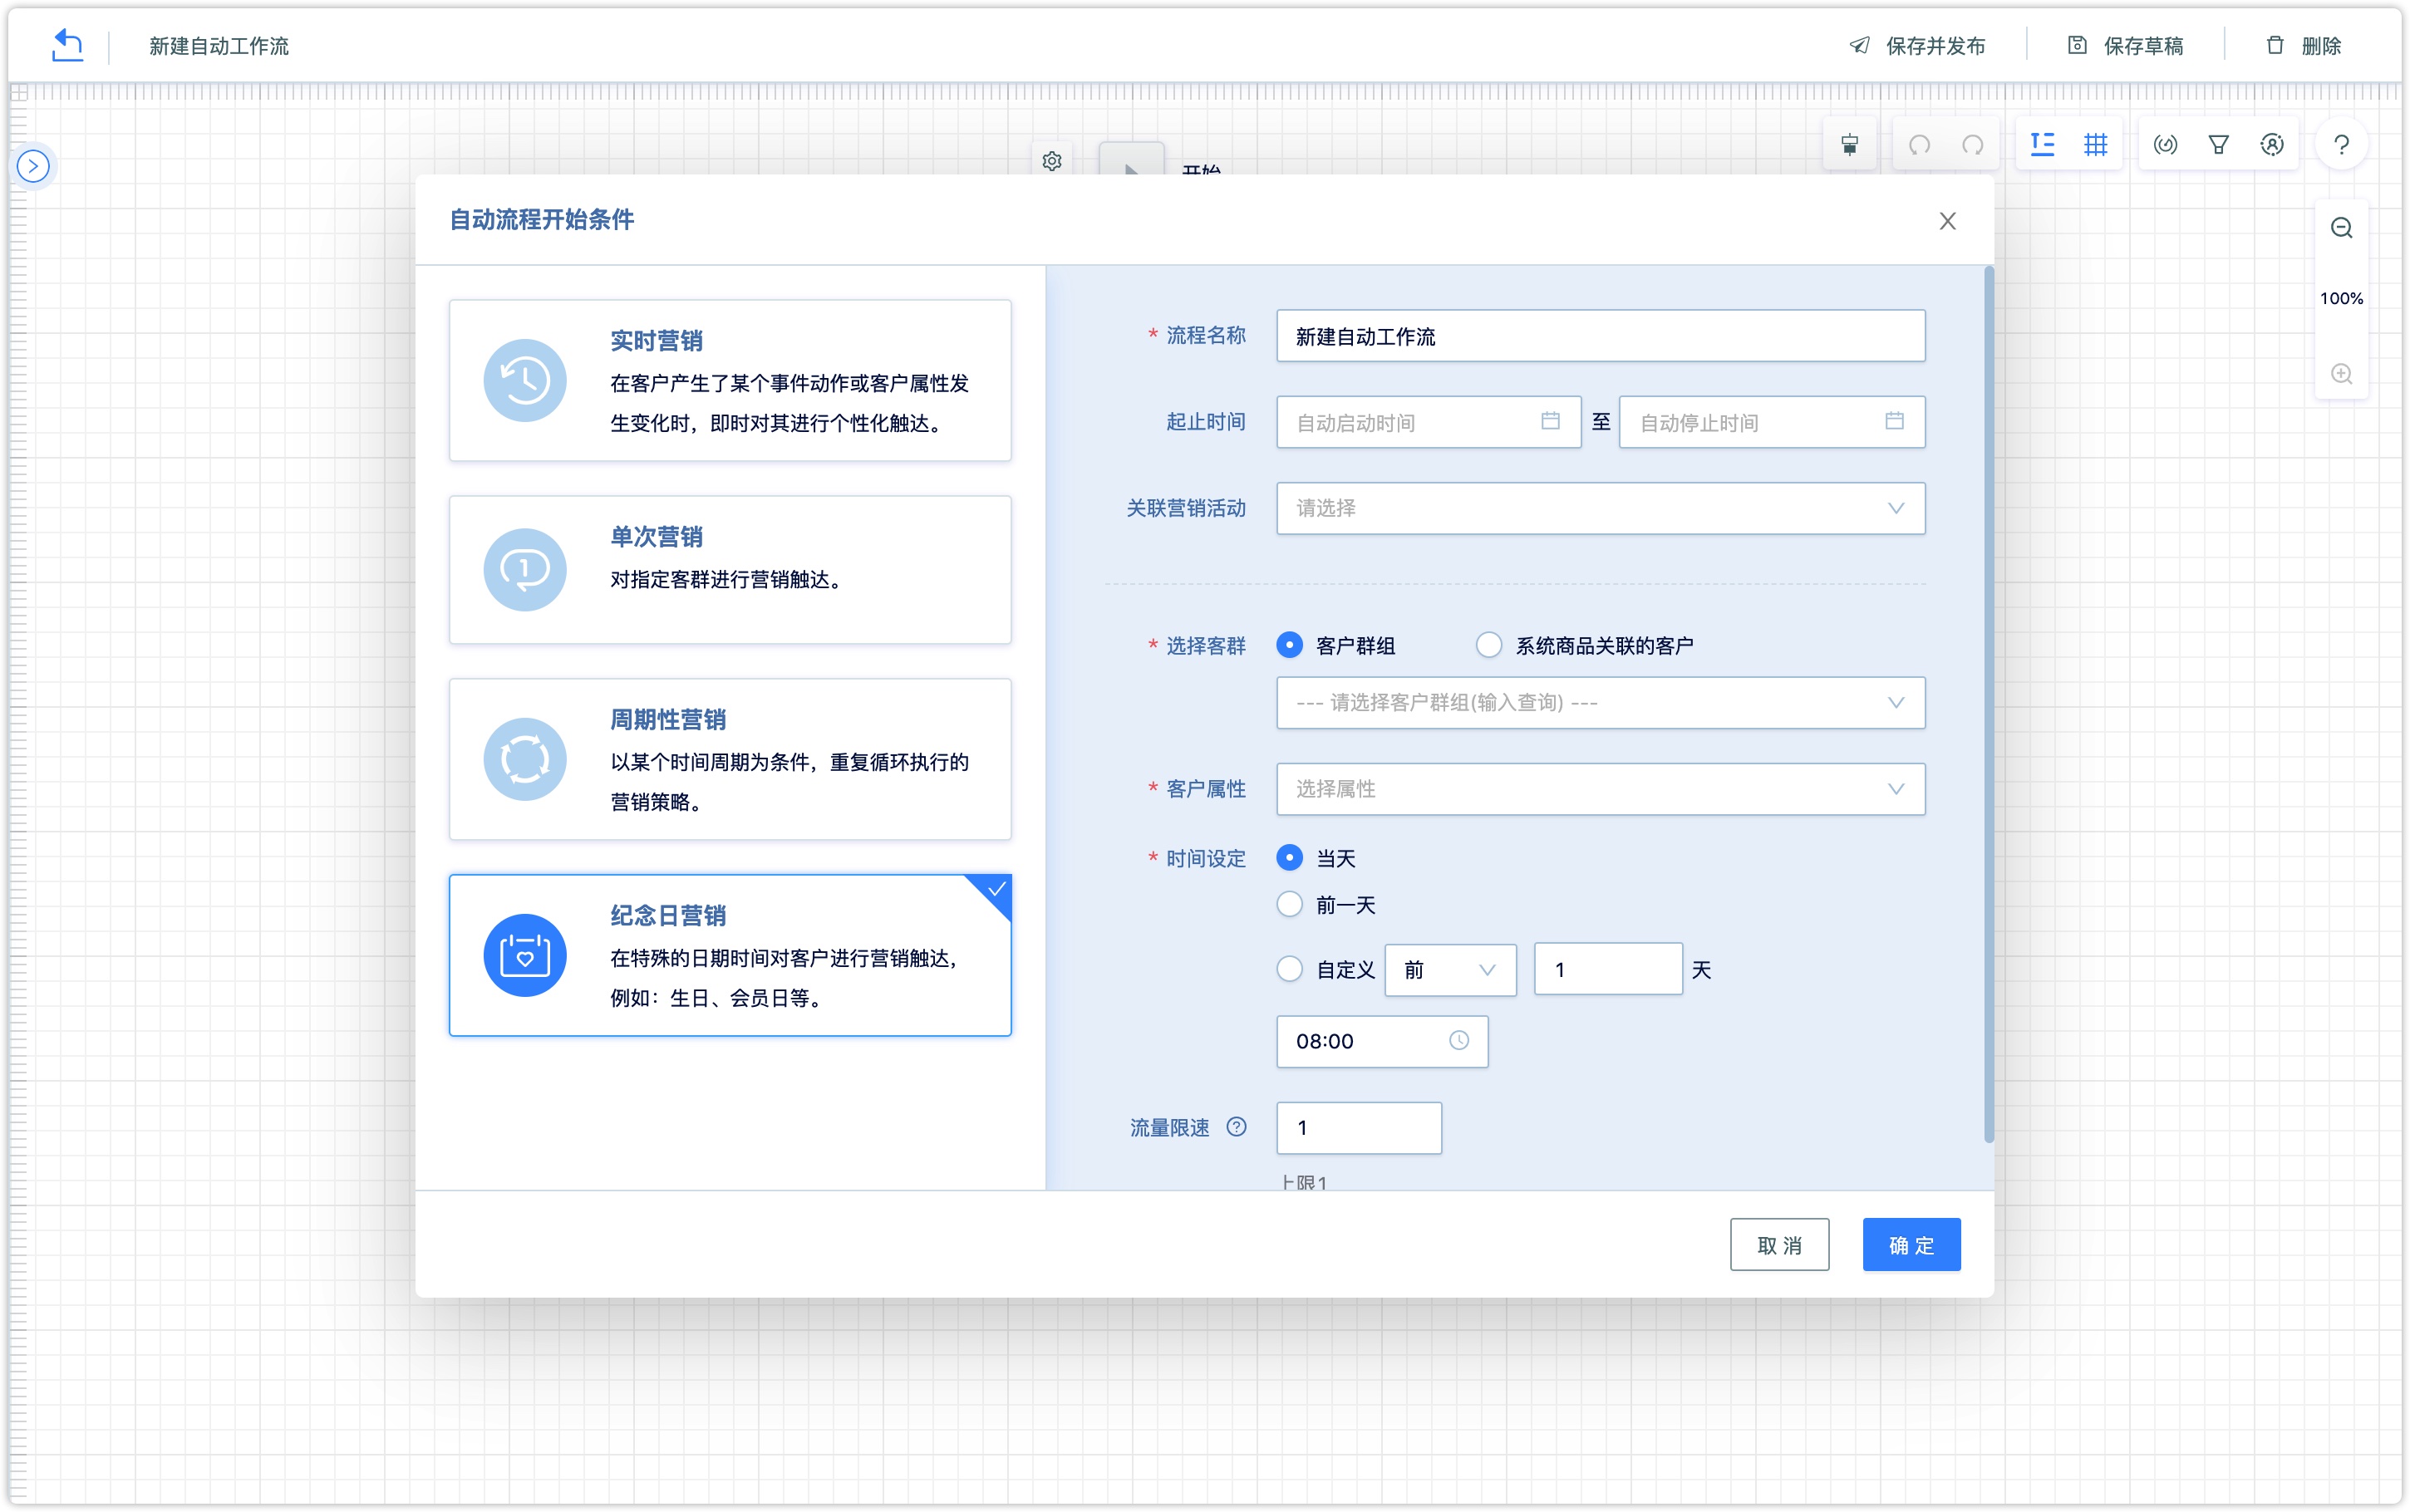
Anniversary marketing refers to the marketing aimed at the attributes of customer dates, such as birthdays, anniversaries, appointments, etc.
The premise is that the customer must have filled in the date class attribute. Select the appropriate date class attributes and customer groups that need to be marketed, and set the time for the start of the process.
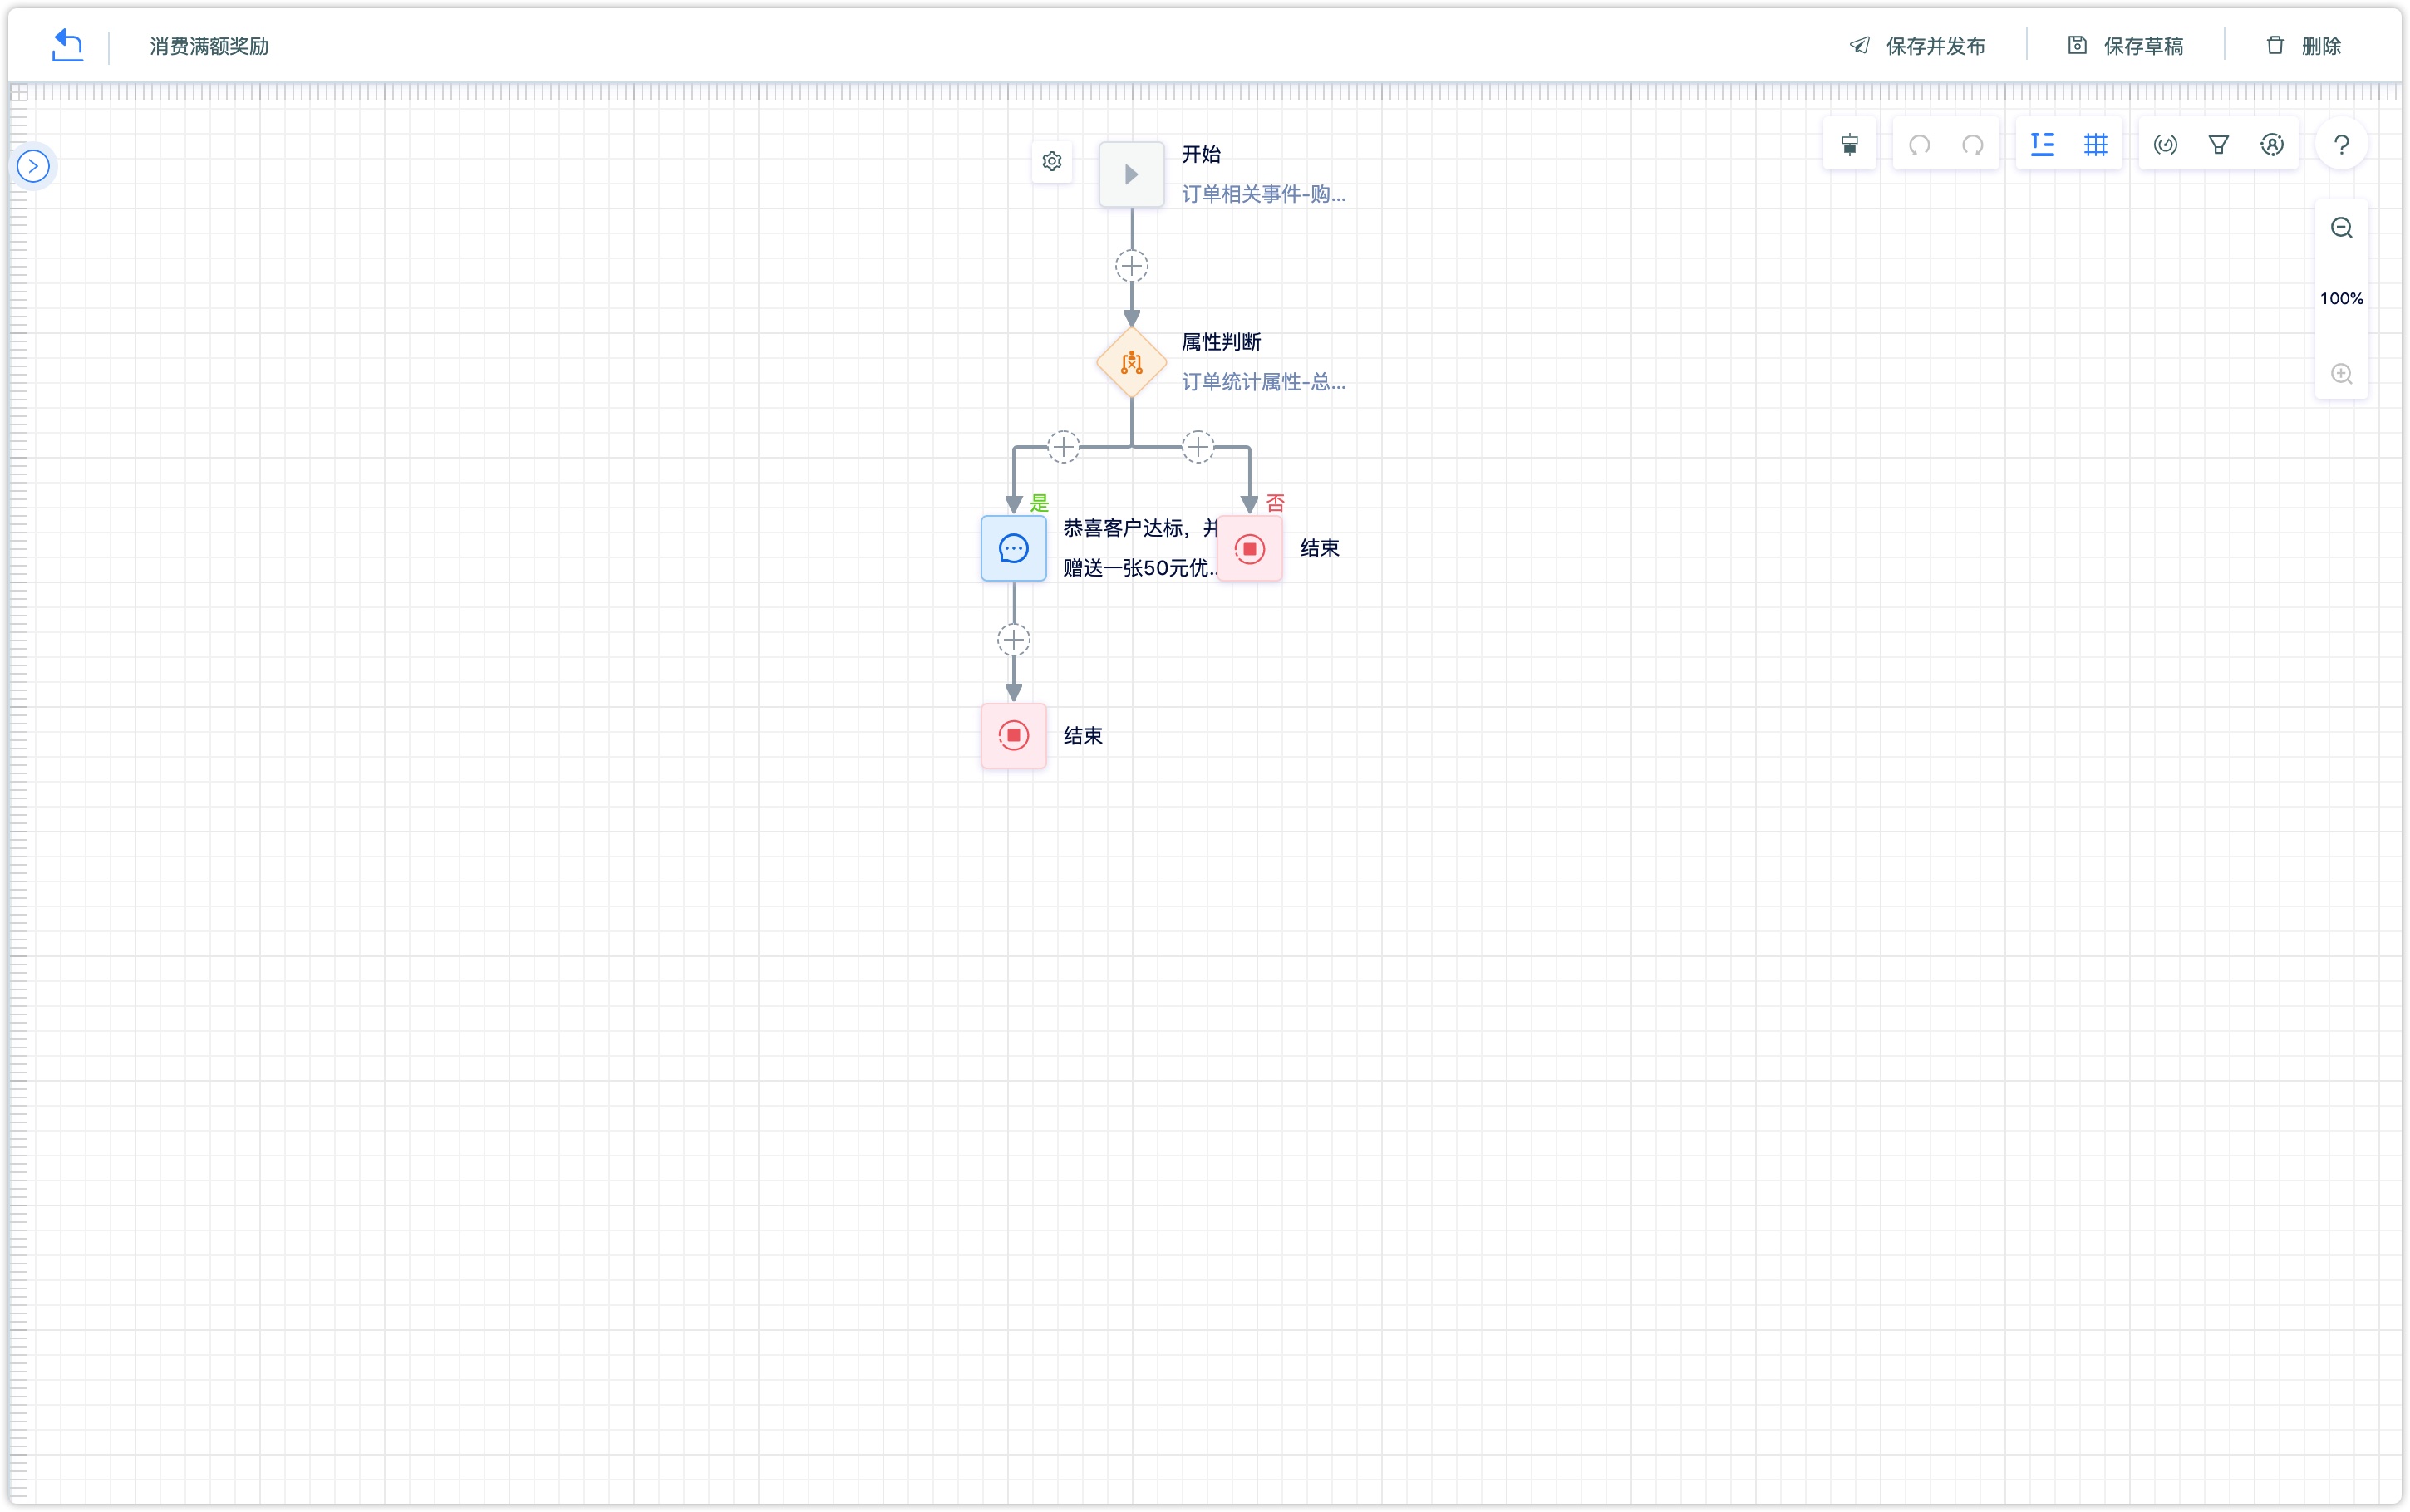
2.2 Edit Workflow
Here is an example of how to use the workflow through a scenario.
When a customer follows an official account, the system will push a WeChat-page automatically. If the customer opens the WeChat-page within 5 hours, the customer will be joined into a static group. And if the customer does not open the WeChat-page within 5 hours, the system will push the WeChat-page to the customer again, and then end the process.
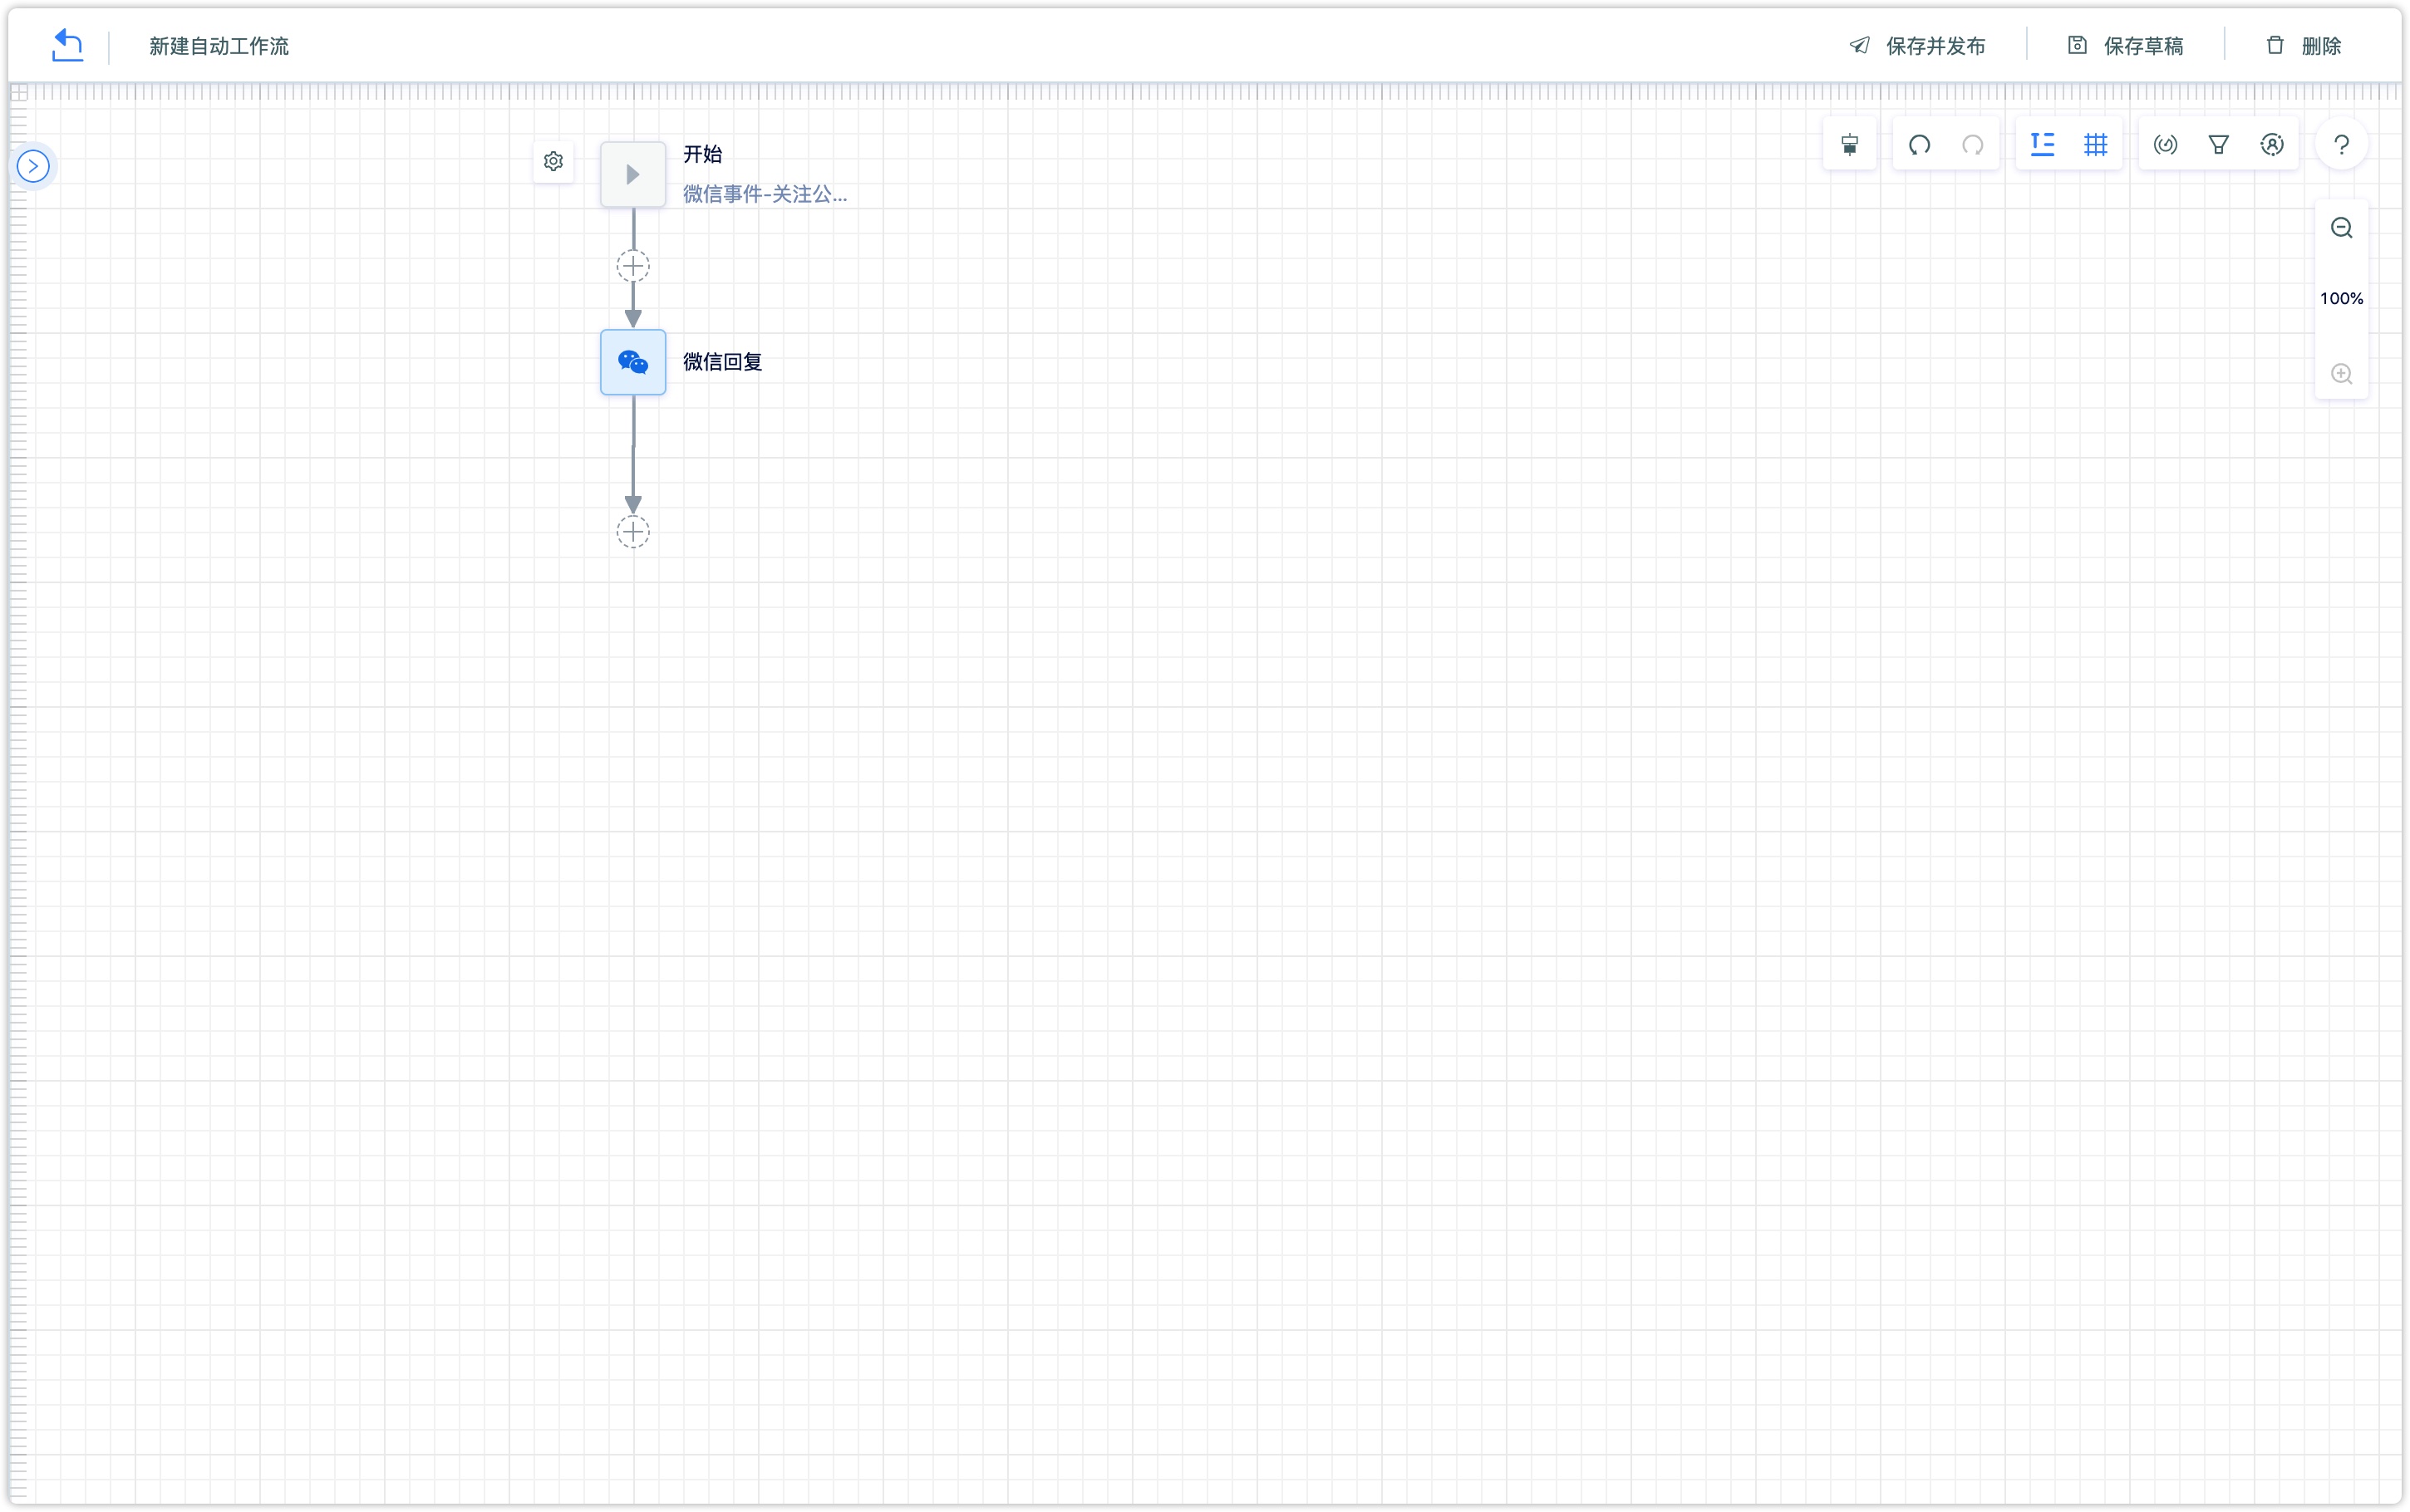
Step 1: Set the trigger condition "follow the official account of Wechat: Huayang Commerce." That is, when the user follows the official account, the workflow will be triggered and allow the customer to get into the process repeatedly.
Step 2: Set the first step to execute the action, when following the official account, WeChat will reply to the WeChat-page automatically.
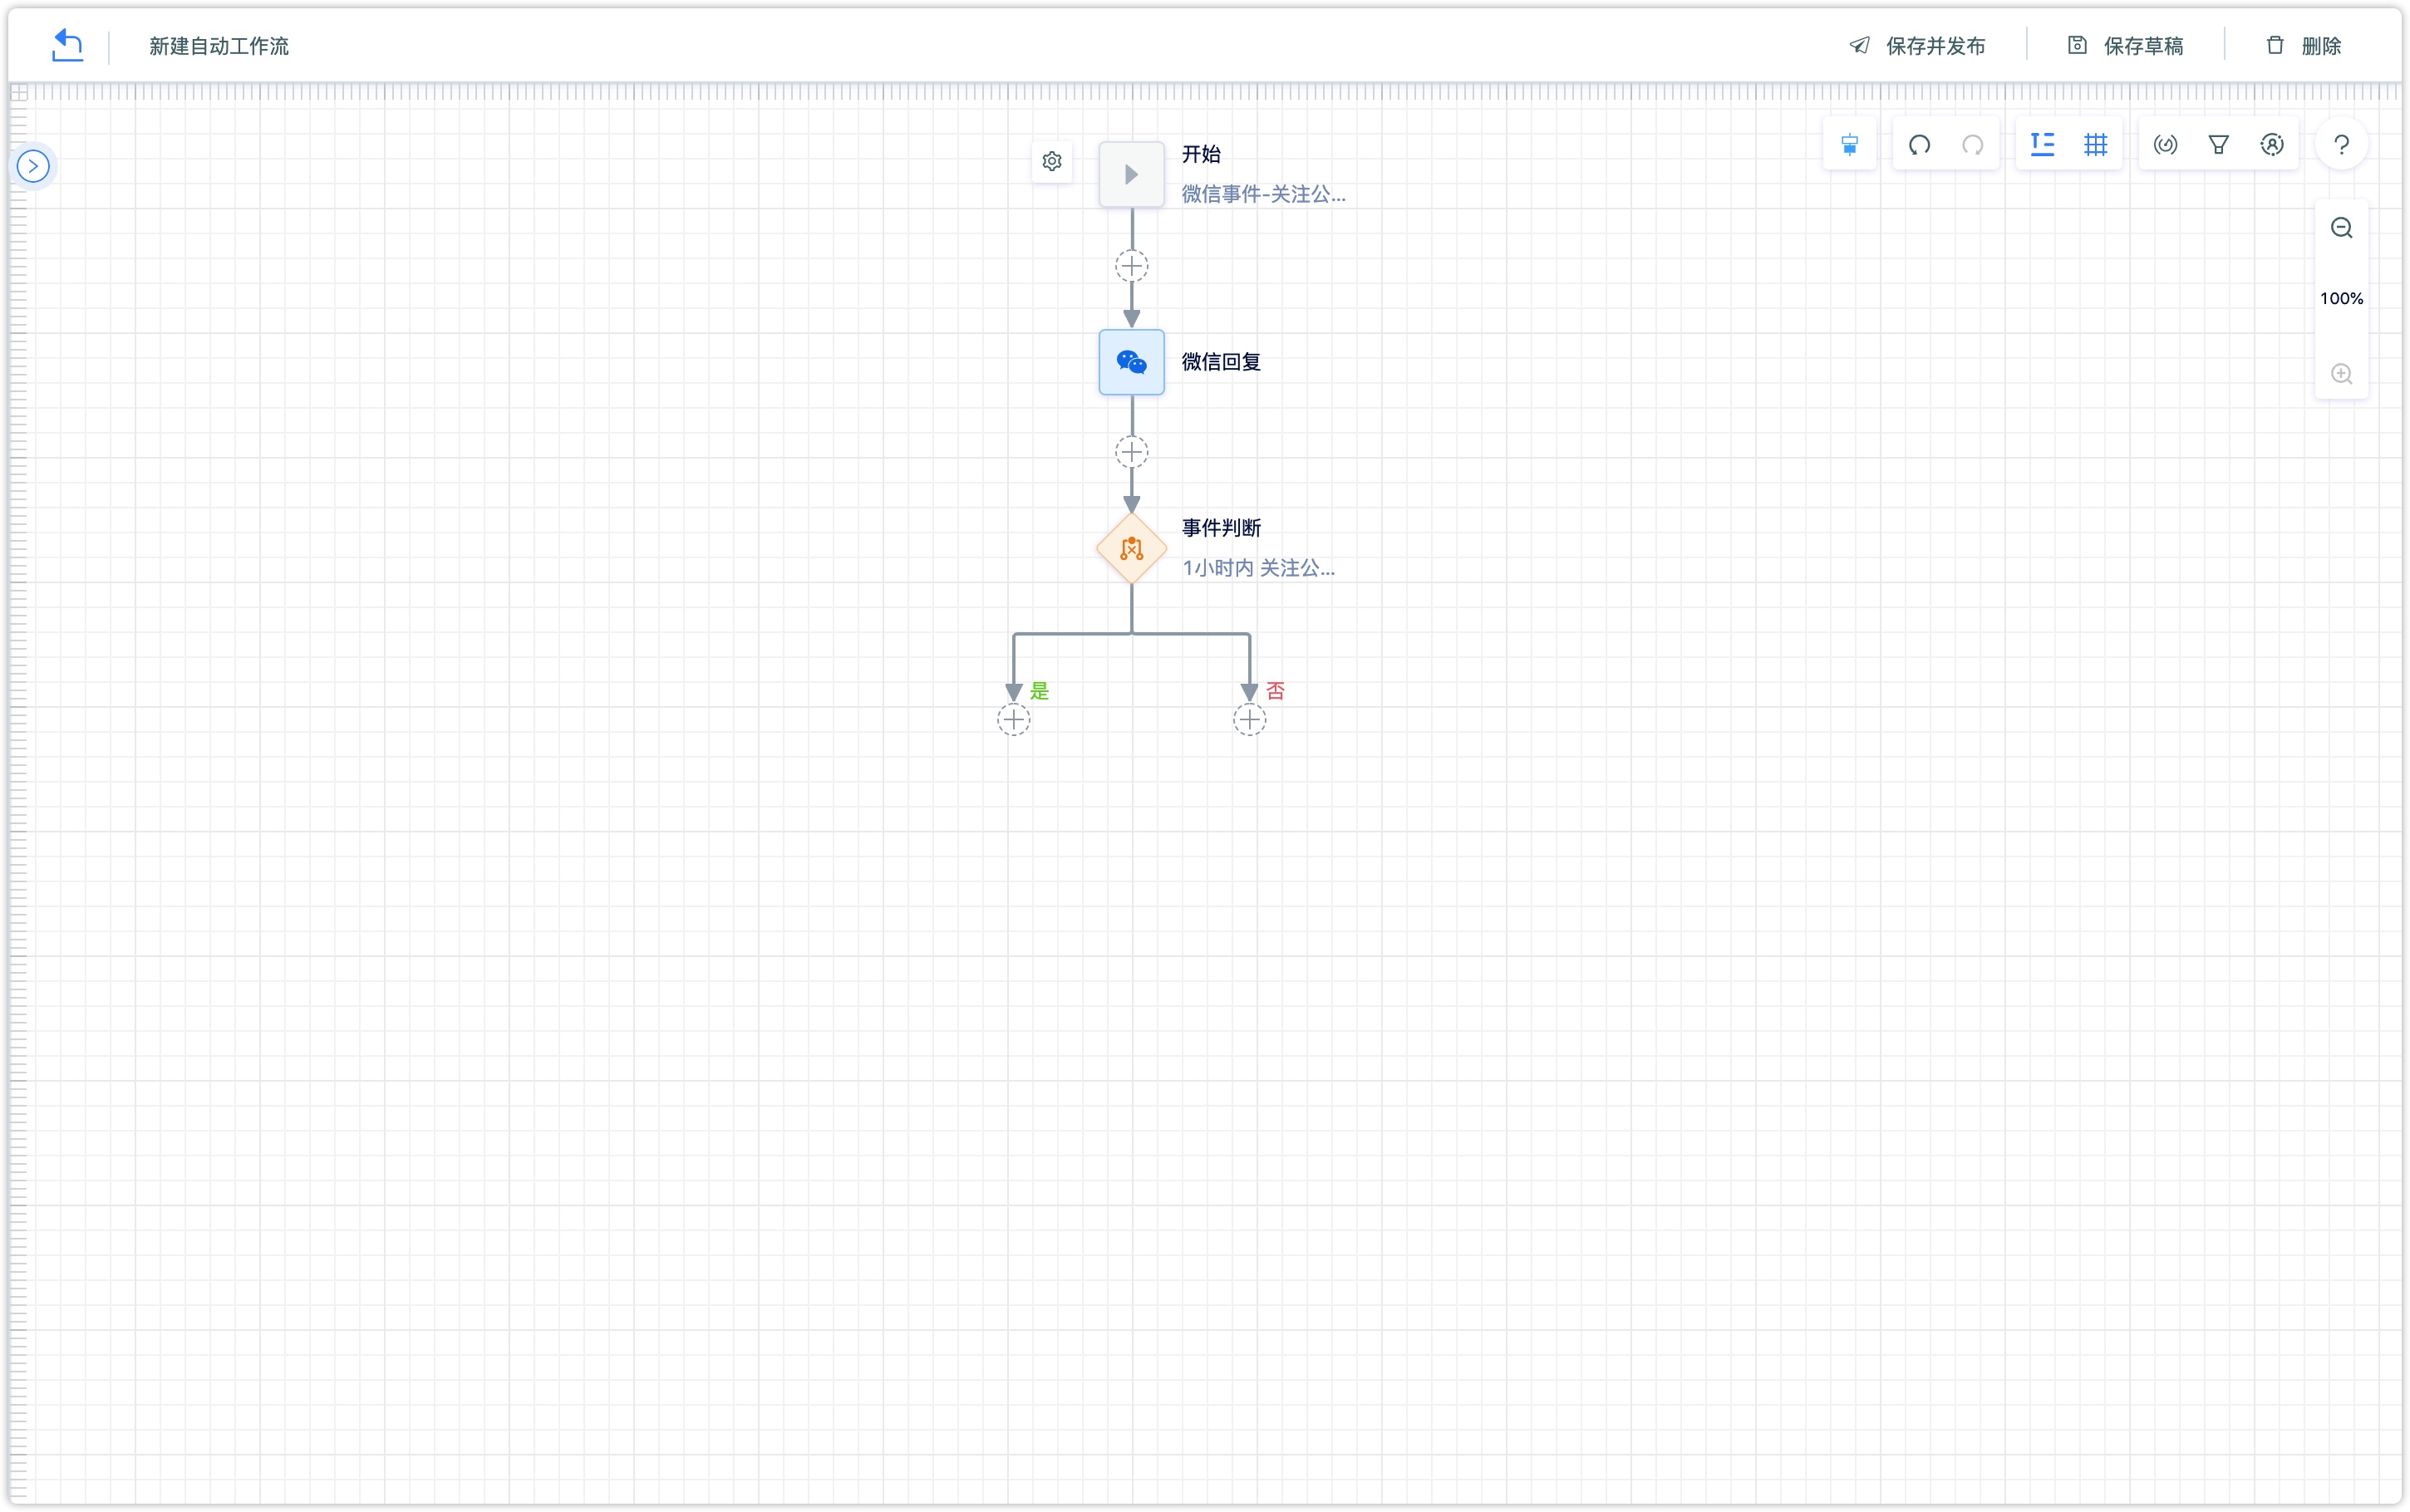
Step 3: The system will judge the users' click situation of the WeChat-page pushed by WeChat.
Step 4: Add the users who open the WeChat-page to a static group, and make another Wechat push to the users who did not open the WeChat-page. then add an end element to each branch.
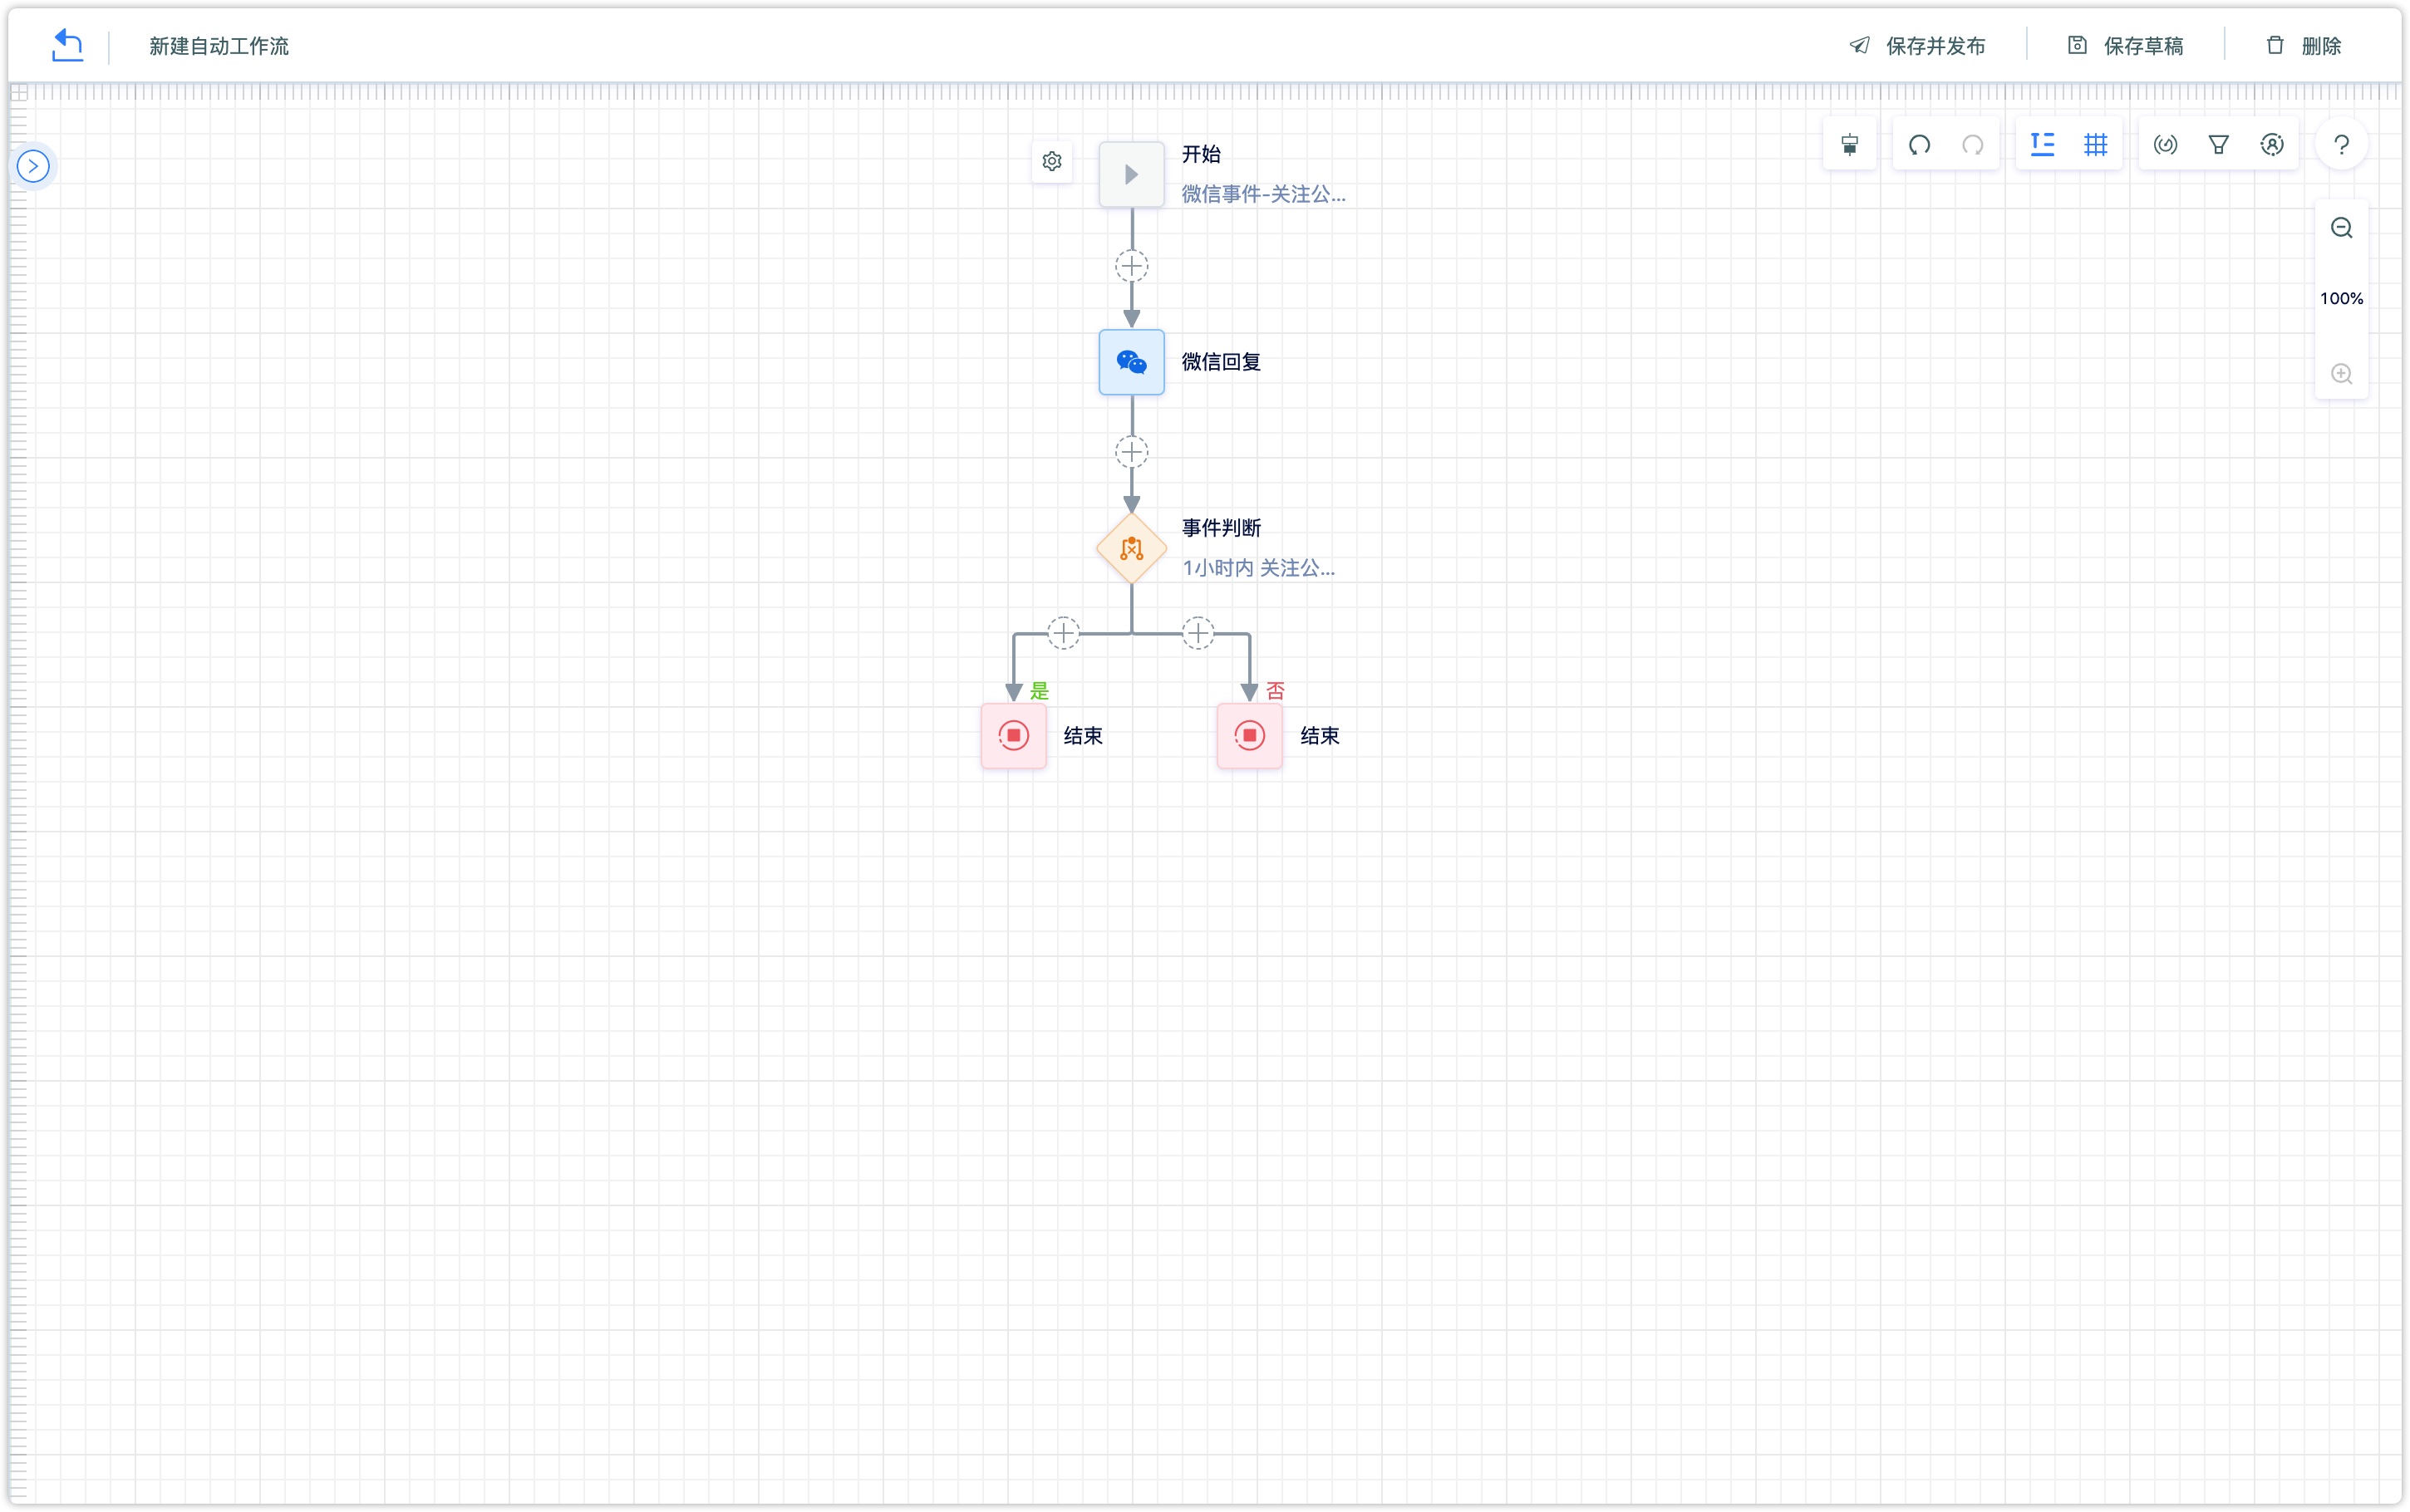
Then click 【Save and publish】, and the workflow starts to run.
Or click 【Save draft】 and the workflow is saved as a draft.
Click 【Delete】 to delete the workflow.
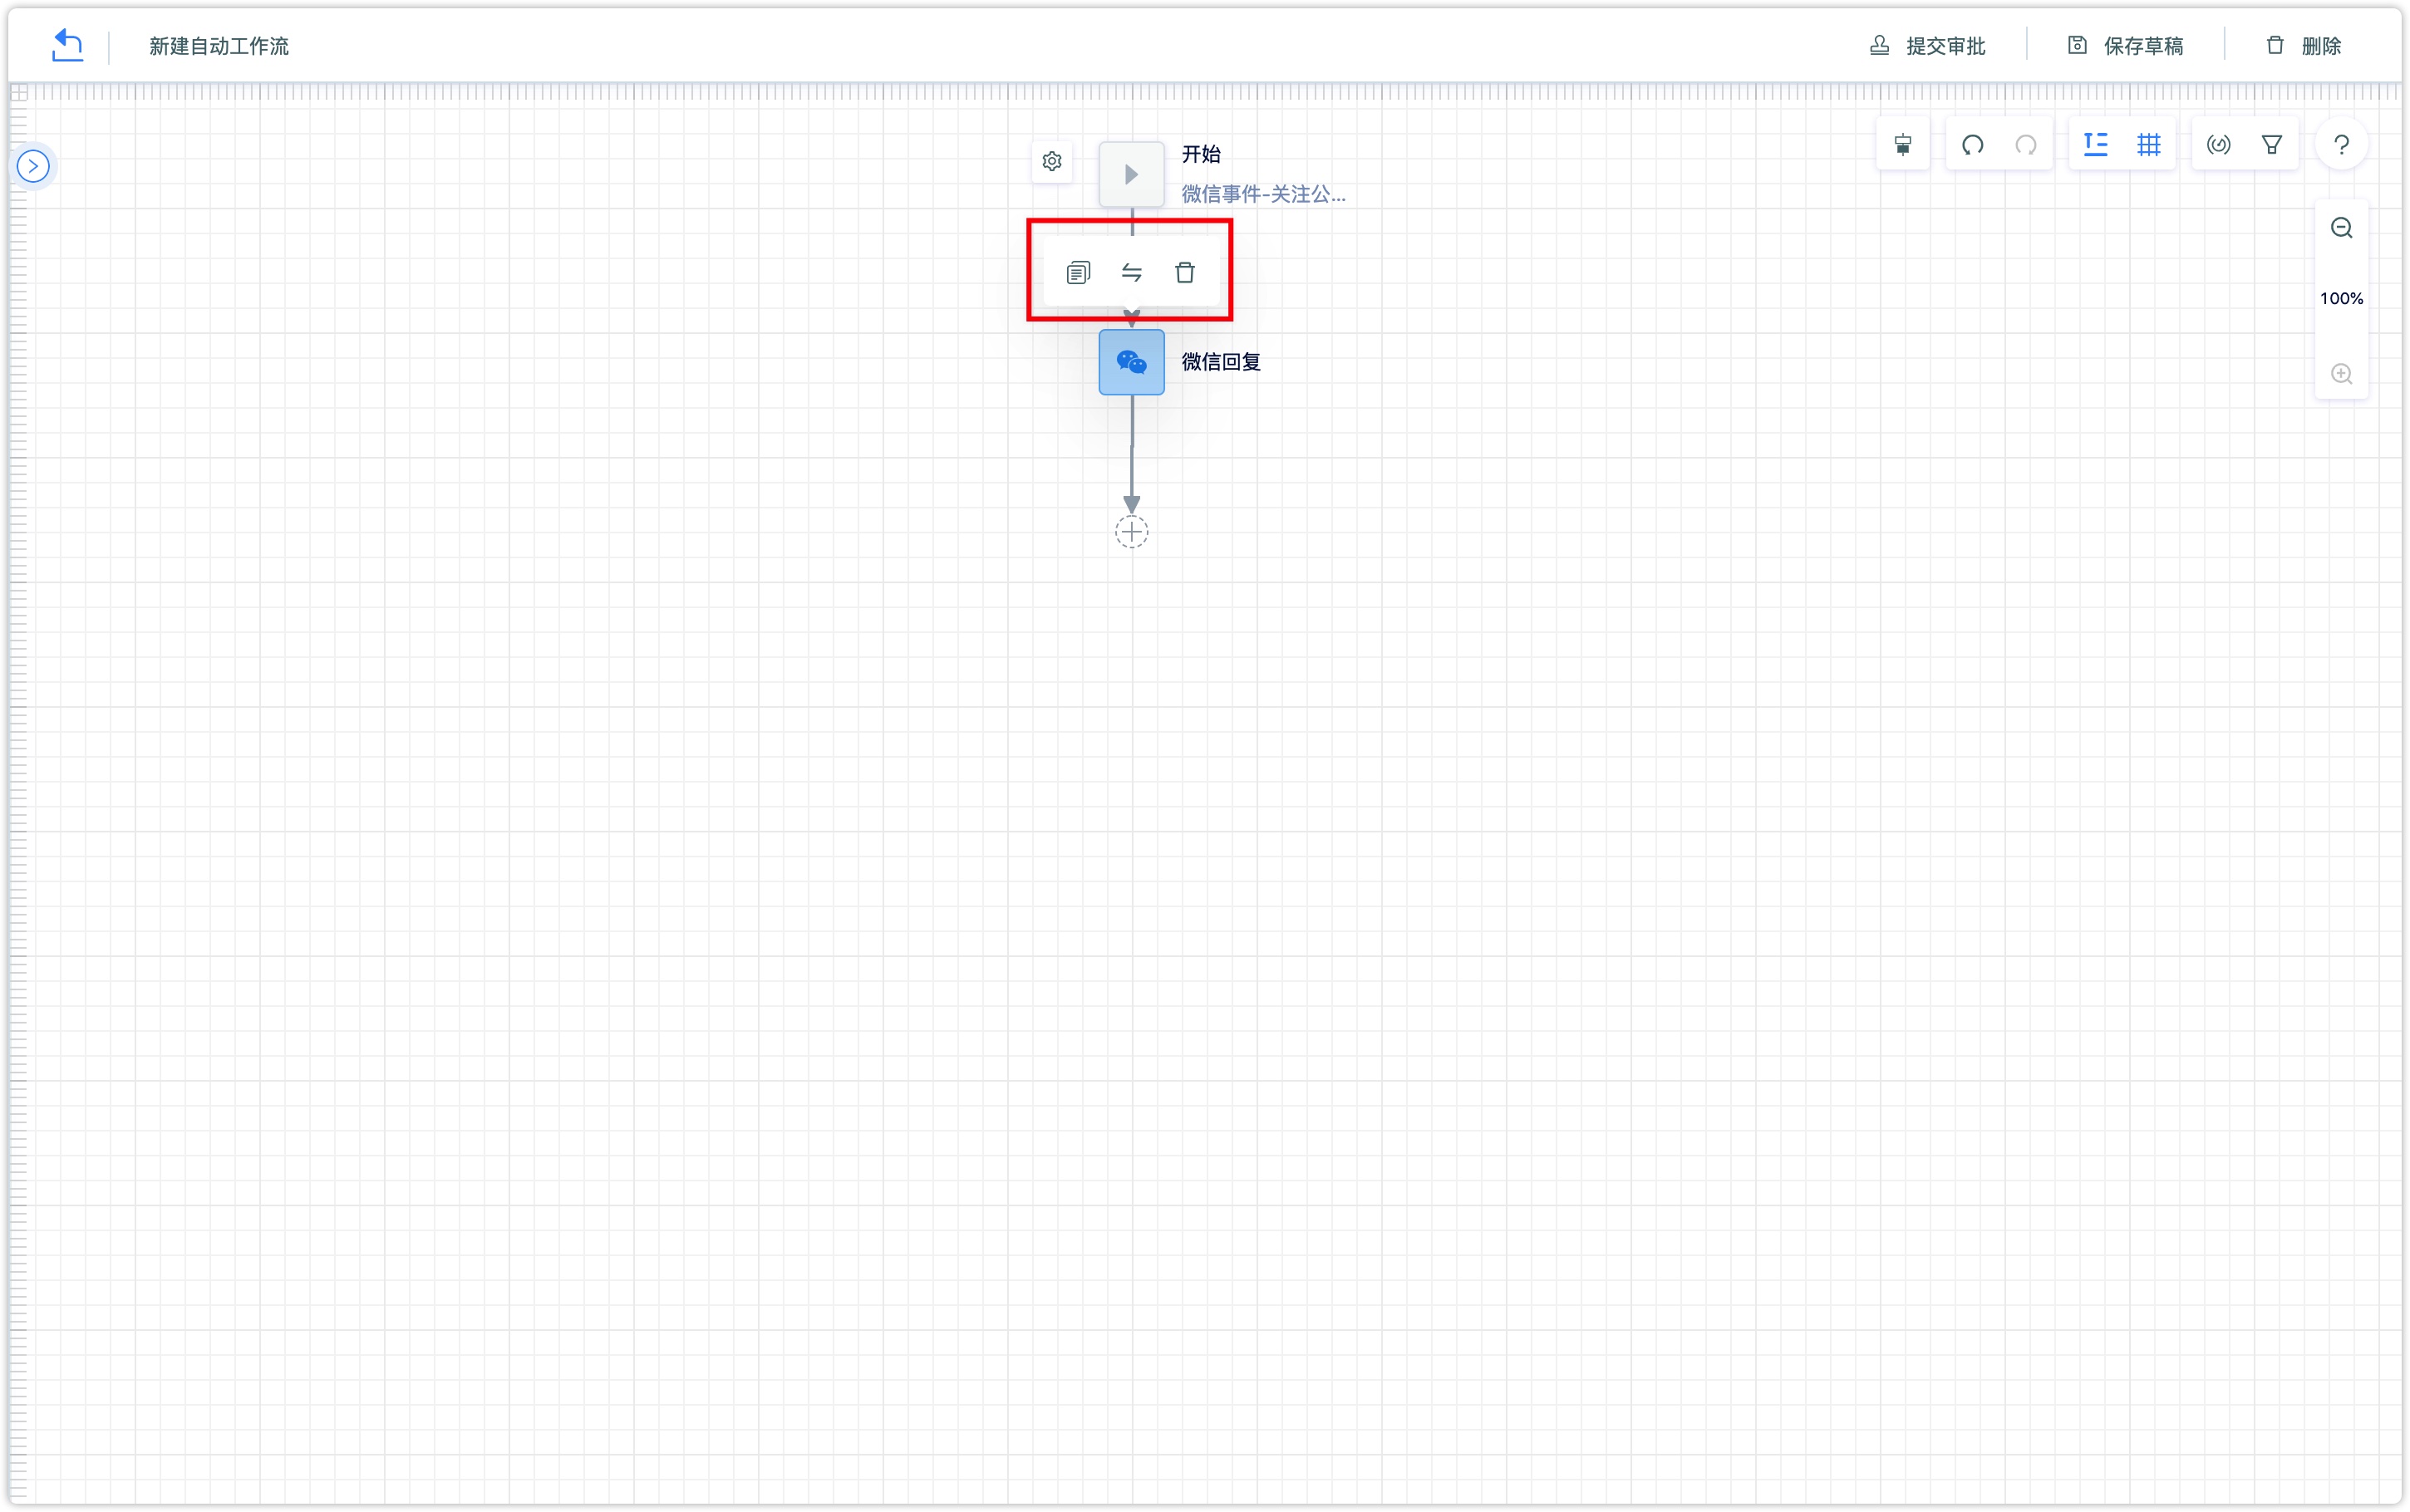
Besides, workflow nodes support replication, replacement, and deletion. As shown in the following image, it's easy to move the mouse over the node to select.
You can see a set of auxiliary buttons on the upper right in the workflow settings interface.
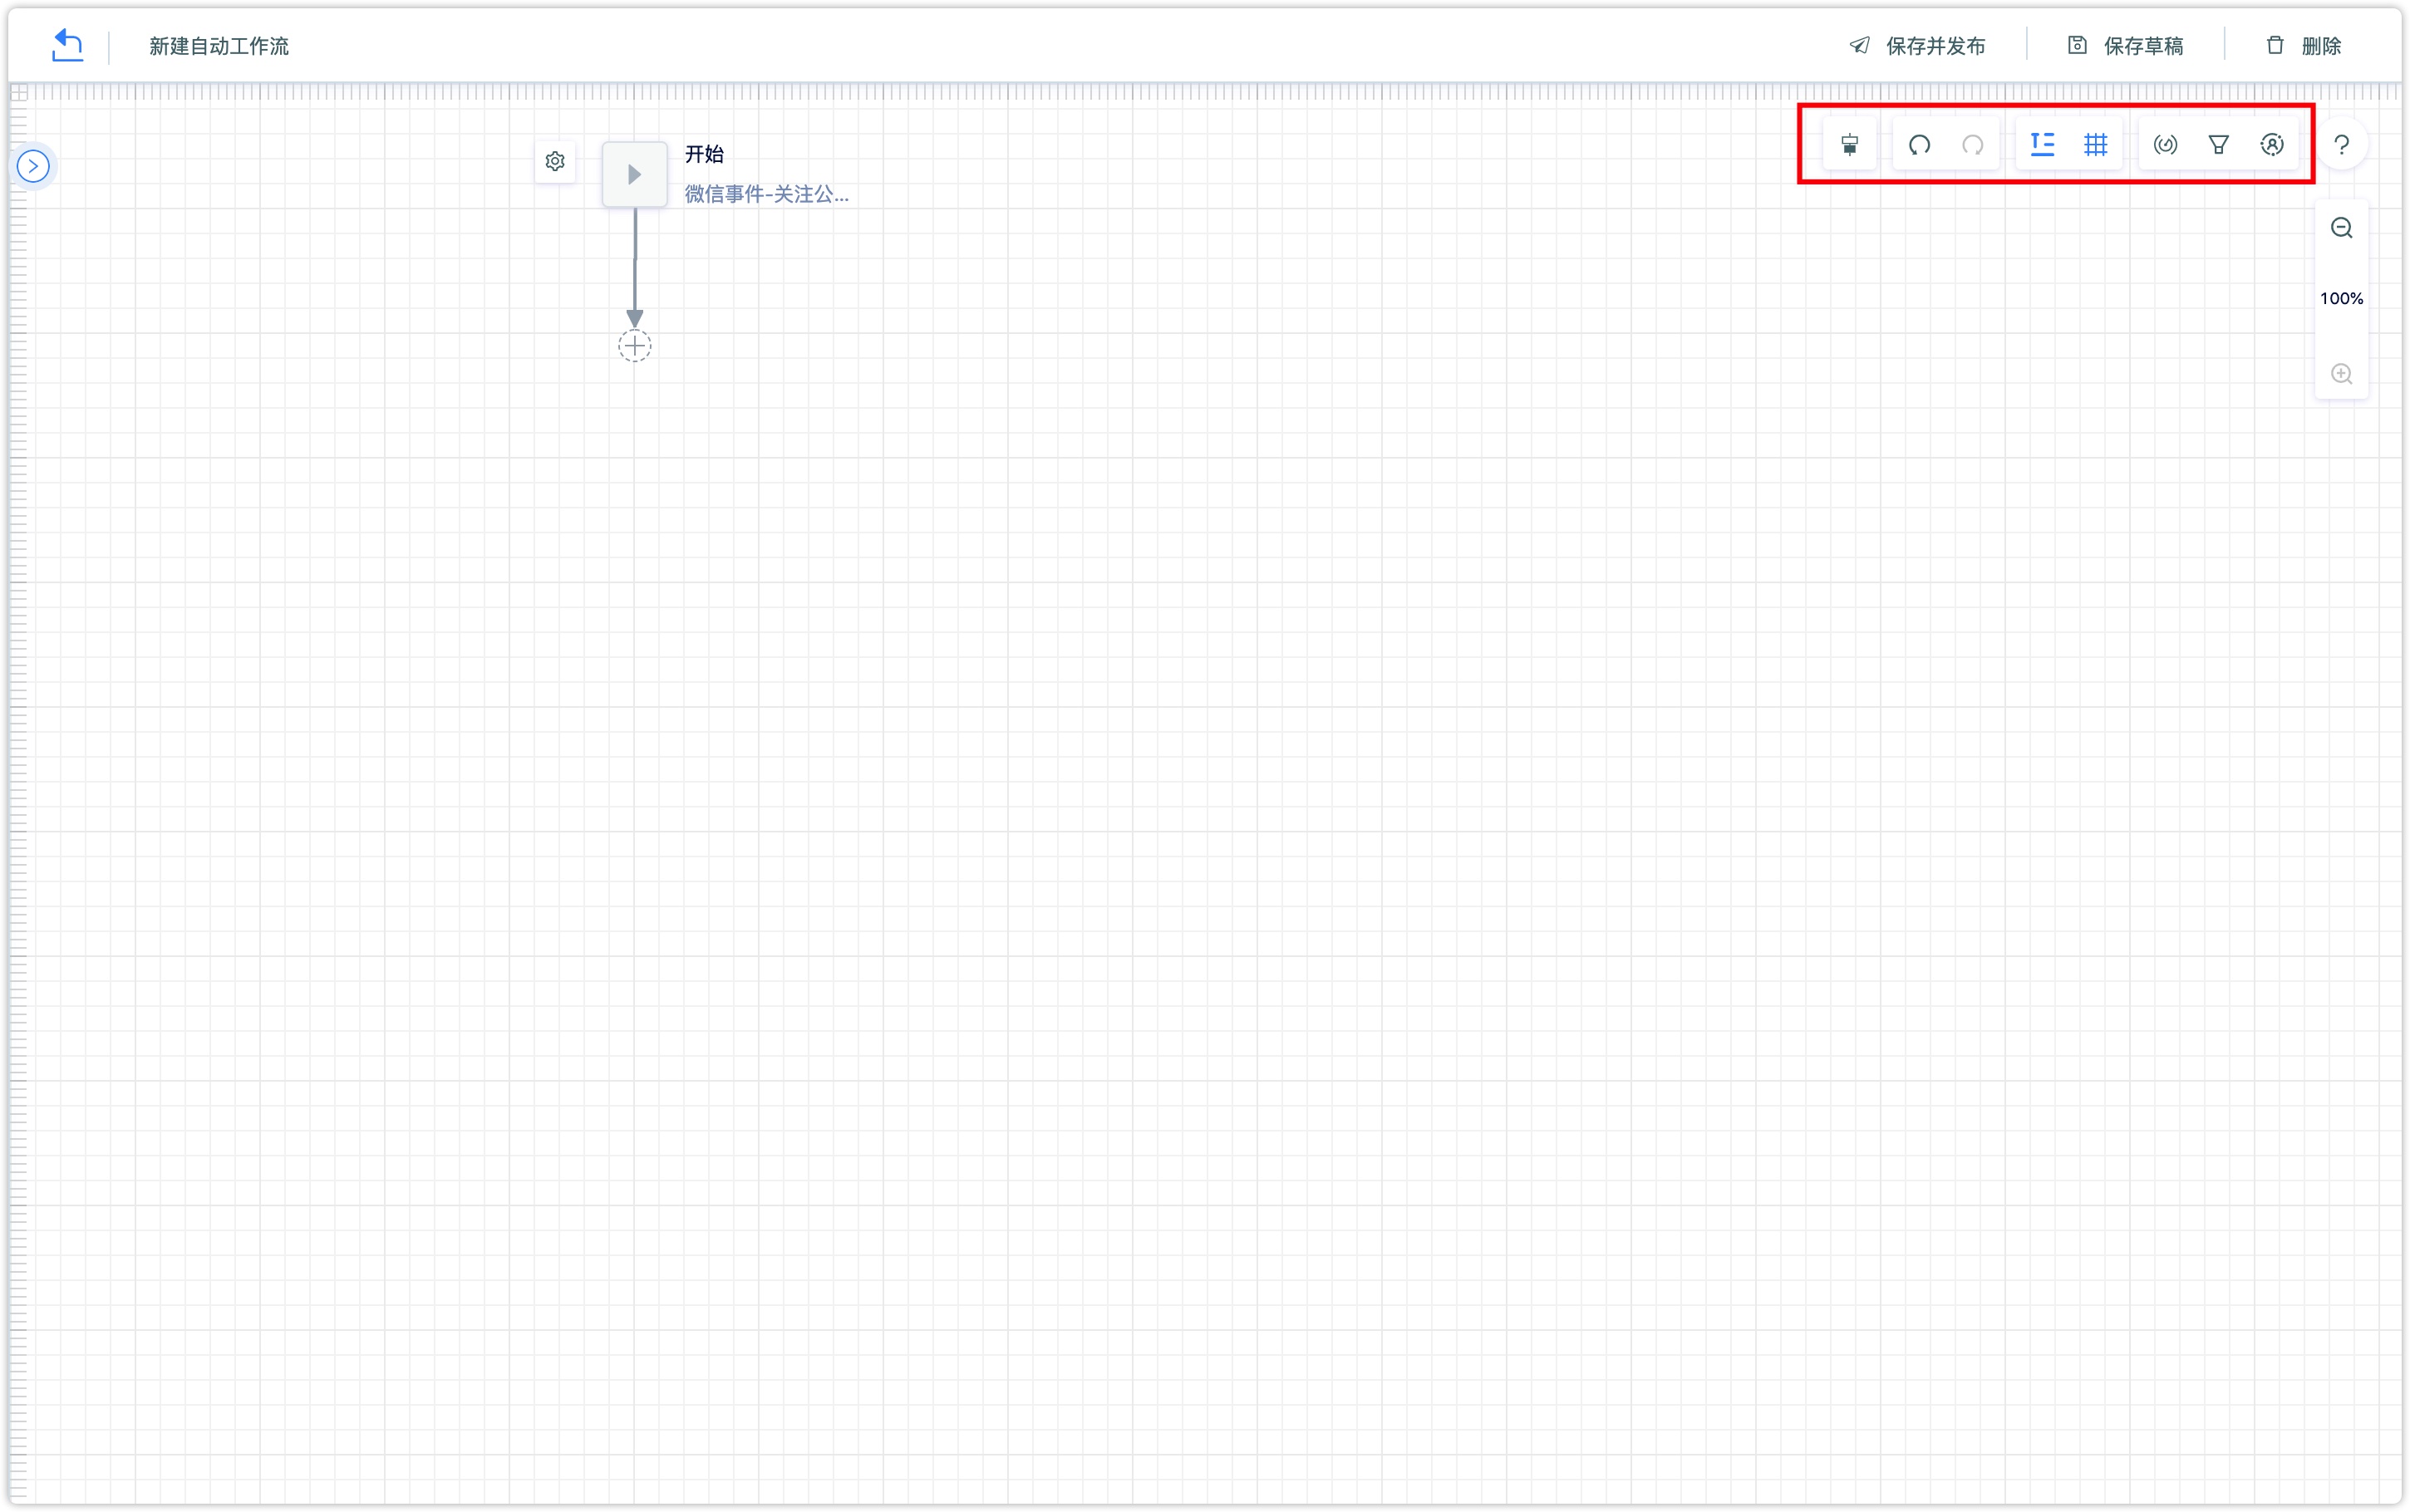
【Automatic sorting】: The process can be sorted out and sorted automatically, and help to be more organized.
【Undo and Redo】: Undo and Redo can be done when editing the workflow.
【Description】: Control the display or hiding the descriptive information for each step.
【Grid】: Control whether to show or hide the grid.
【Scan】: It is supported to scan the following suspicious configurations: multiple nodes are associated with the same data, such as two nodes are configured to send the same messages; node association data is abnormal, such as a coupon configured by a node has expired or has been deleted.
【View】: Control screen view to zoom in or out.
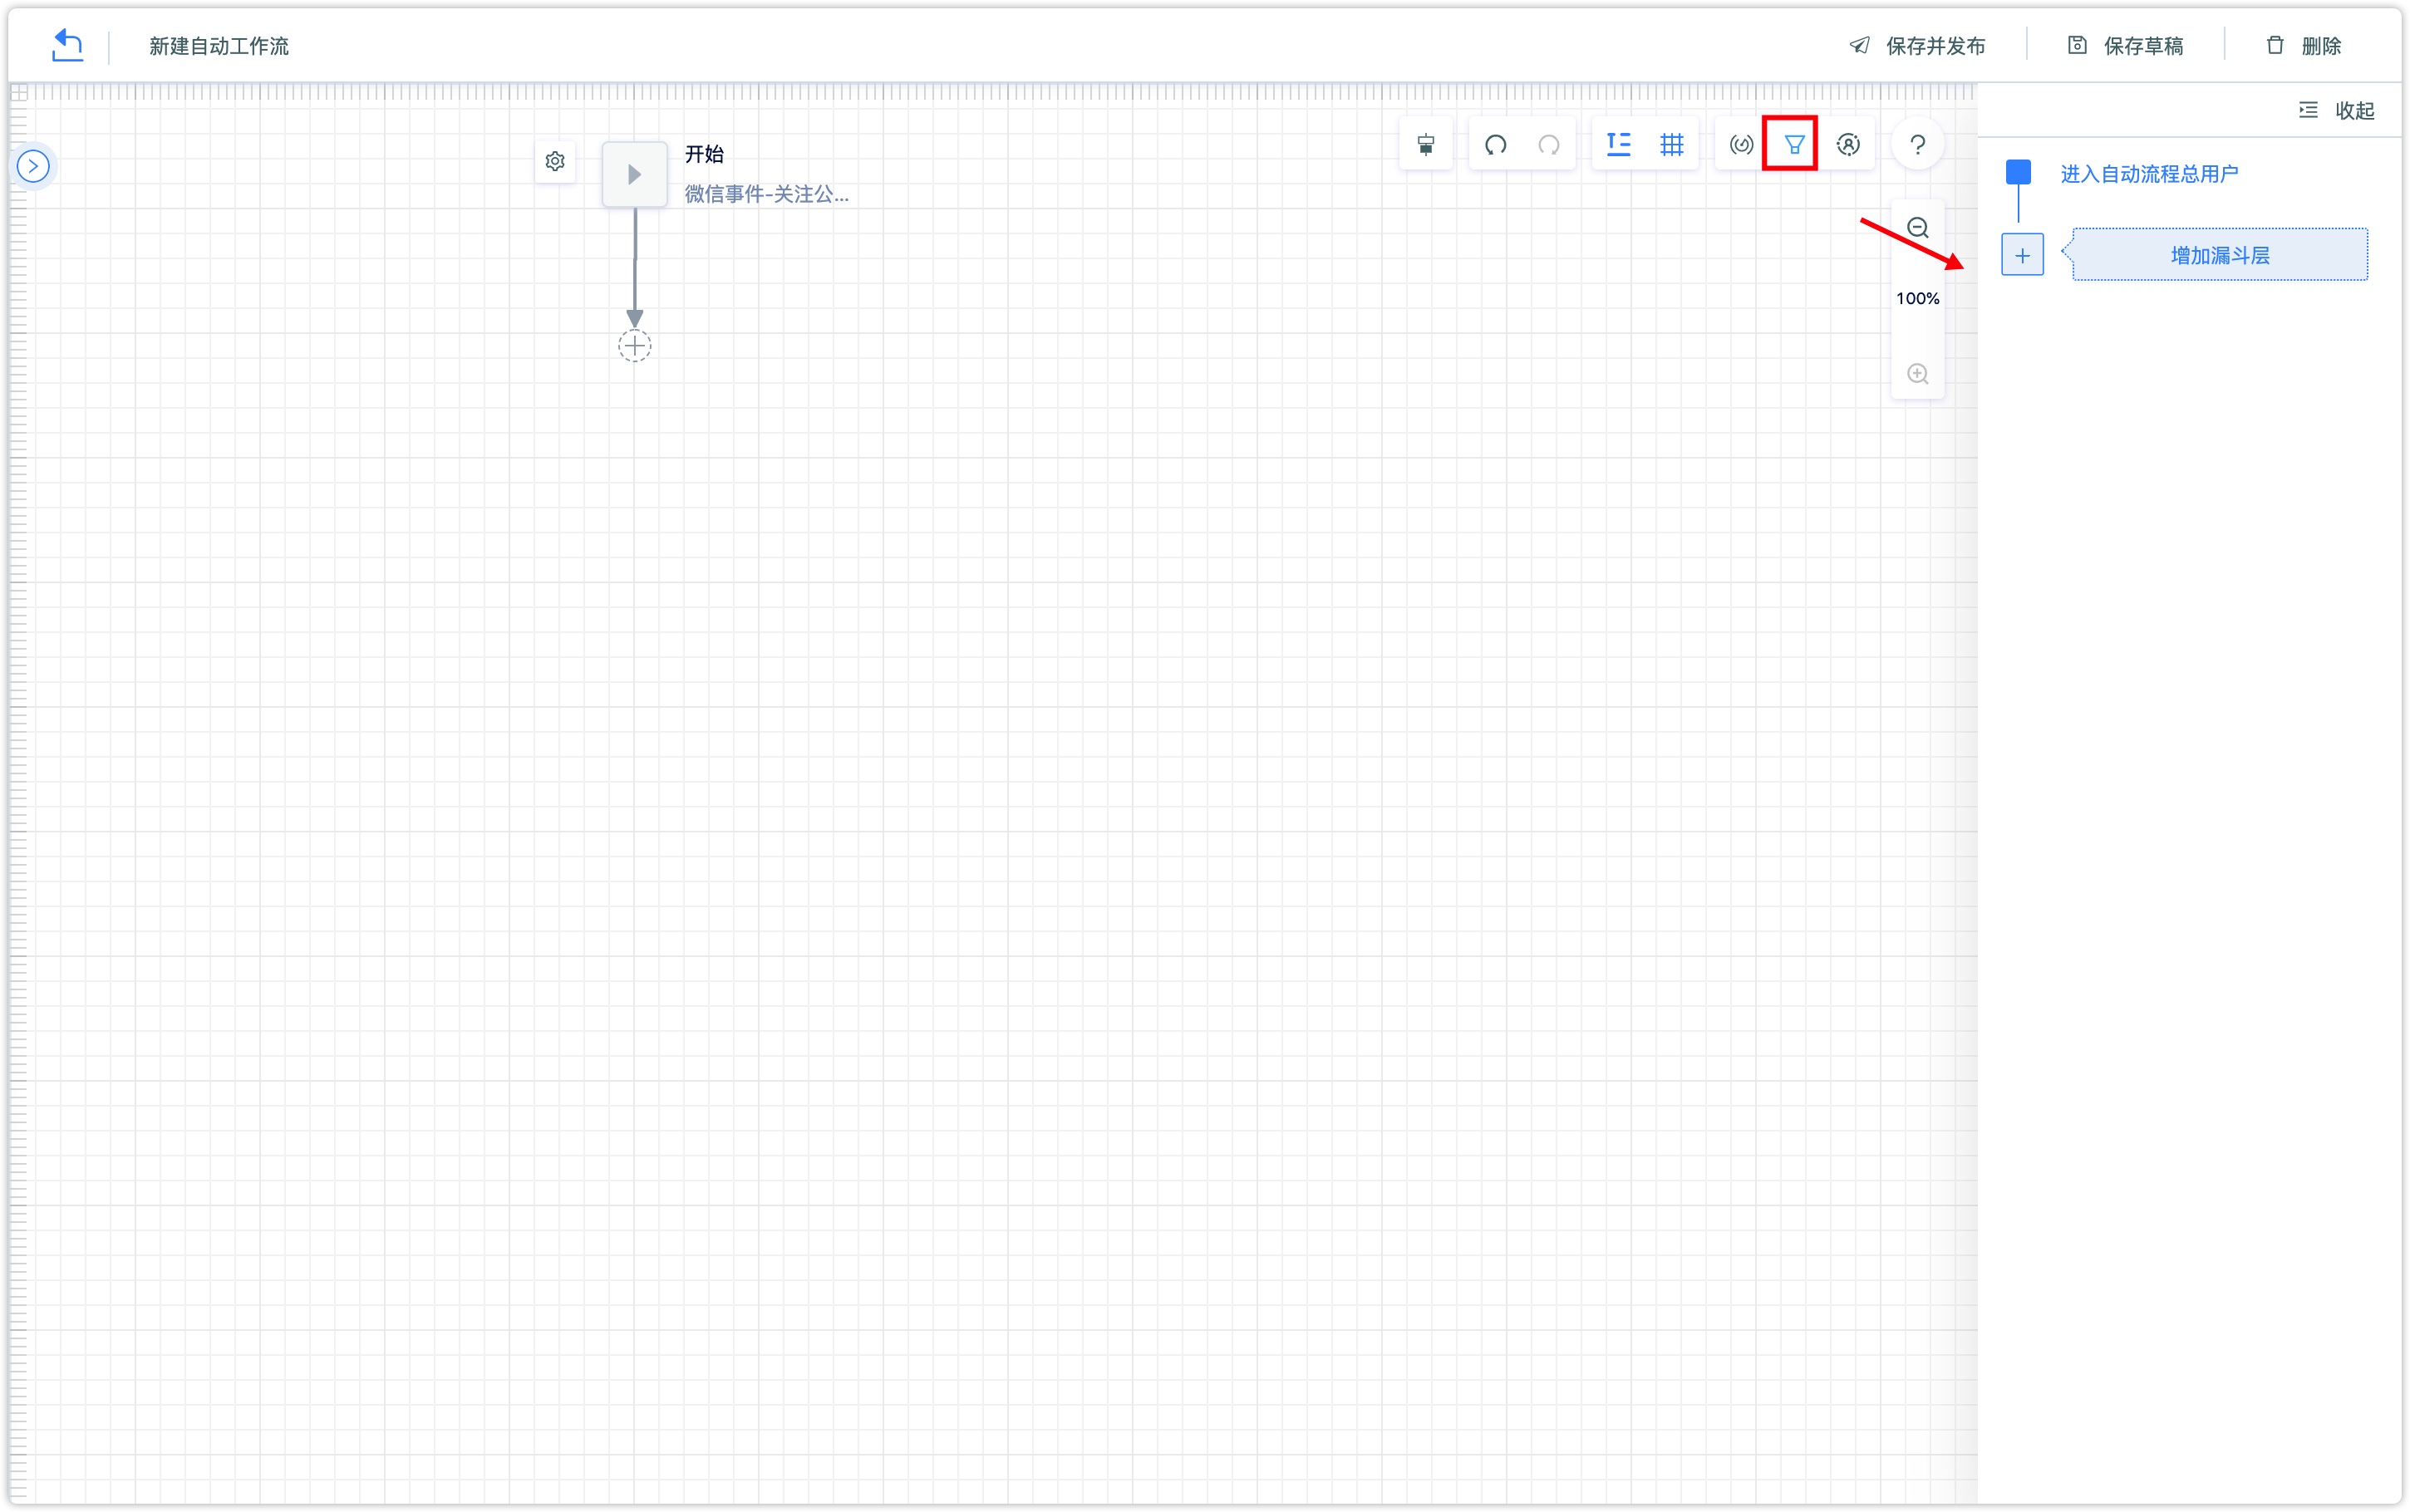
【Funnel】: Set funnel analysis in the state of automatic process editing, which can be used to investigate the transformation.
Click 【Funnel】 in the toolbar to turn on the funnel analysis setting function. The multi-layer funnel can be customized, and the name of each layer funnel can be changed; click the branch node in the program canvas, the selected components will be added to the layer funnel. Each funnel can select components of multiple branch nodes.
There are many design controls in the workflows, which are divided into three categories: action, process control, and condition control. The following examples are WeChat reply in action component, attribute multi-branch judgment in condition control, label multi-branch judgment, and a comparison group.
2.3 Introduction of Workflow components
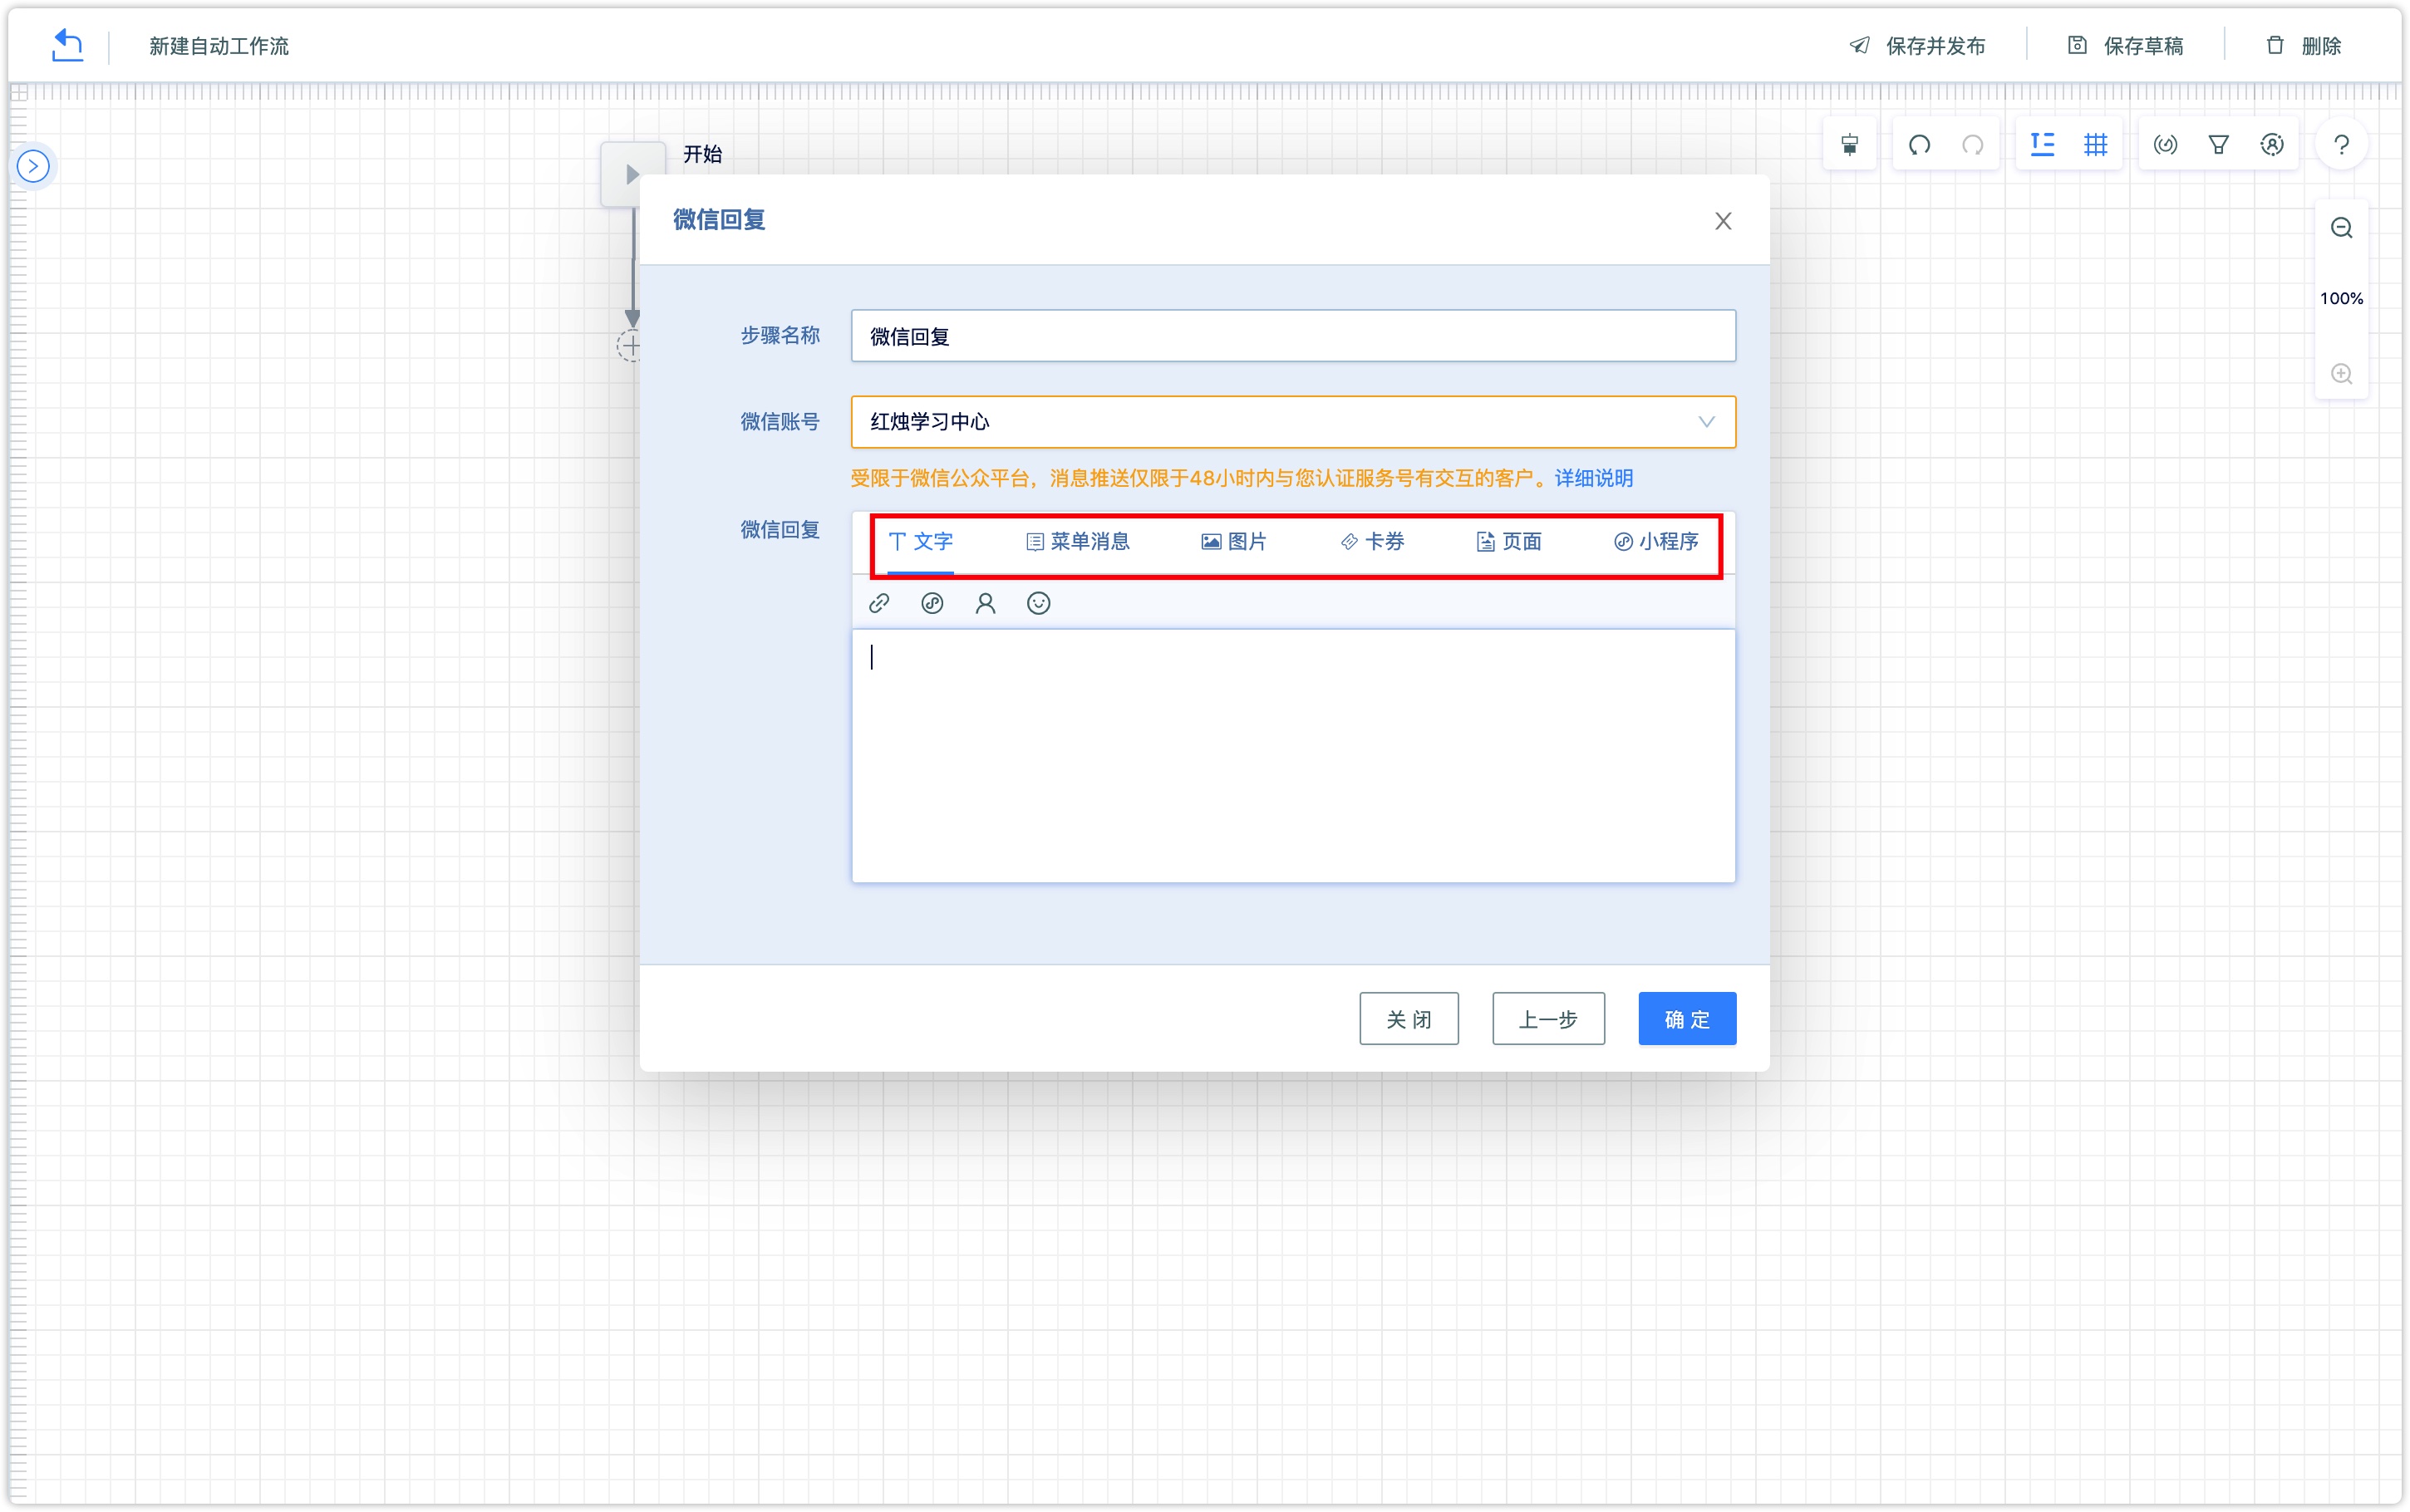
2.3.1 Marketing Reach
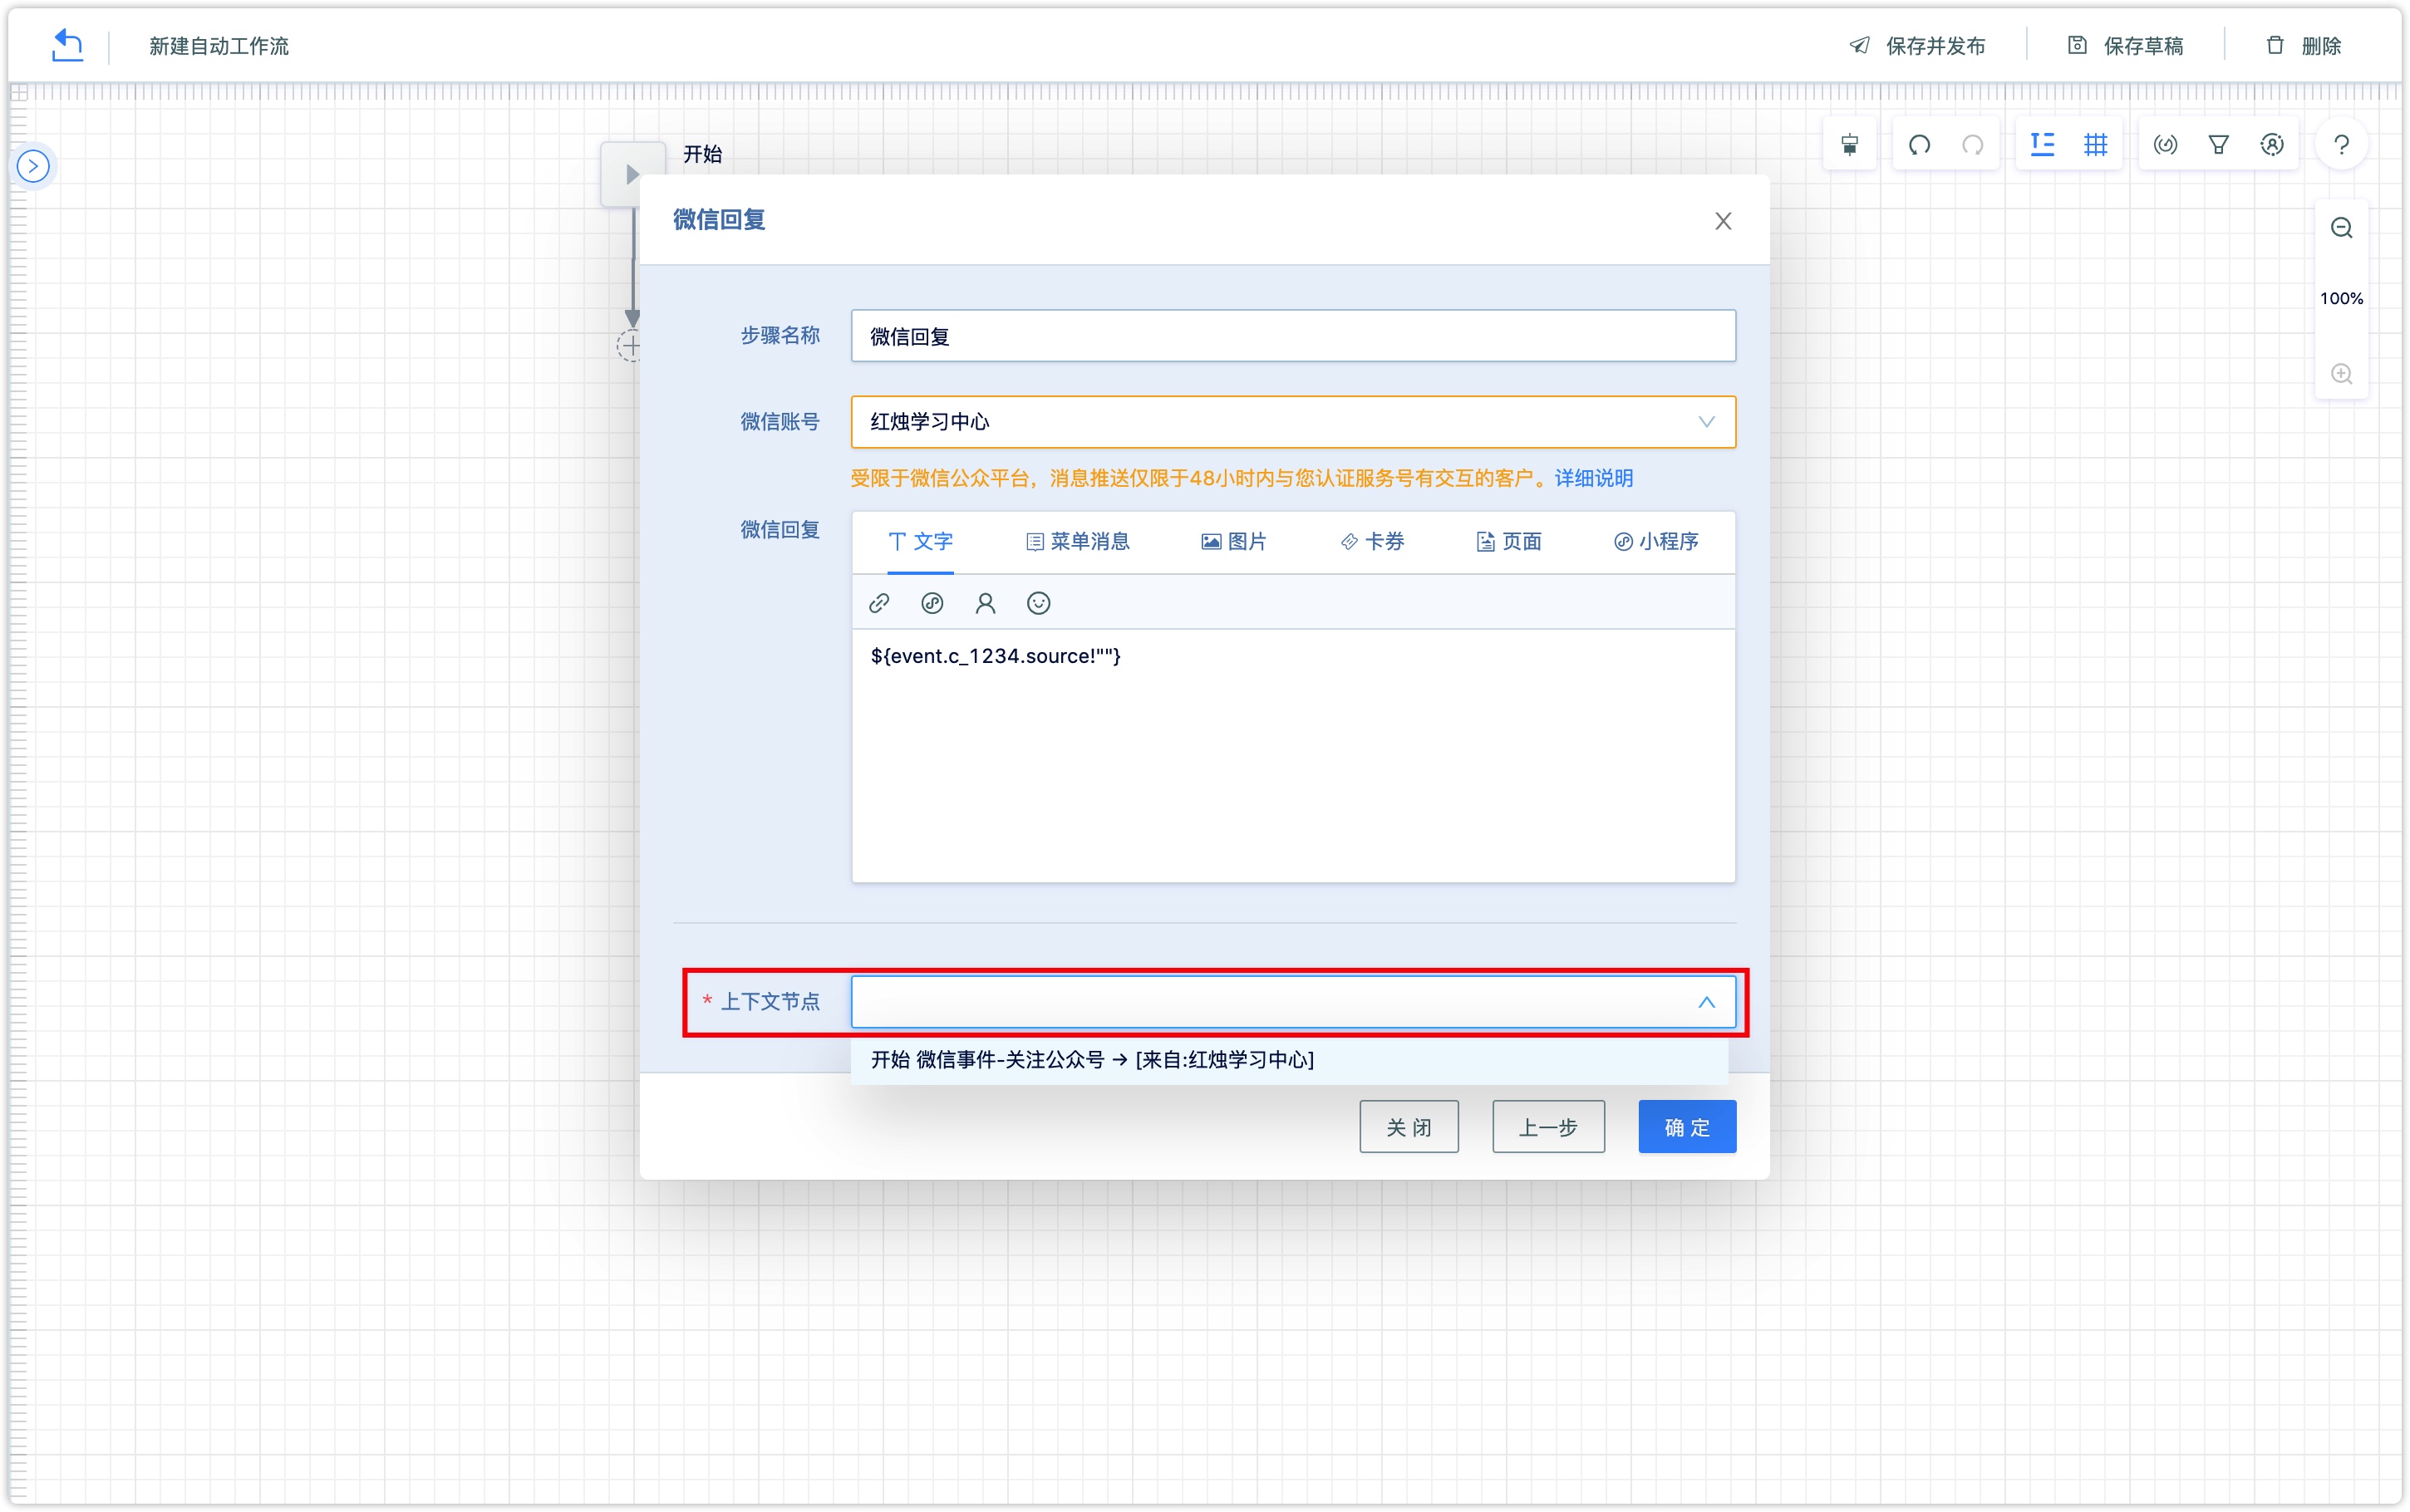
Refers to the way to reach the customer. Take 【WeChat Reply】 as an example: WeChat reply can reply to texts, menu messages, pictures, coupons, pages, Mini Programs through the WeChat official account.
Insert variables: Variable types support customer attributes, customer Open_ID, context attributes, value tags, etc.
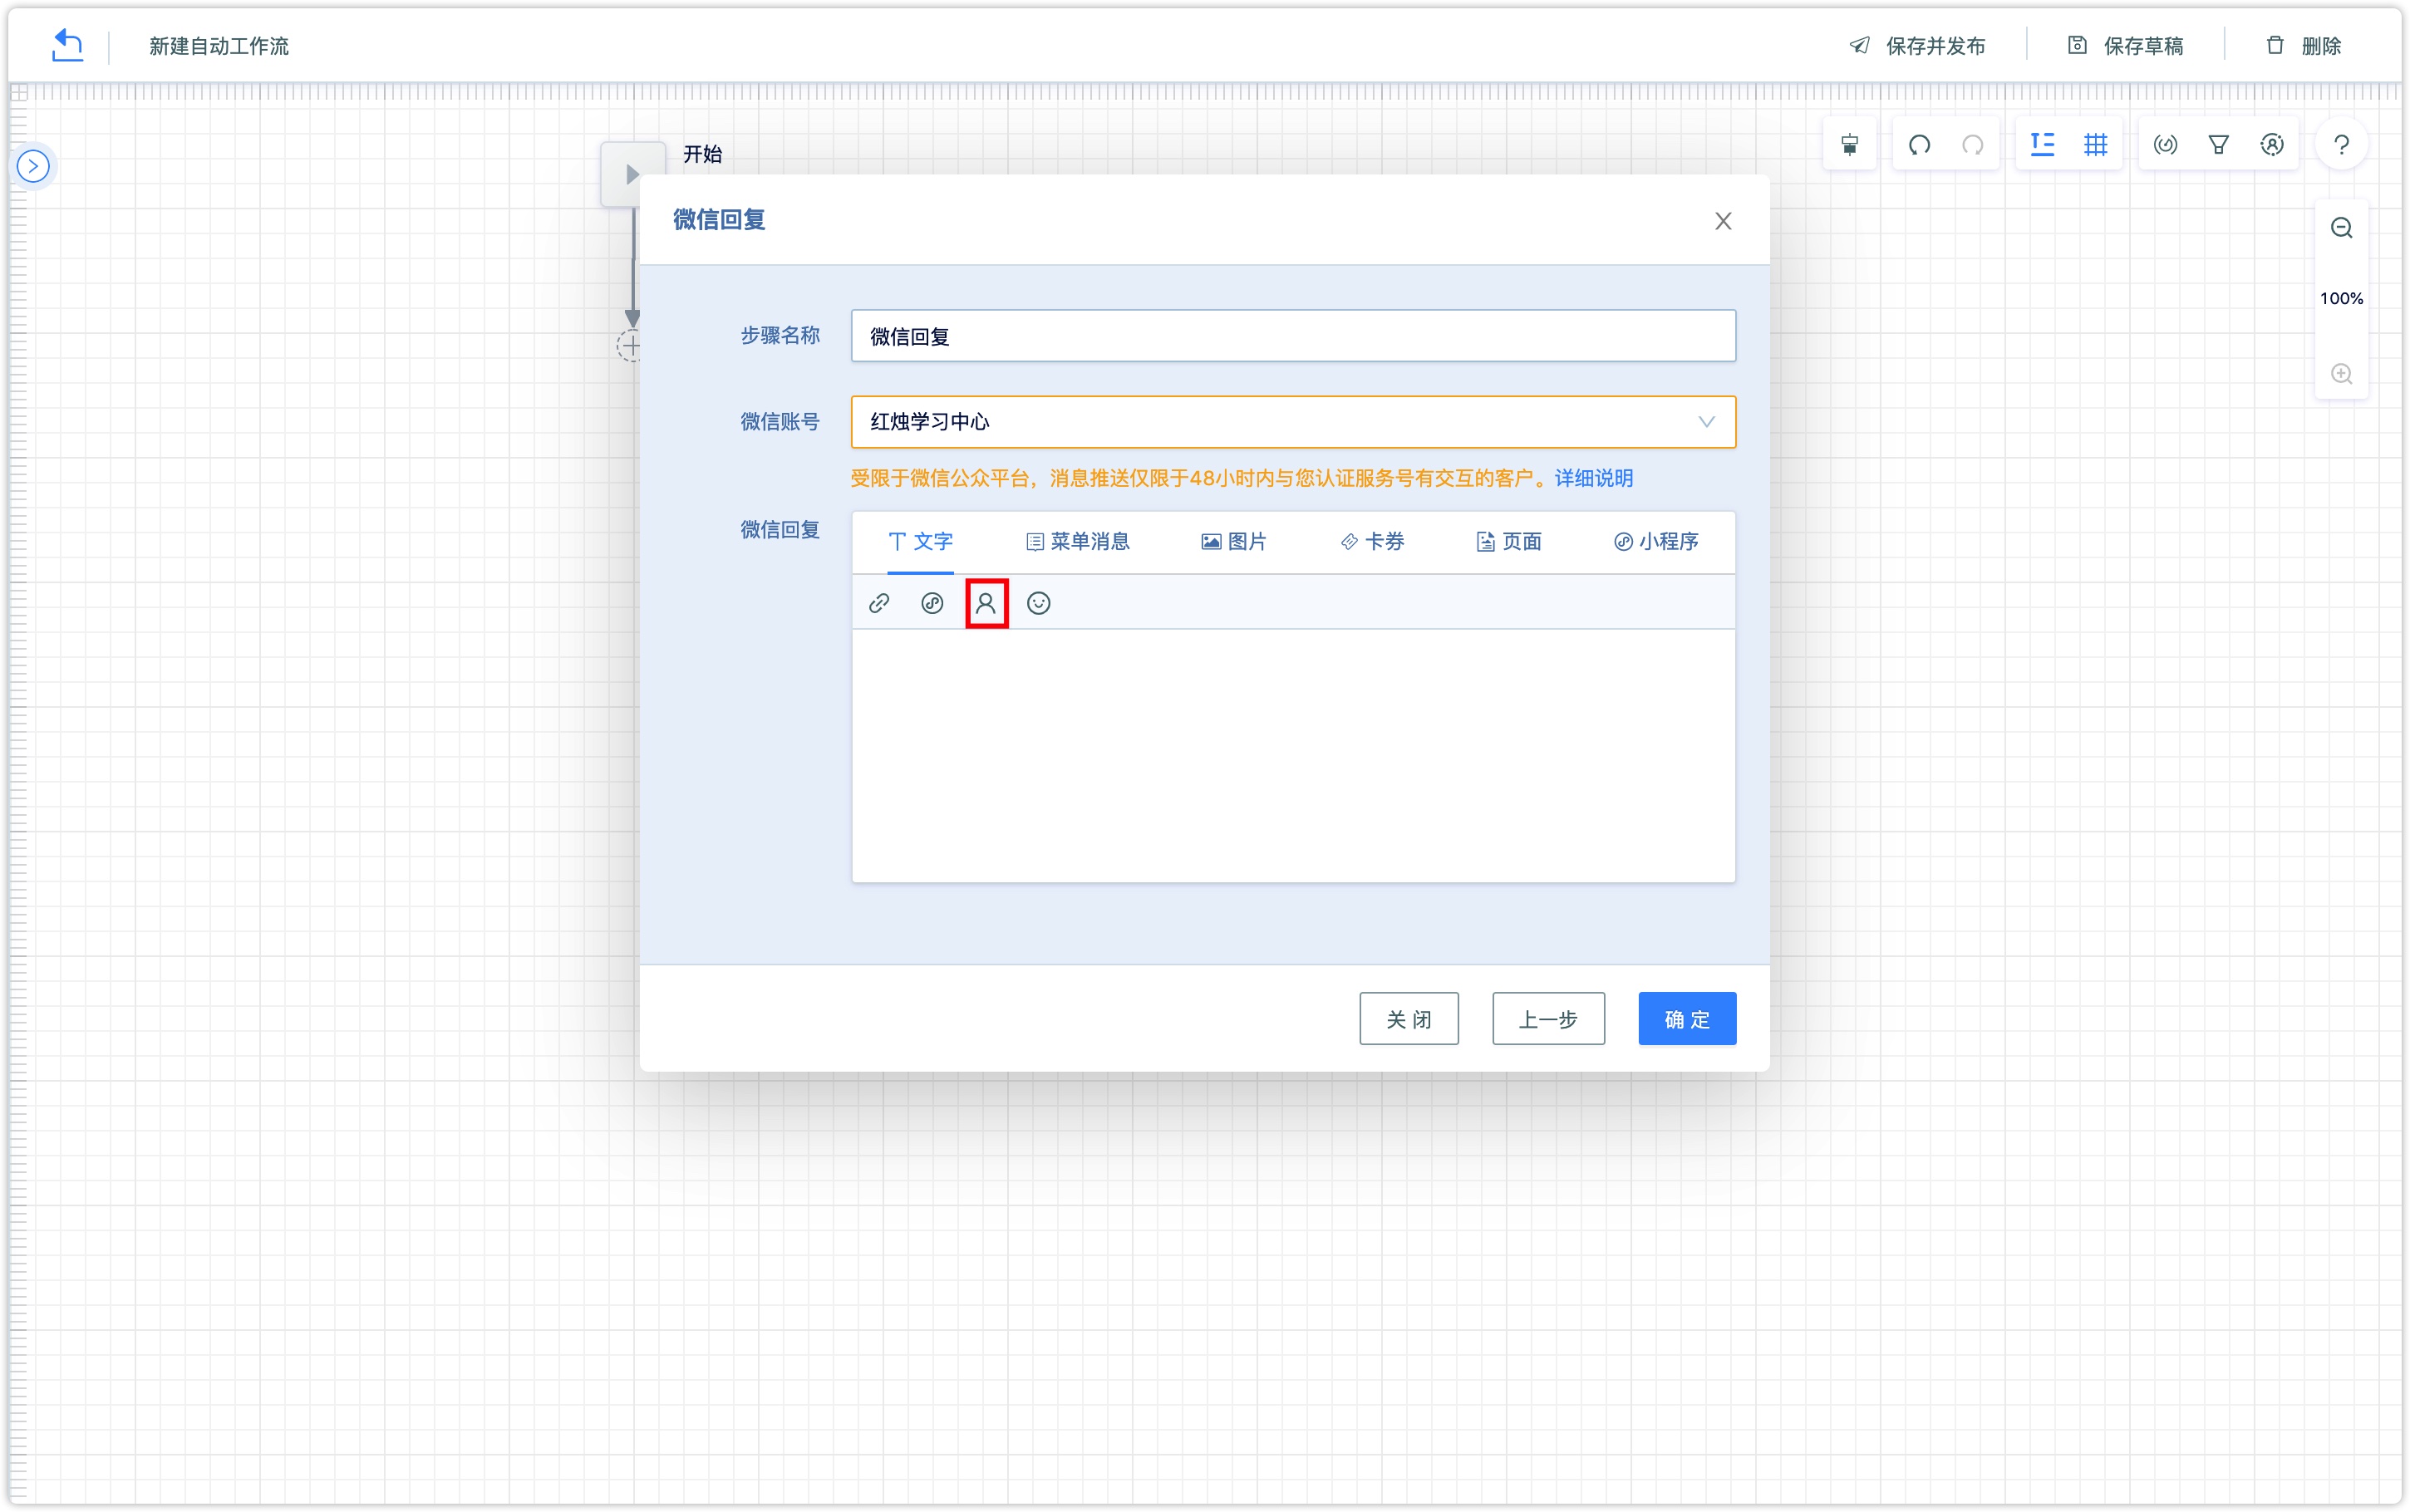

Insert the context attribute, that is, the event attribute. Select the event and the corresponding event attribute, but be aware of the event inserted into the context attribute must be consistent with the trigger condition of the workflow. Select the corresponding event in the selection context node.
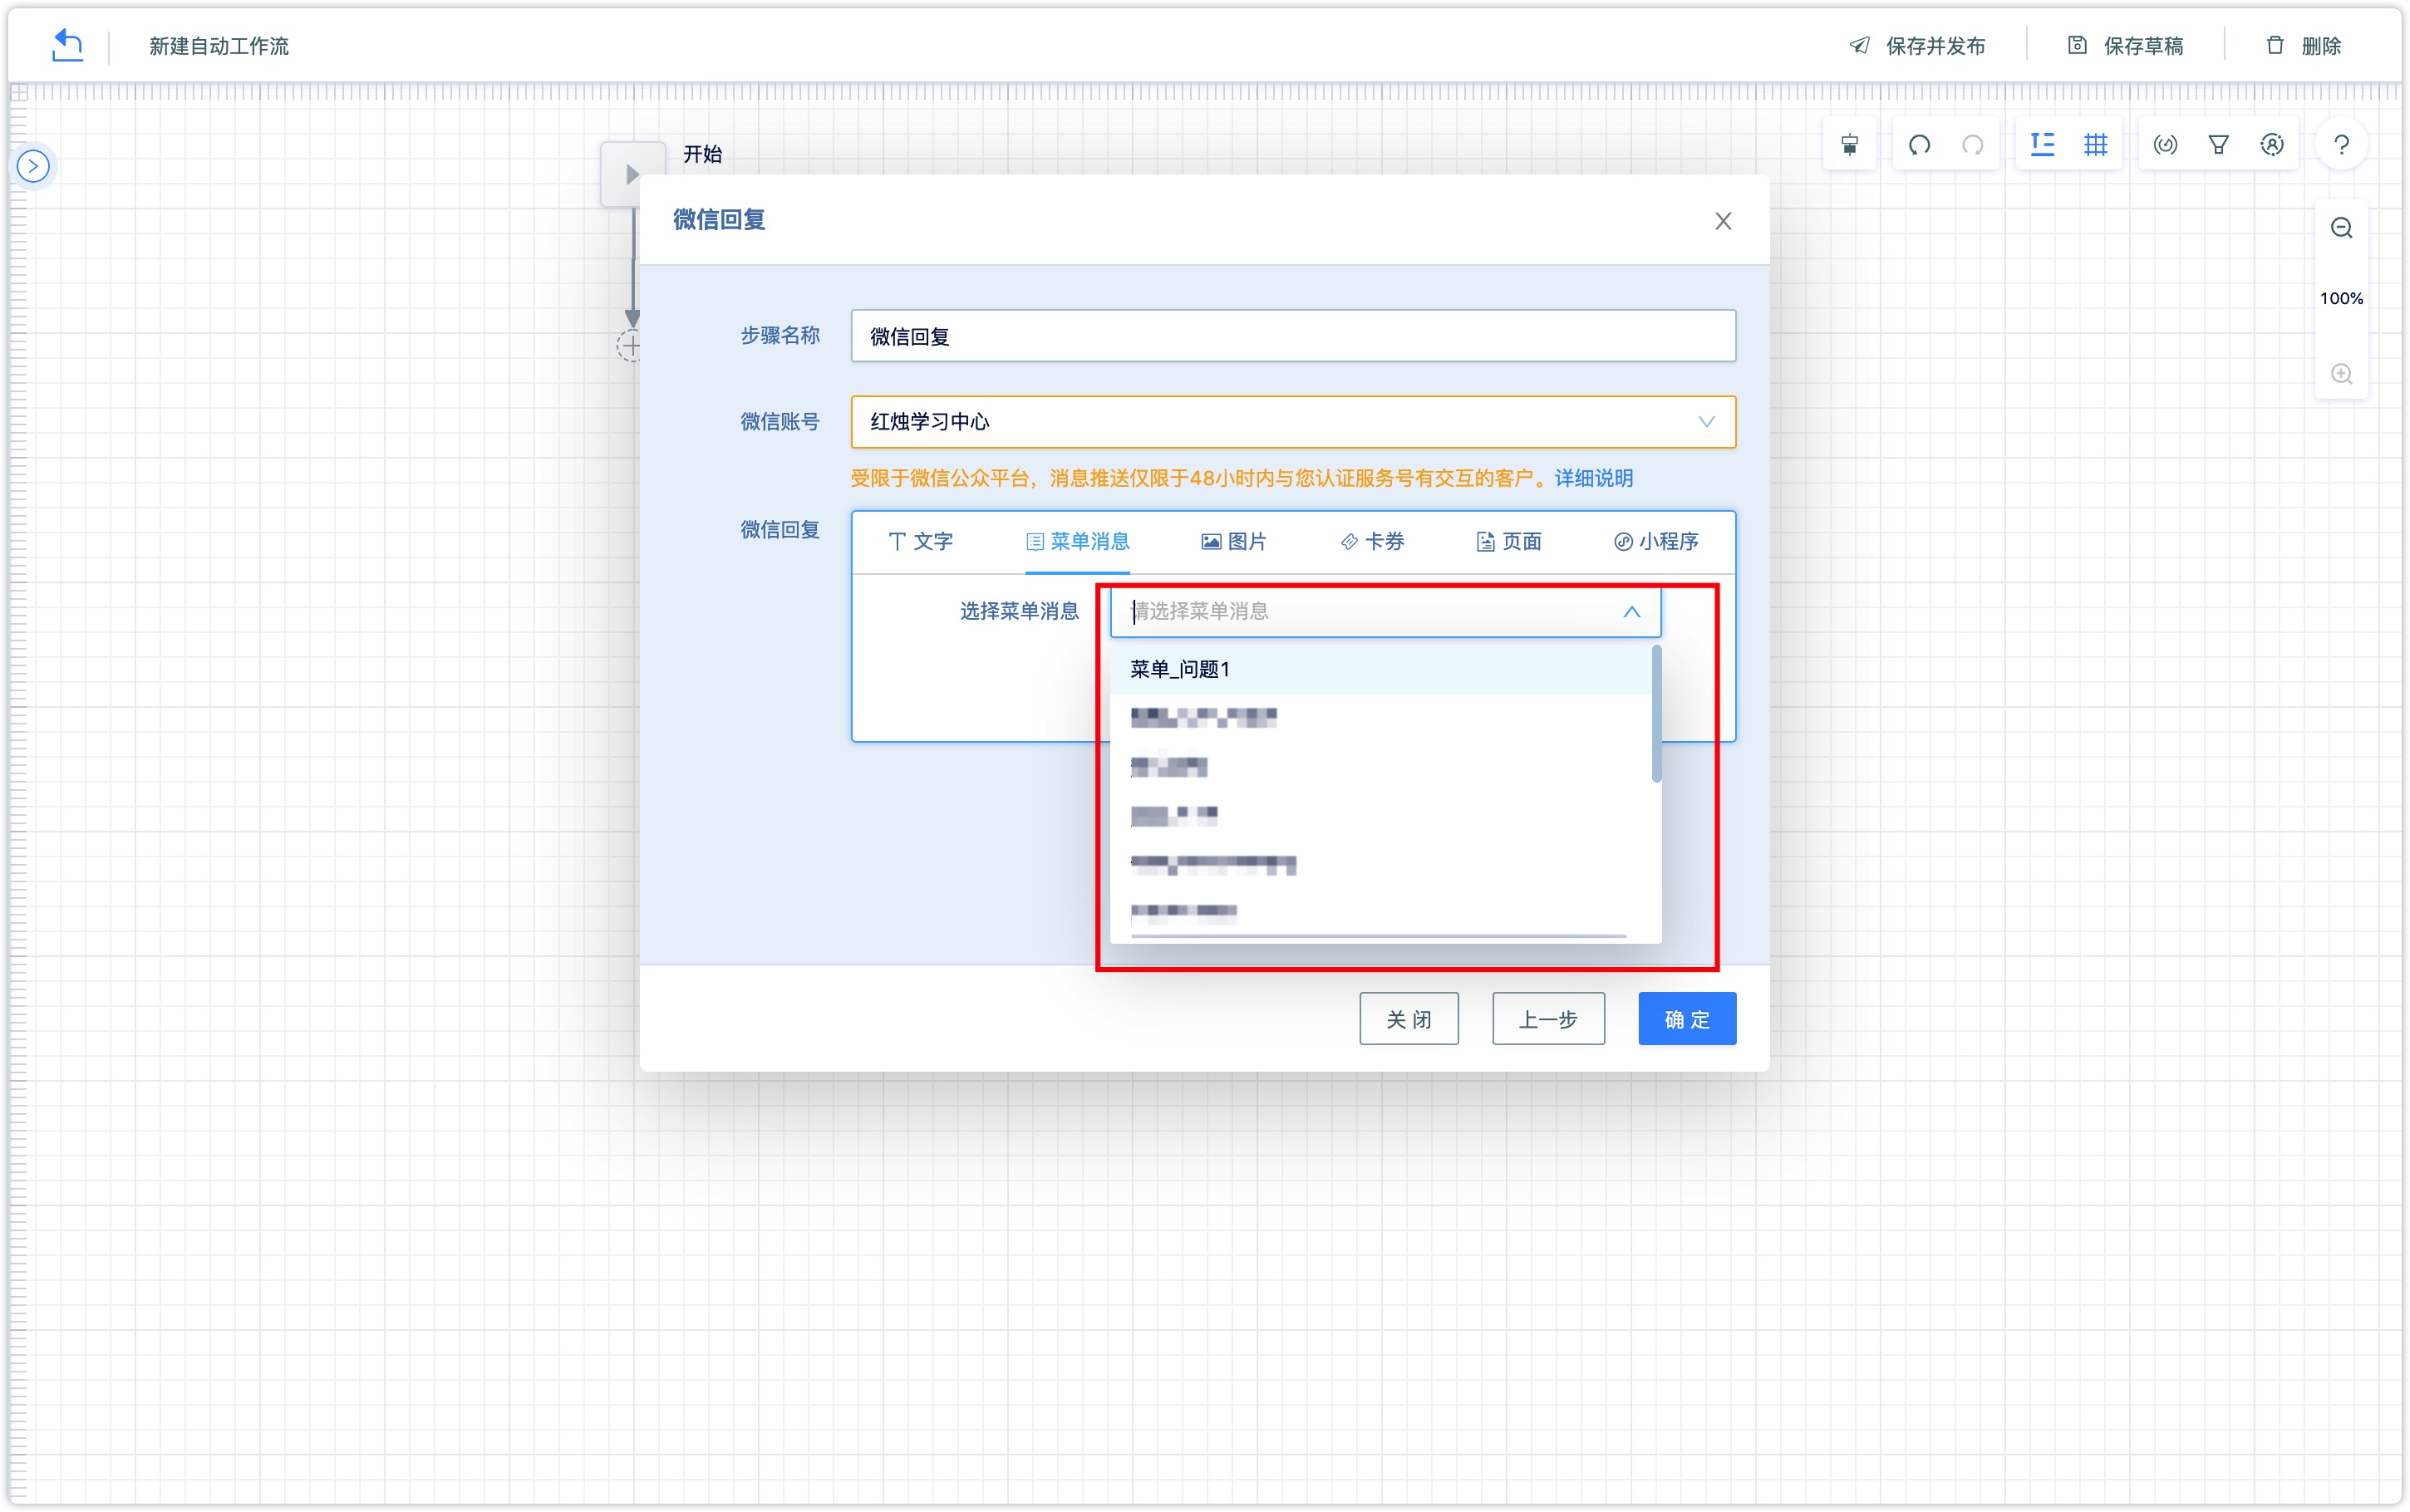
To reply to the menu message, you can select the menu message created in the DM Hub system from the drop-down box.
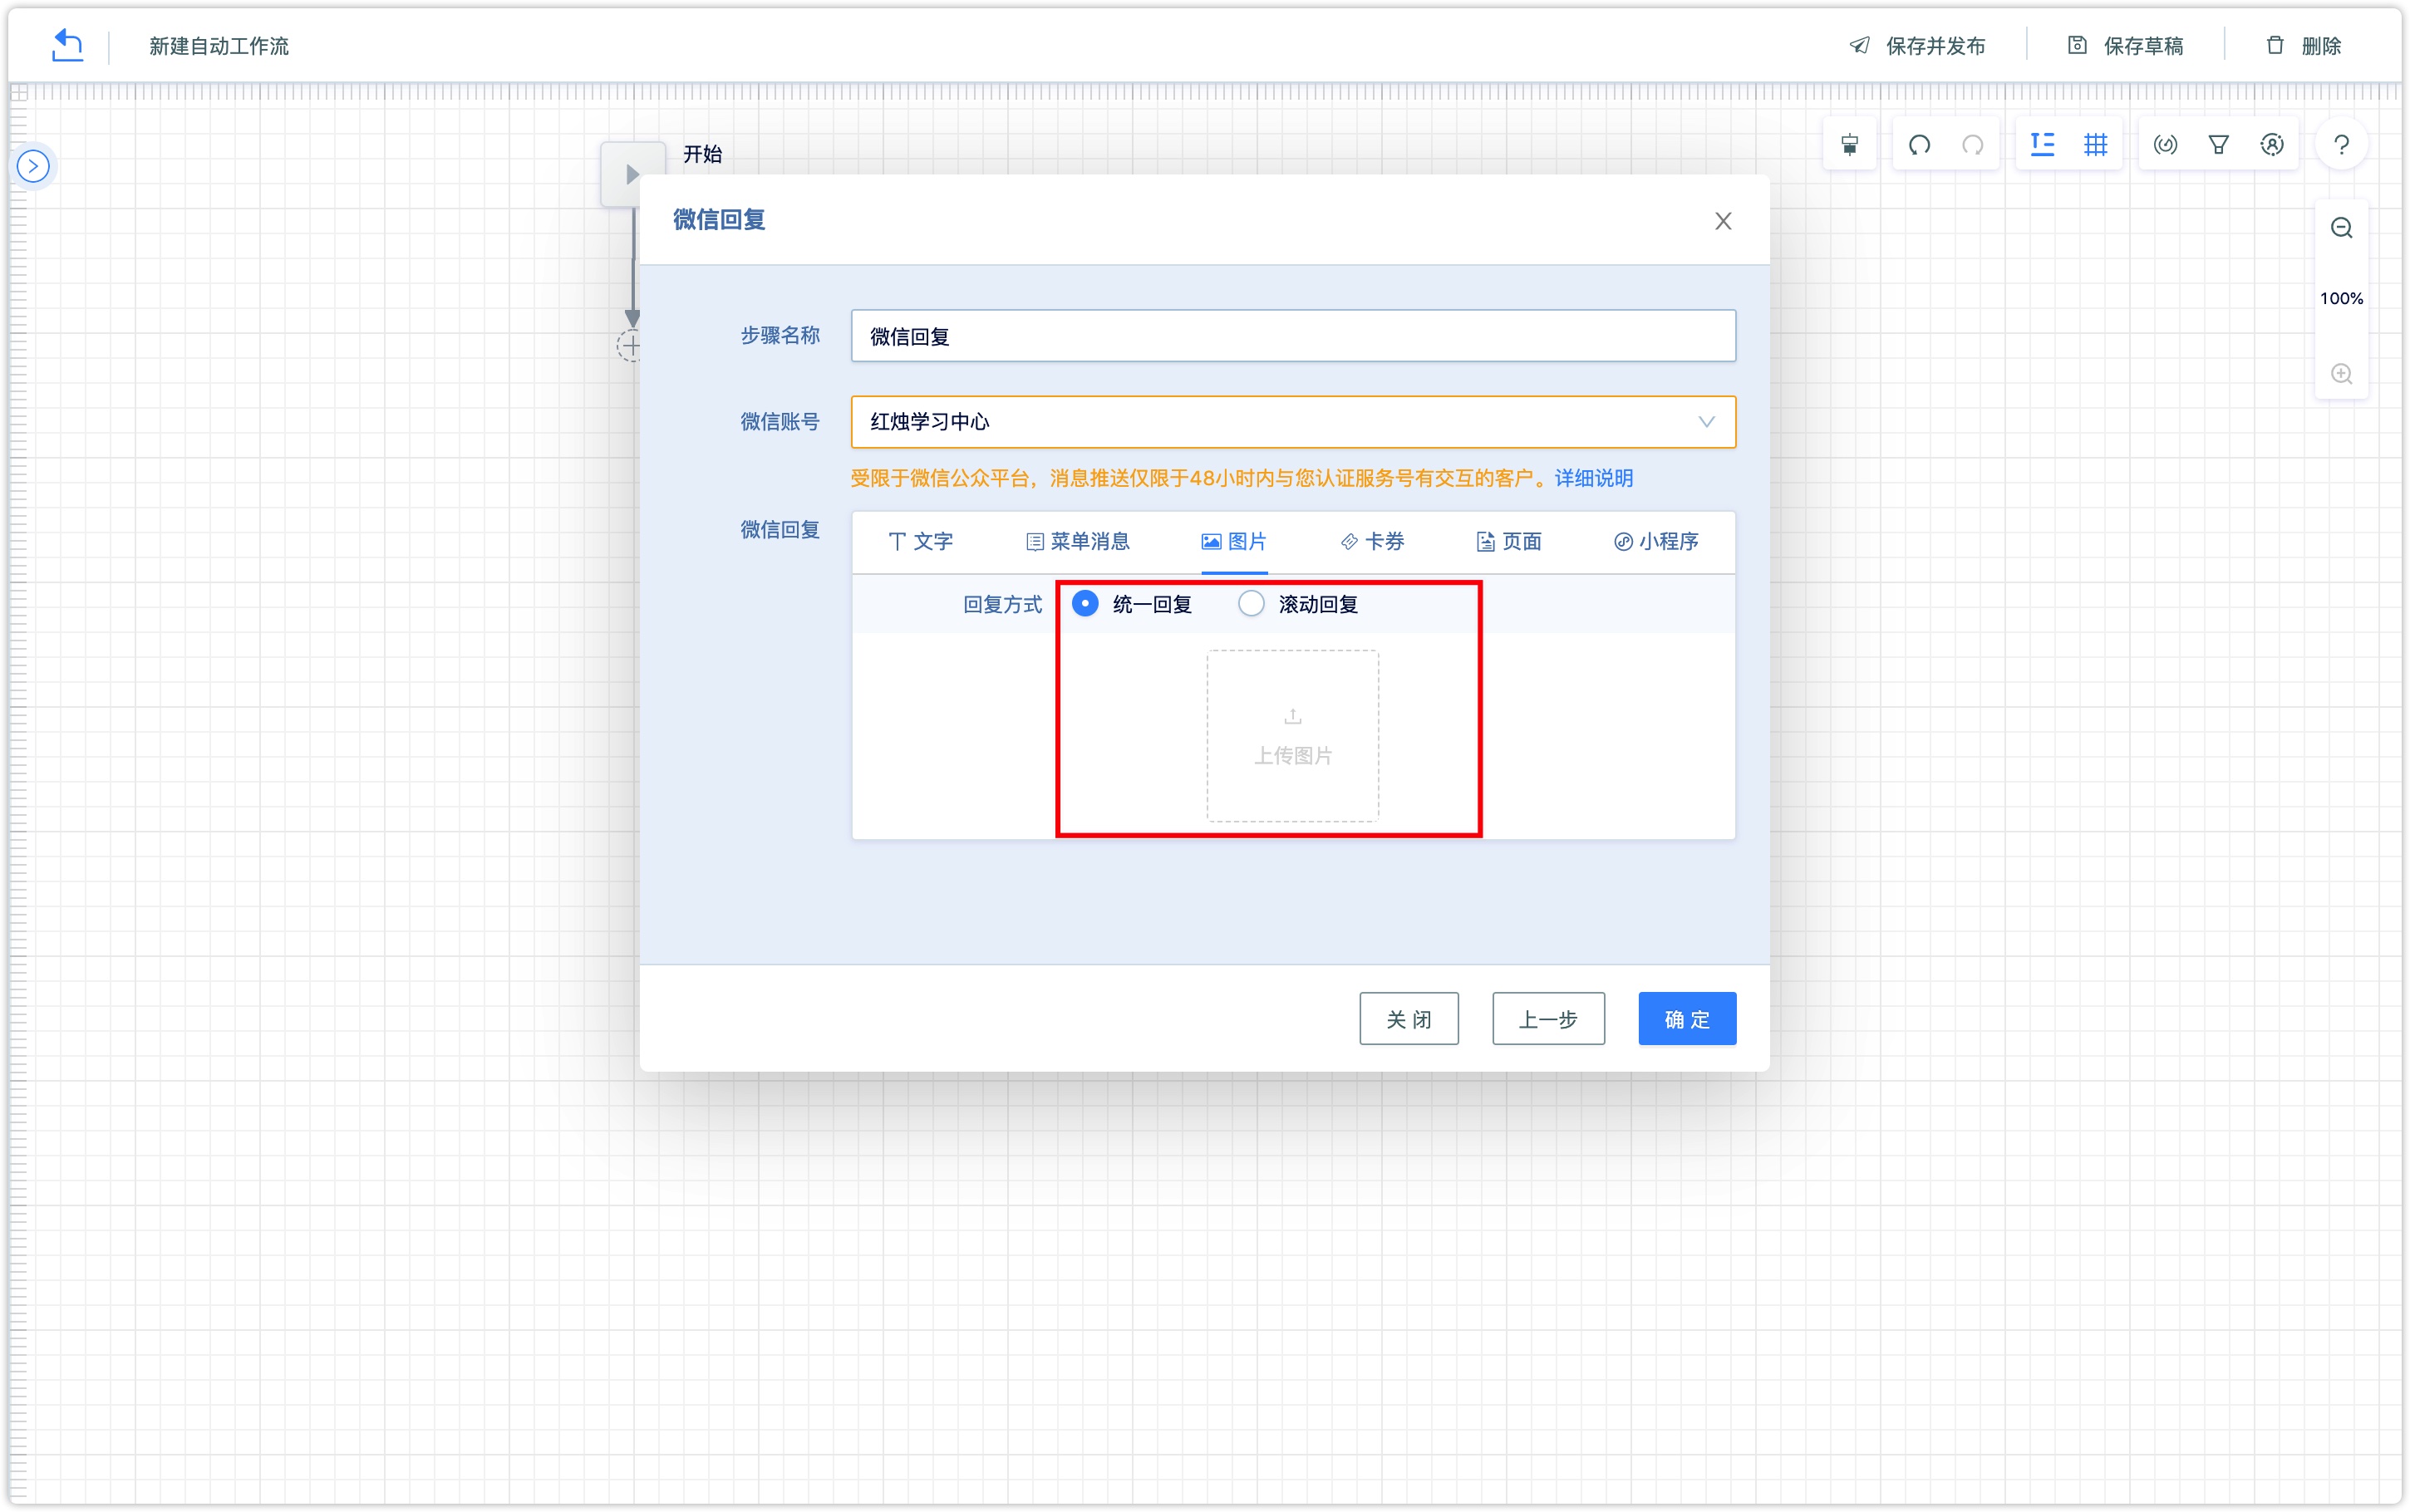
Reply to the pictures, support unified reply, and scrolling reply. Unified reply means that all customers who enter this step will reply to the same picture; rolling reply supports adding multiple pictures as a gallery, when each customer enters this step, the system selects a picture from the gallery to reply automatically, to ensure that these pictures are replied to different customers with the same probability.
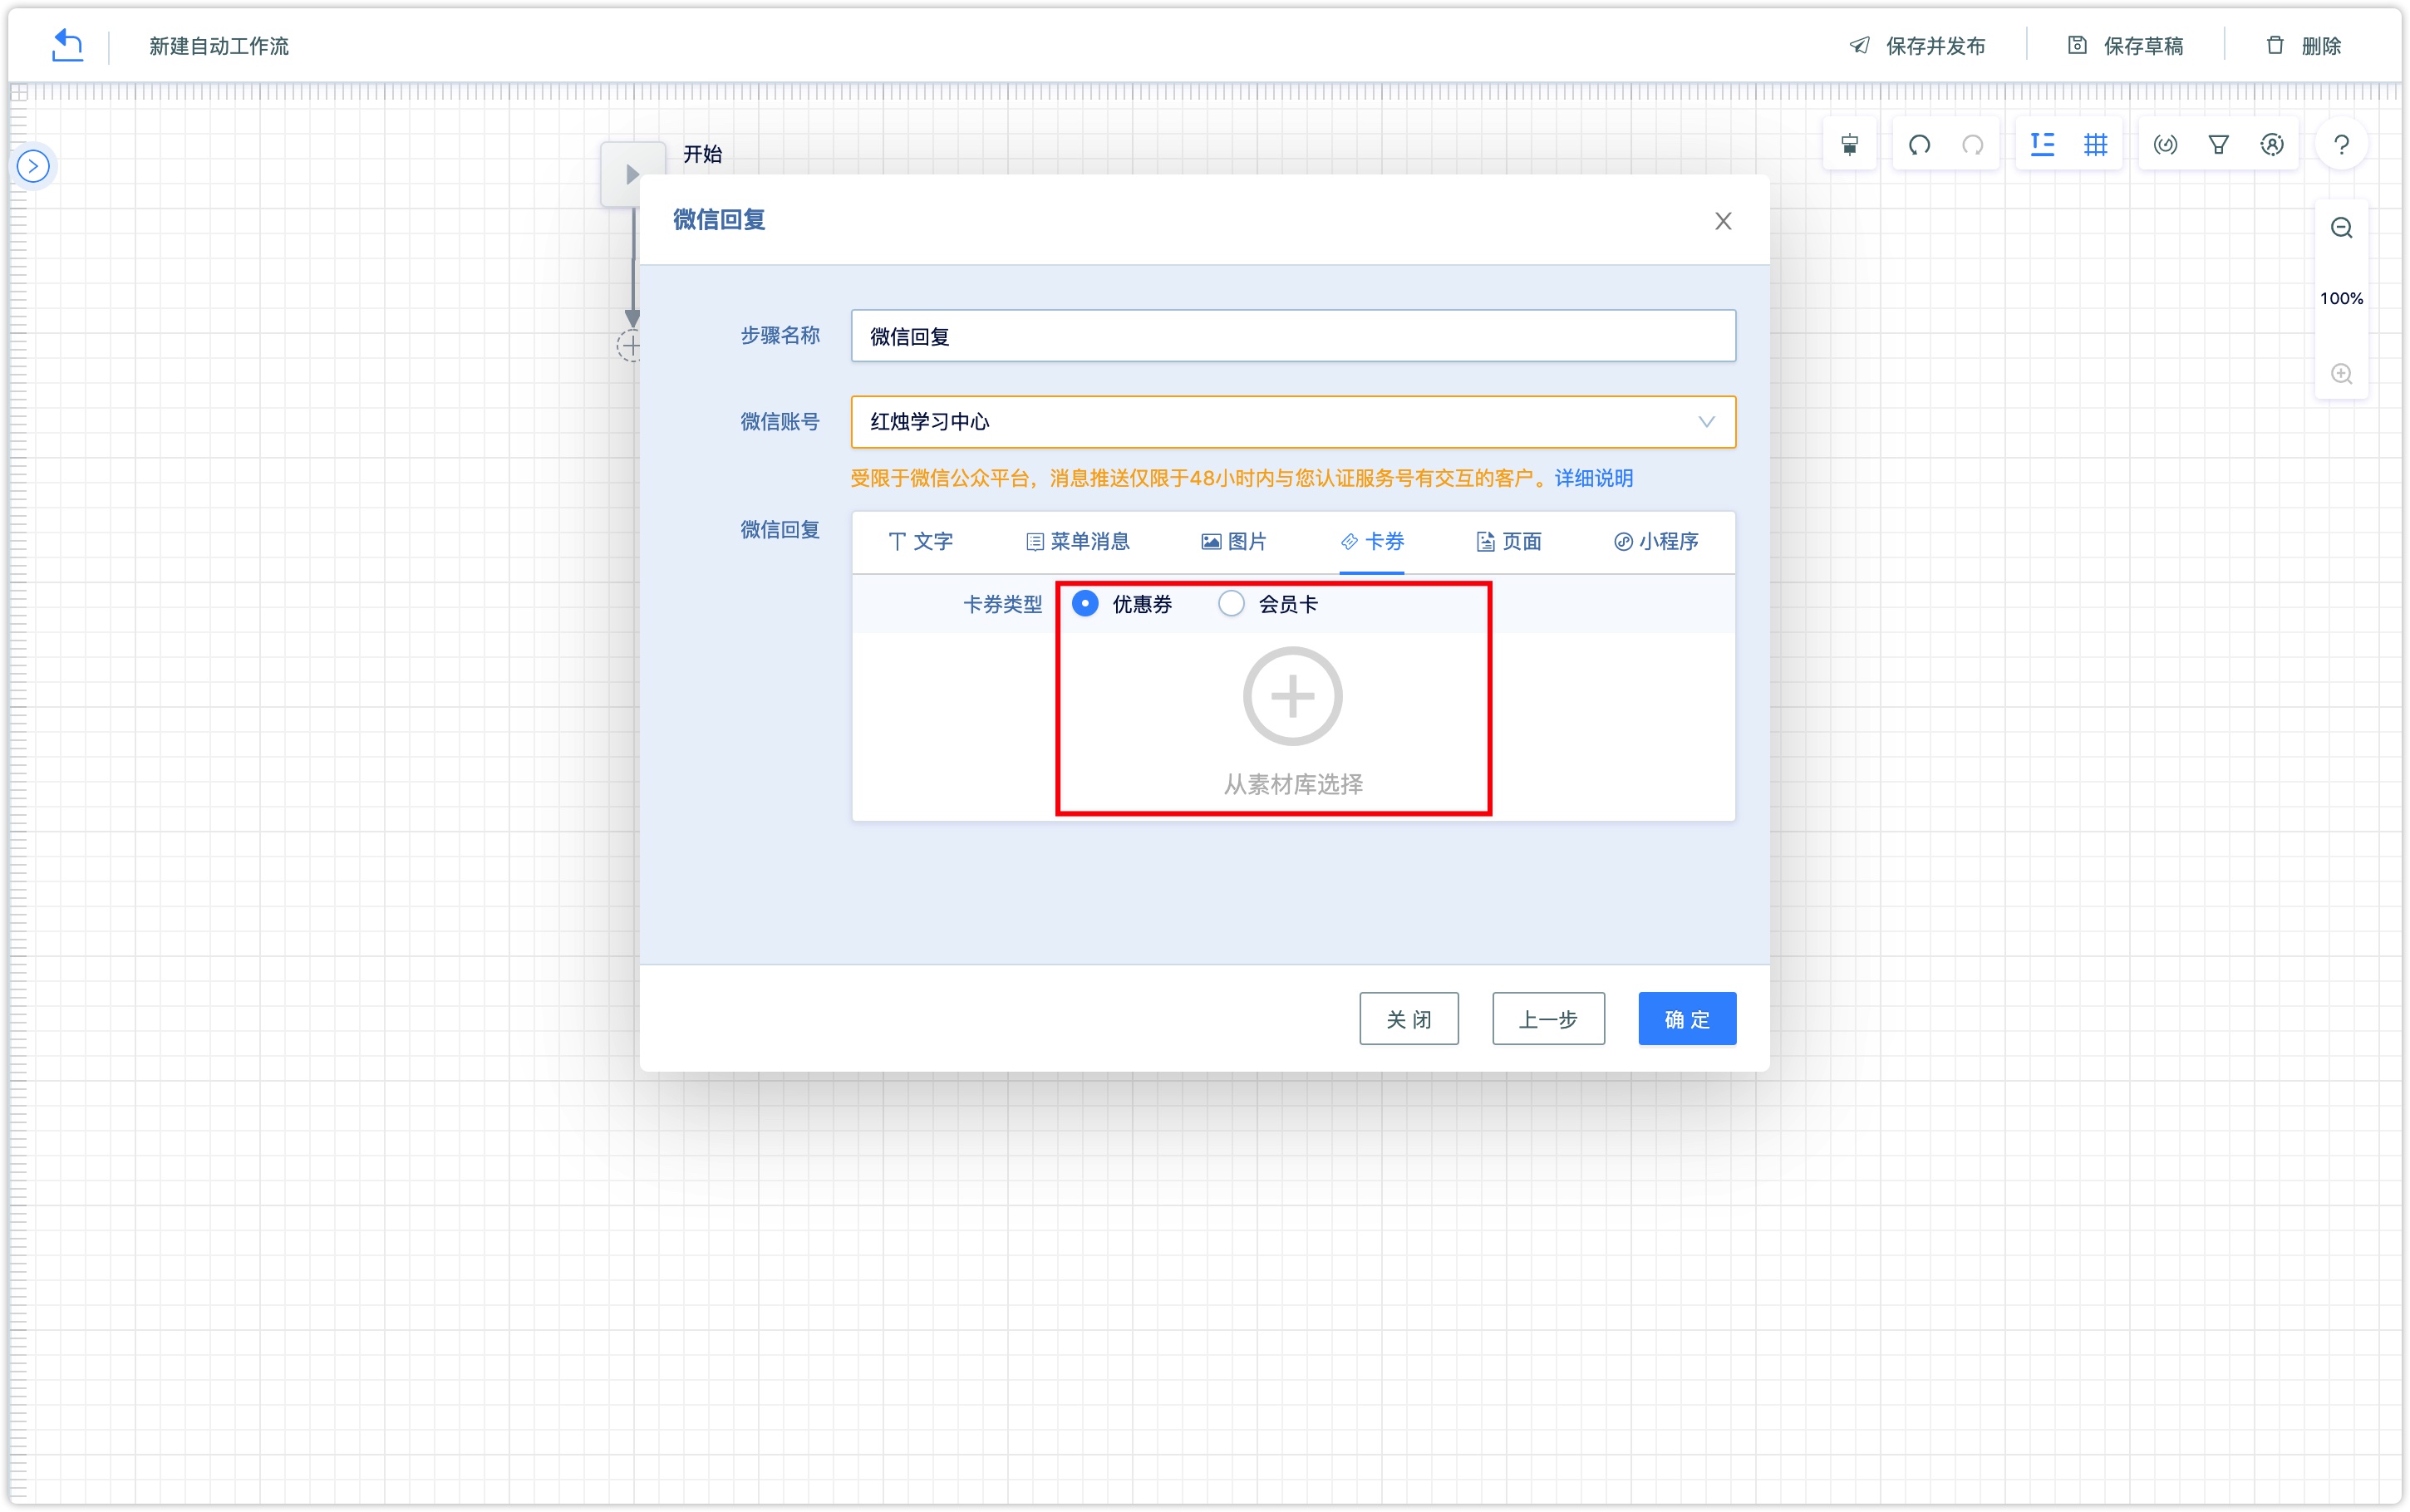
To reply to the coupons, you can select the WeChat coupons and membership cards that have been synchronized or created in the DM Hub system from the drop-down box.
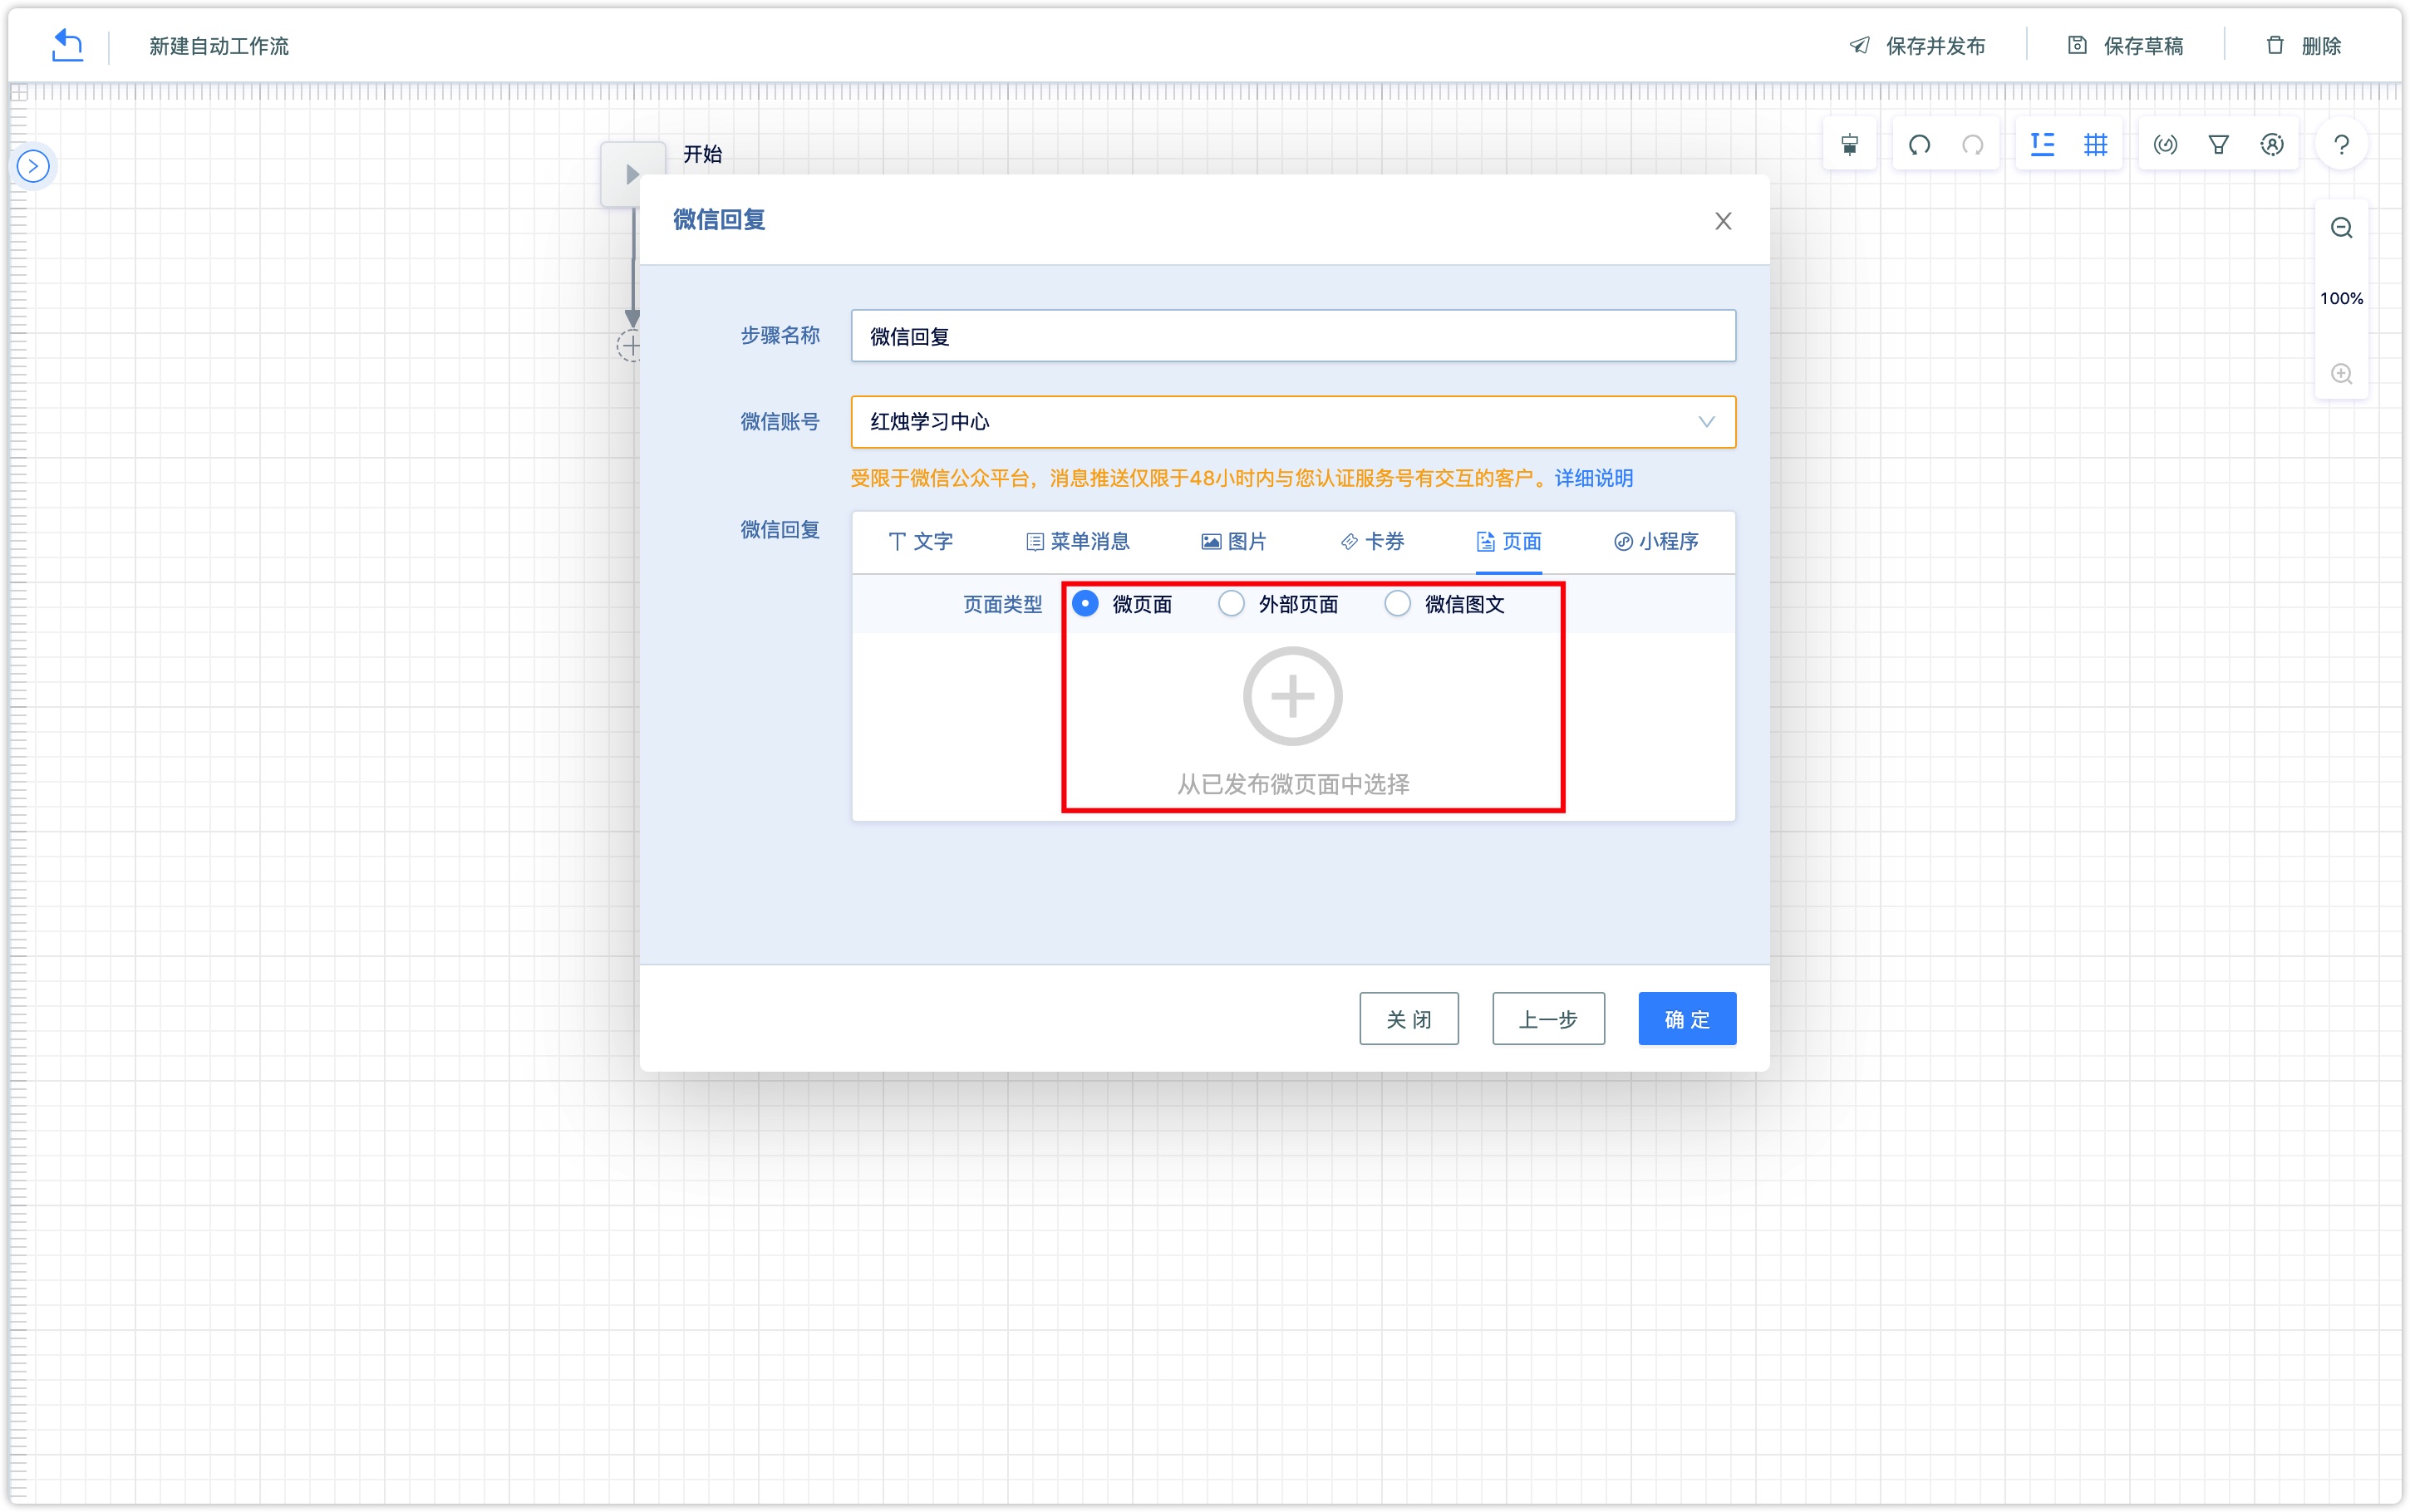
Reply to the page, you can select WeChat-page, external page, and WeChat article. WeChat-pages are available for WeChat-pages that have been released successfully; WeChat articles are optional for synchronizing articles from WeChat background to DM Hub.
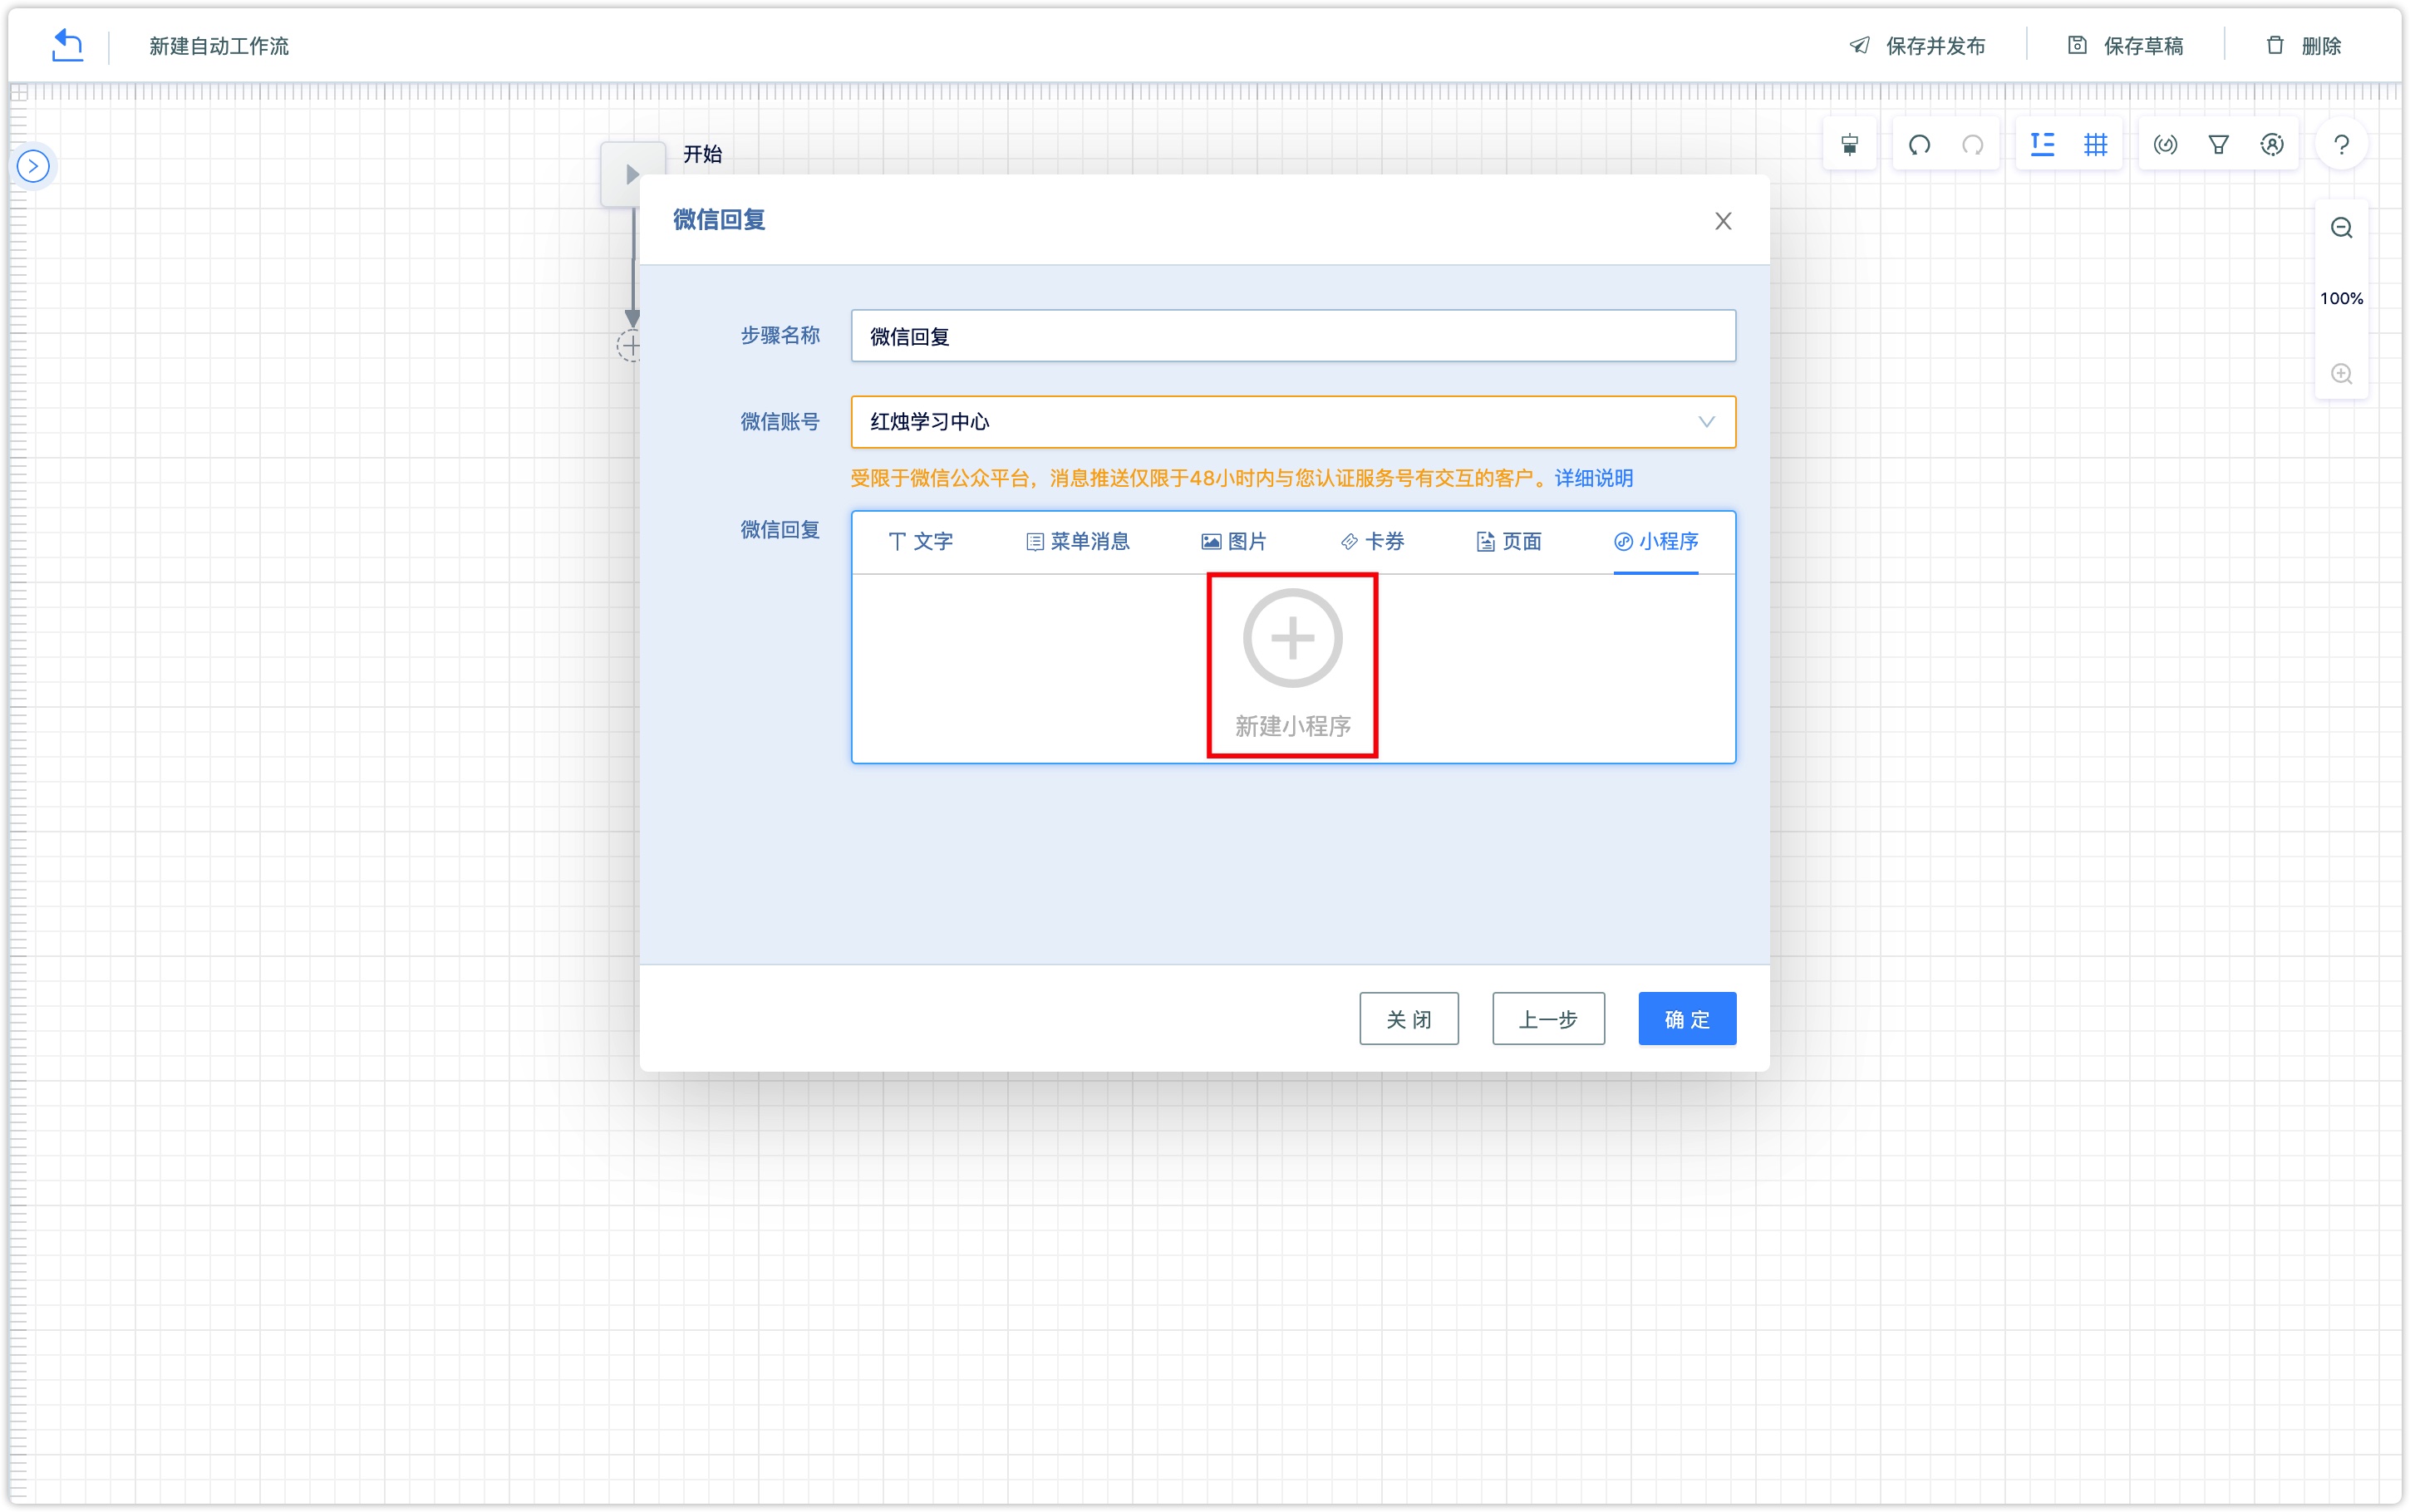
To reply to the Mini Program, you can choose the associated Mini Programs in DM Hub. See 《Bind WeChat Mini Programs》 / hc/docs/guide/wechat_mini_program, select the corresponding Mini Program, then add Mini Program path, title, and cover.
Other marketing reach ways are similar to Wechat replies, which can be used as a reference.
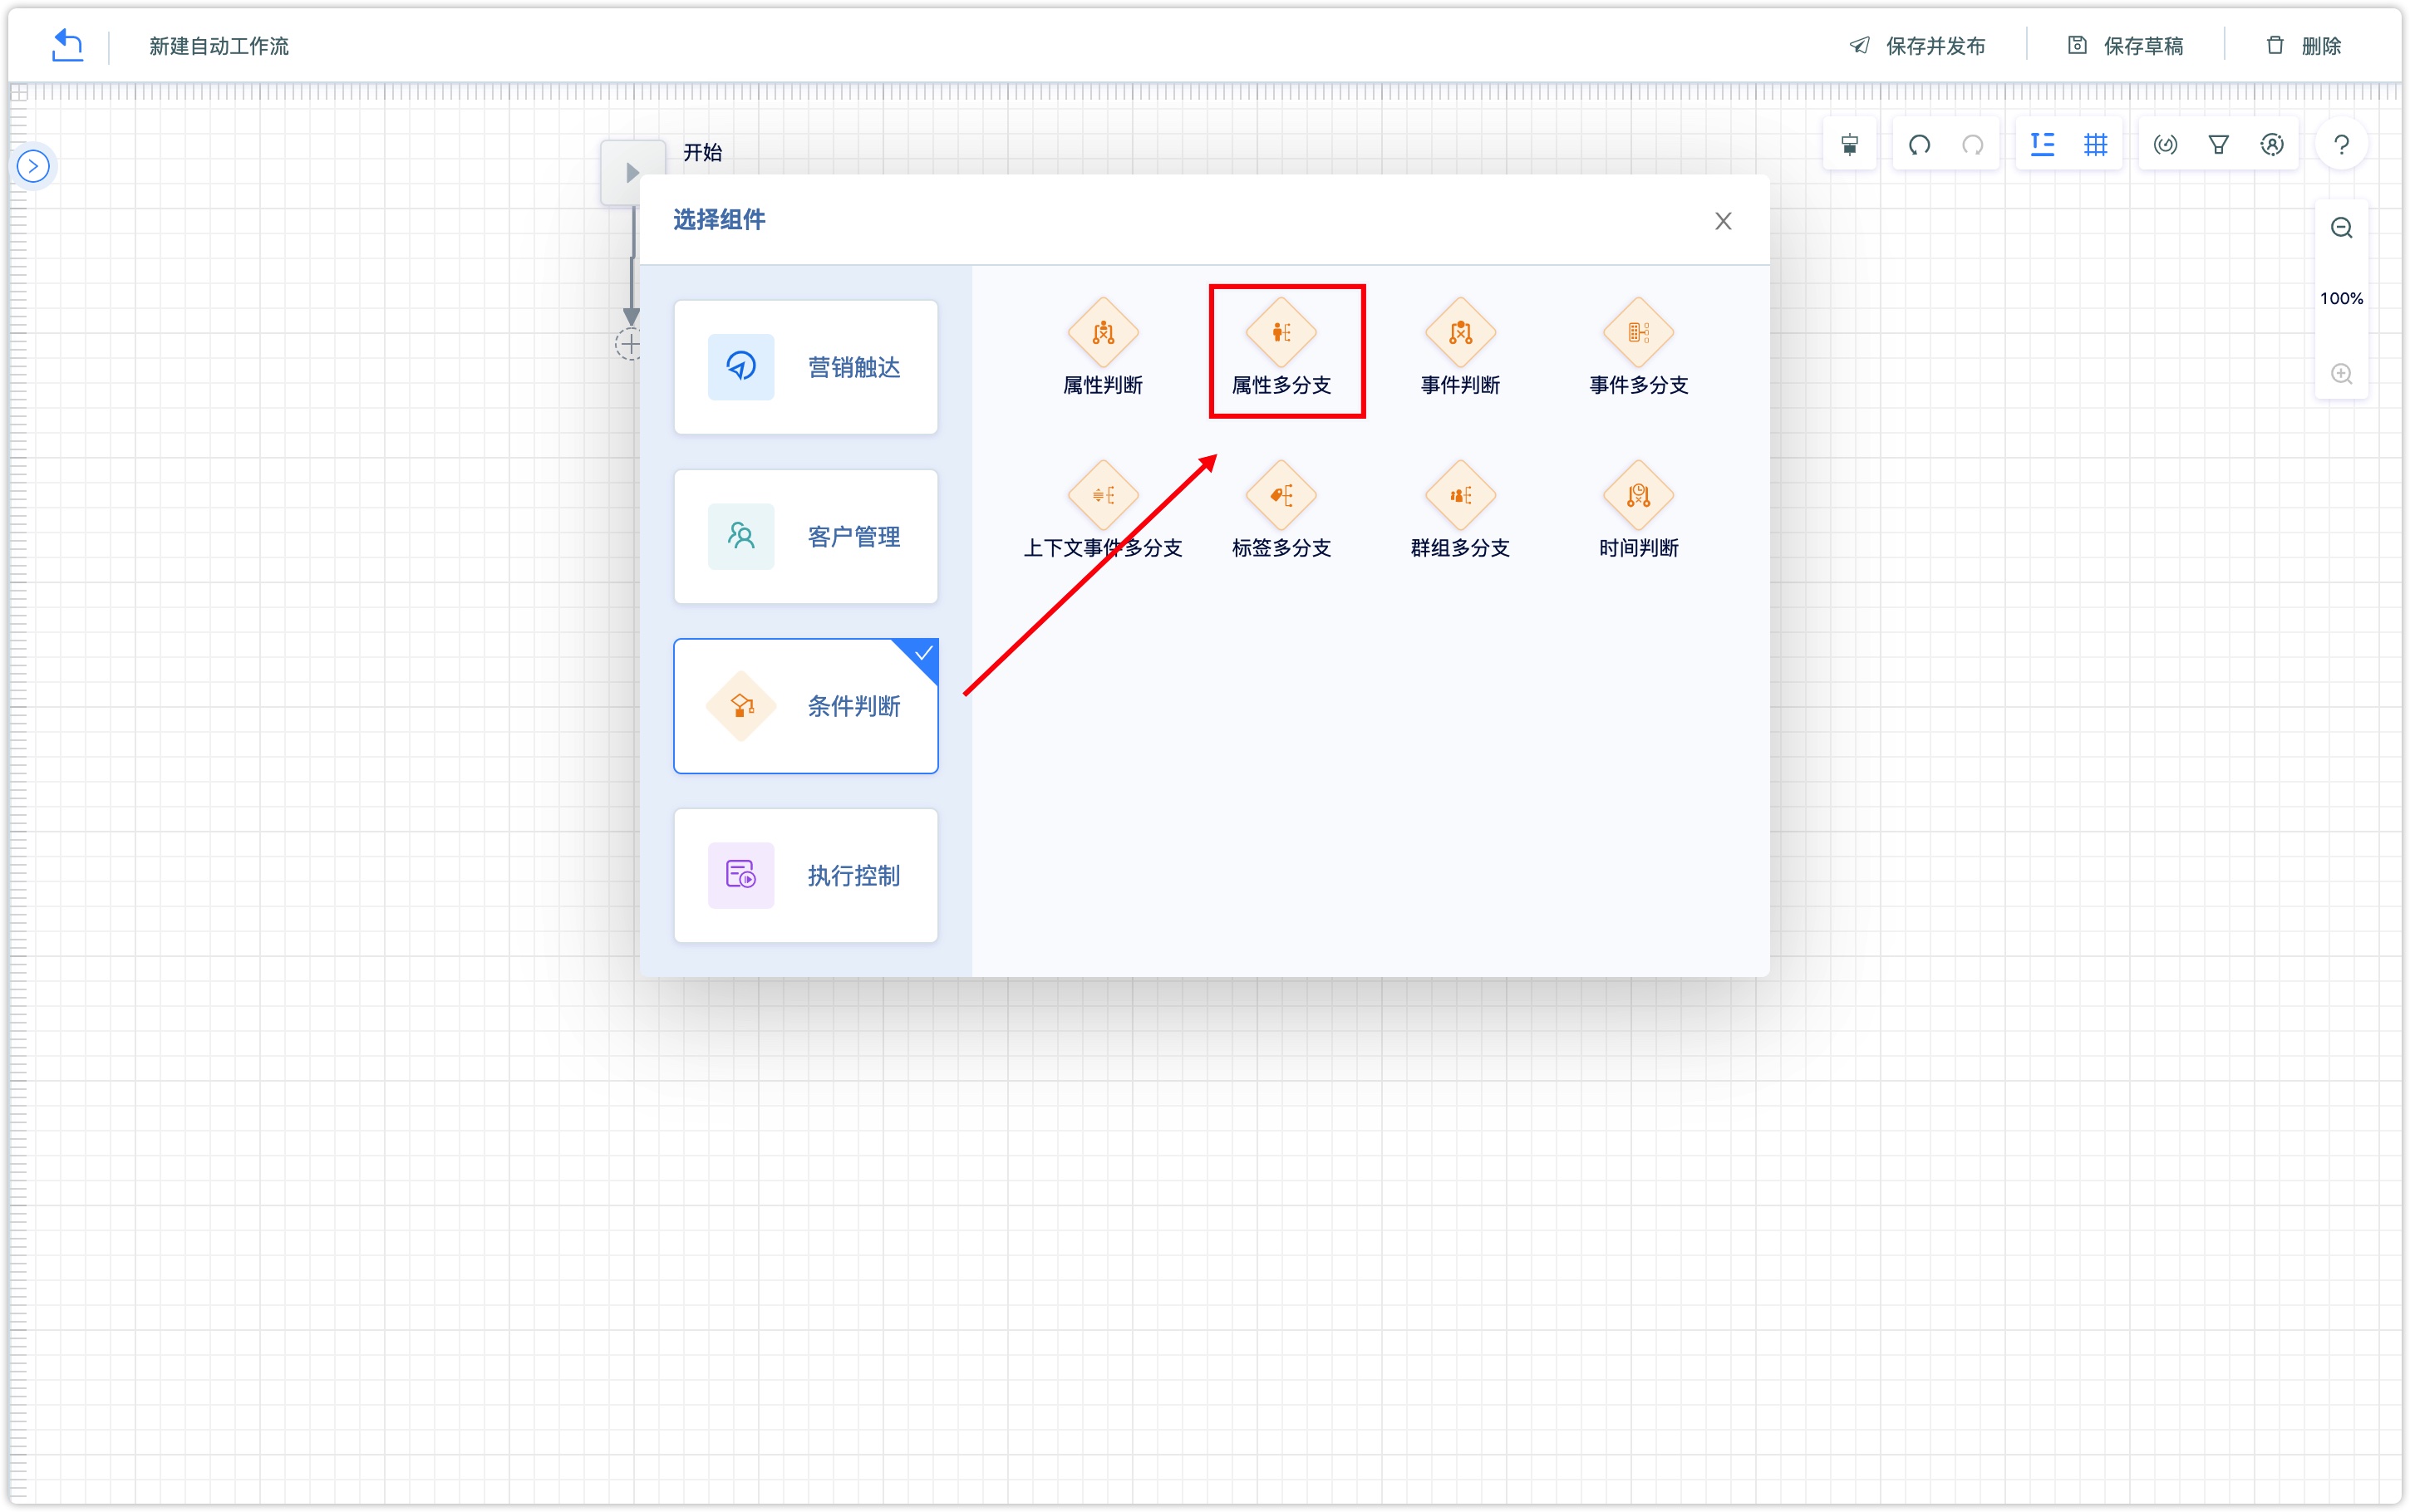
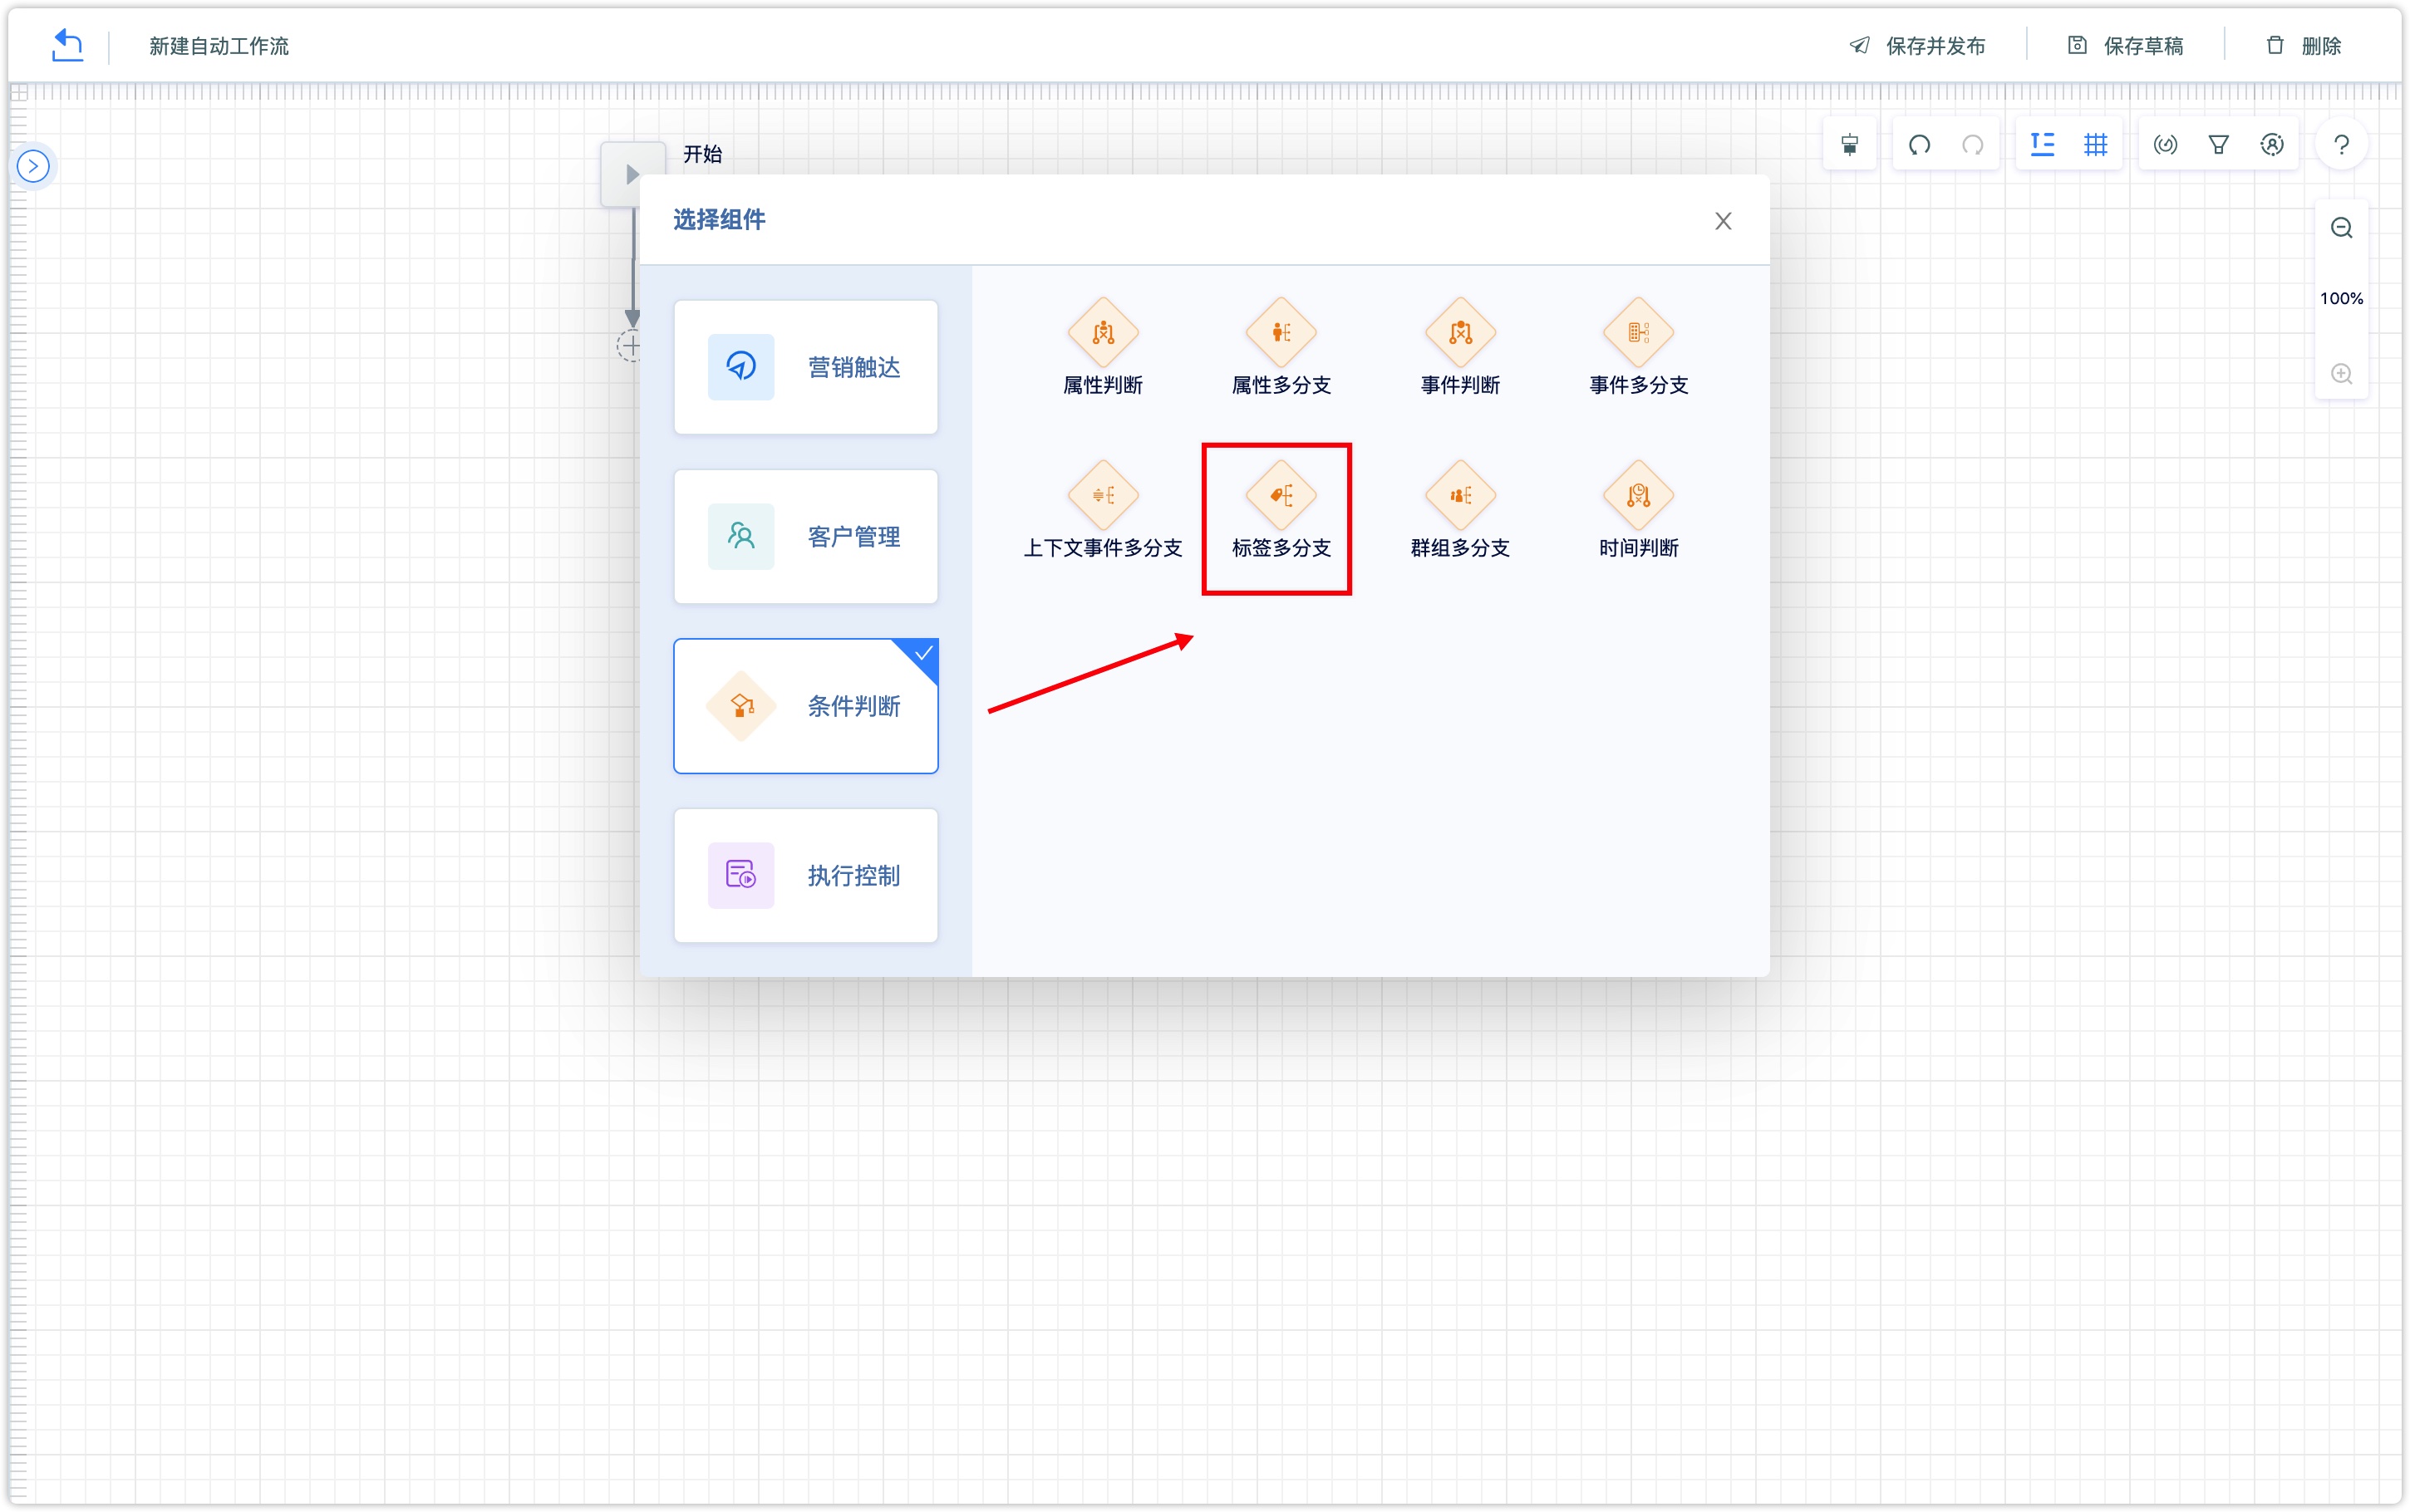
2.3.2 Condition Judgment
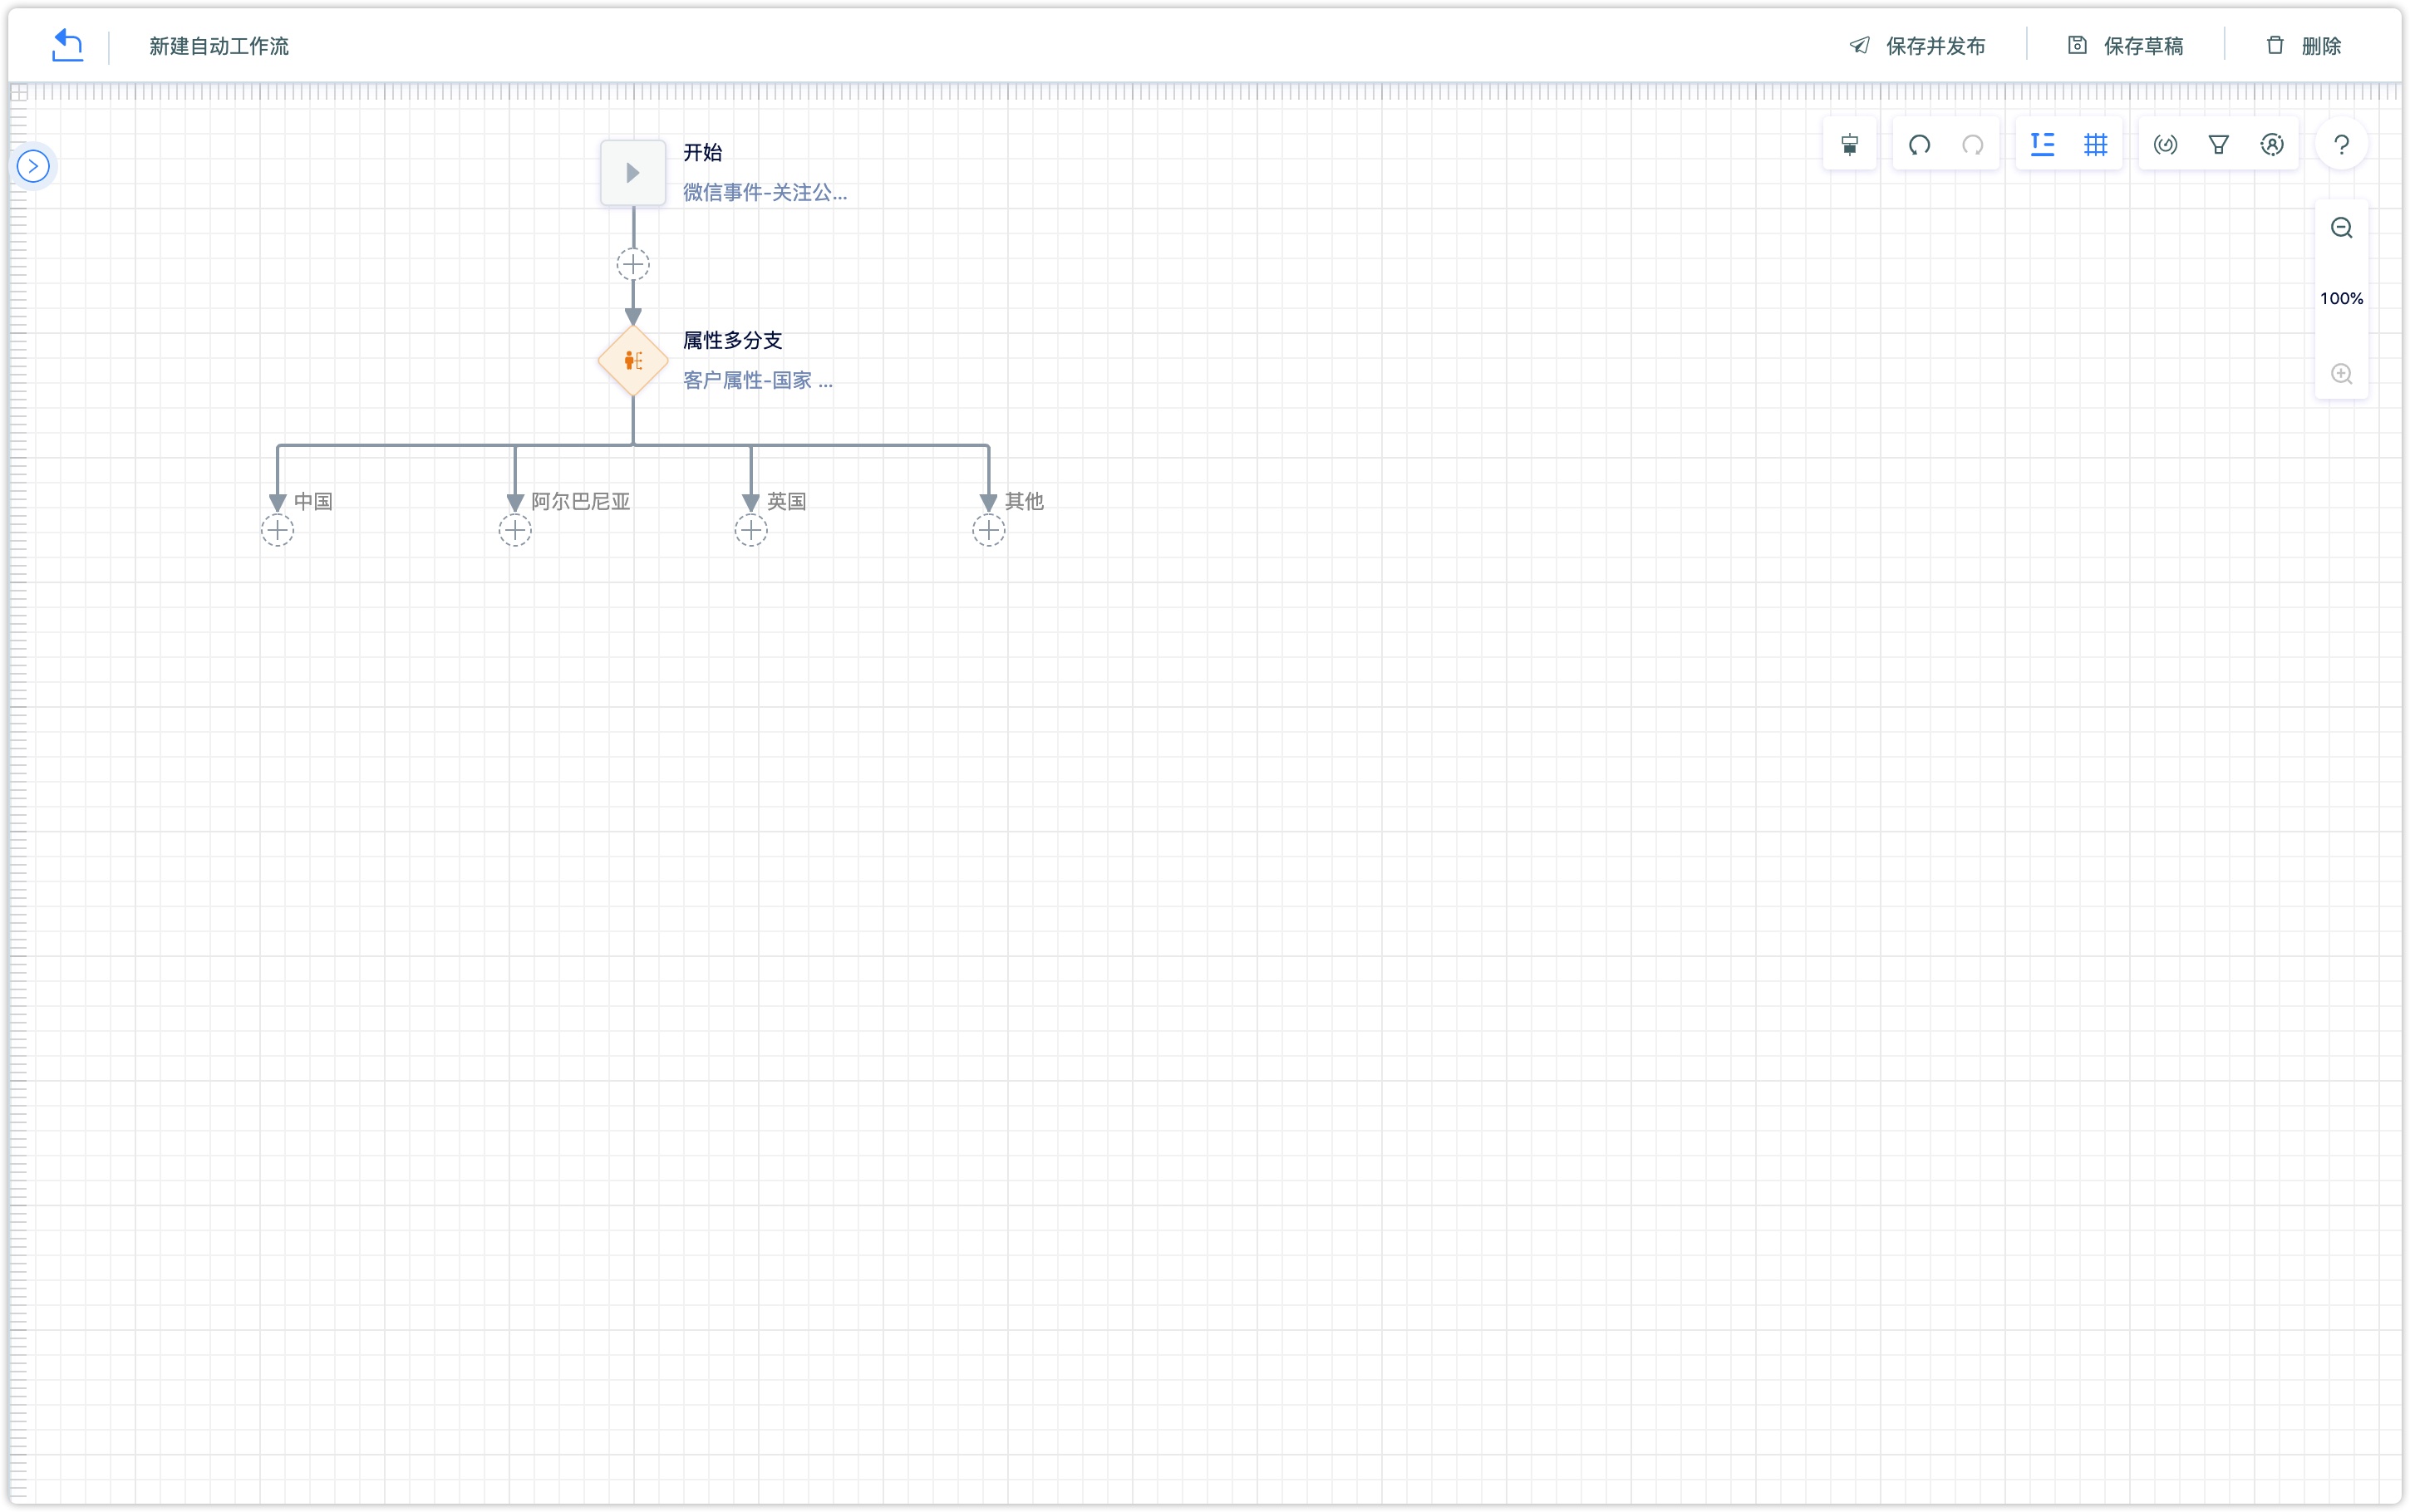
Judge the conditions of customers who enter the process. Take 【Attribute multi-branch】 and 【Label multi-branch】 as examples: Attribute multi-branch That is the judgment of one attribute and multiple different values.
After adding the attribute multi-branch component, click on Branch 1 to set the attribute judgment condition.
Take the country attribute of customer attribute as an example, Branch 1 country is equal to China, Branch 2 country is equal to Albania, Branch 3 country is equal to the United Kingdom.
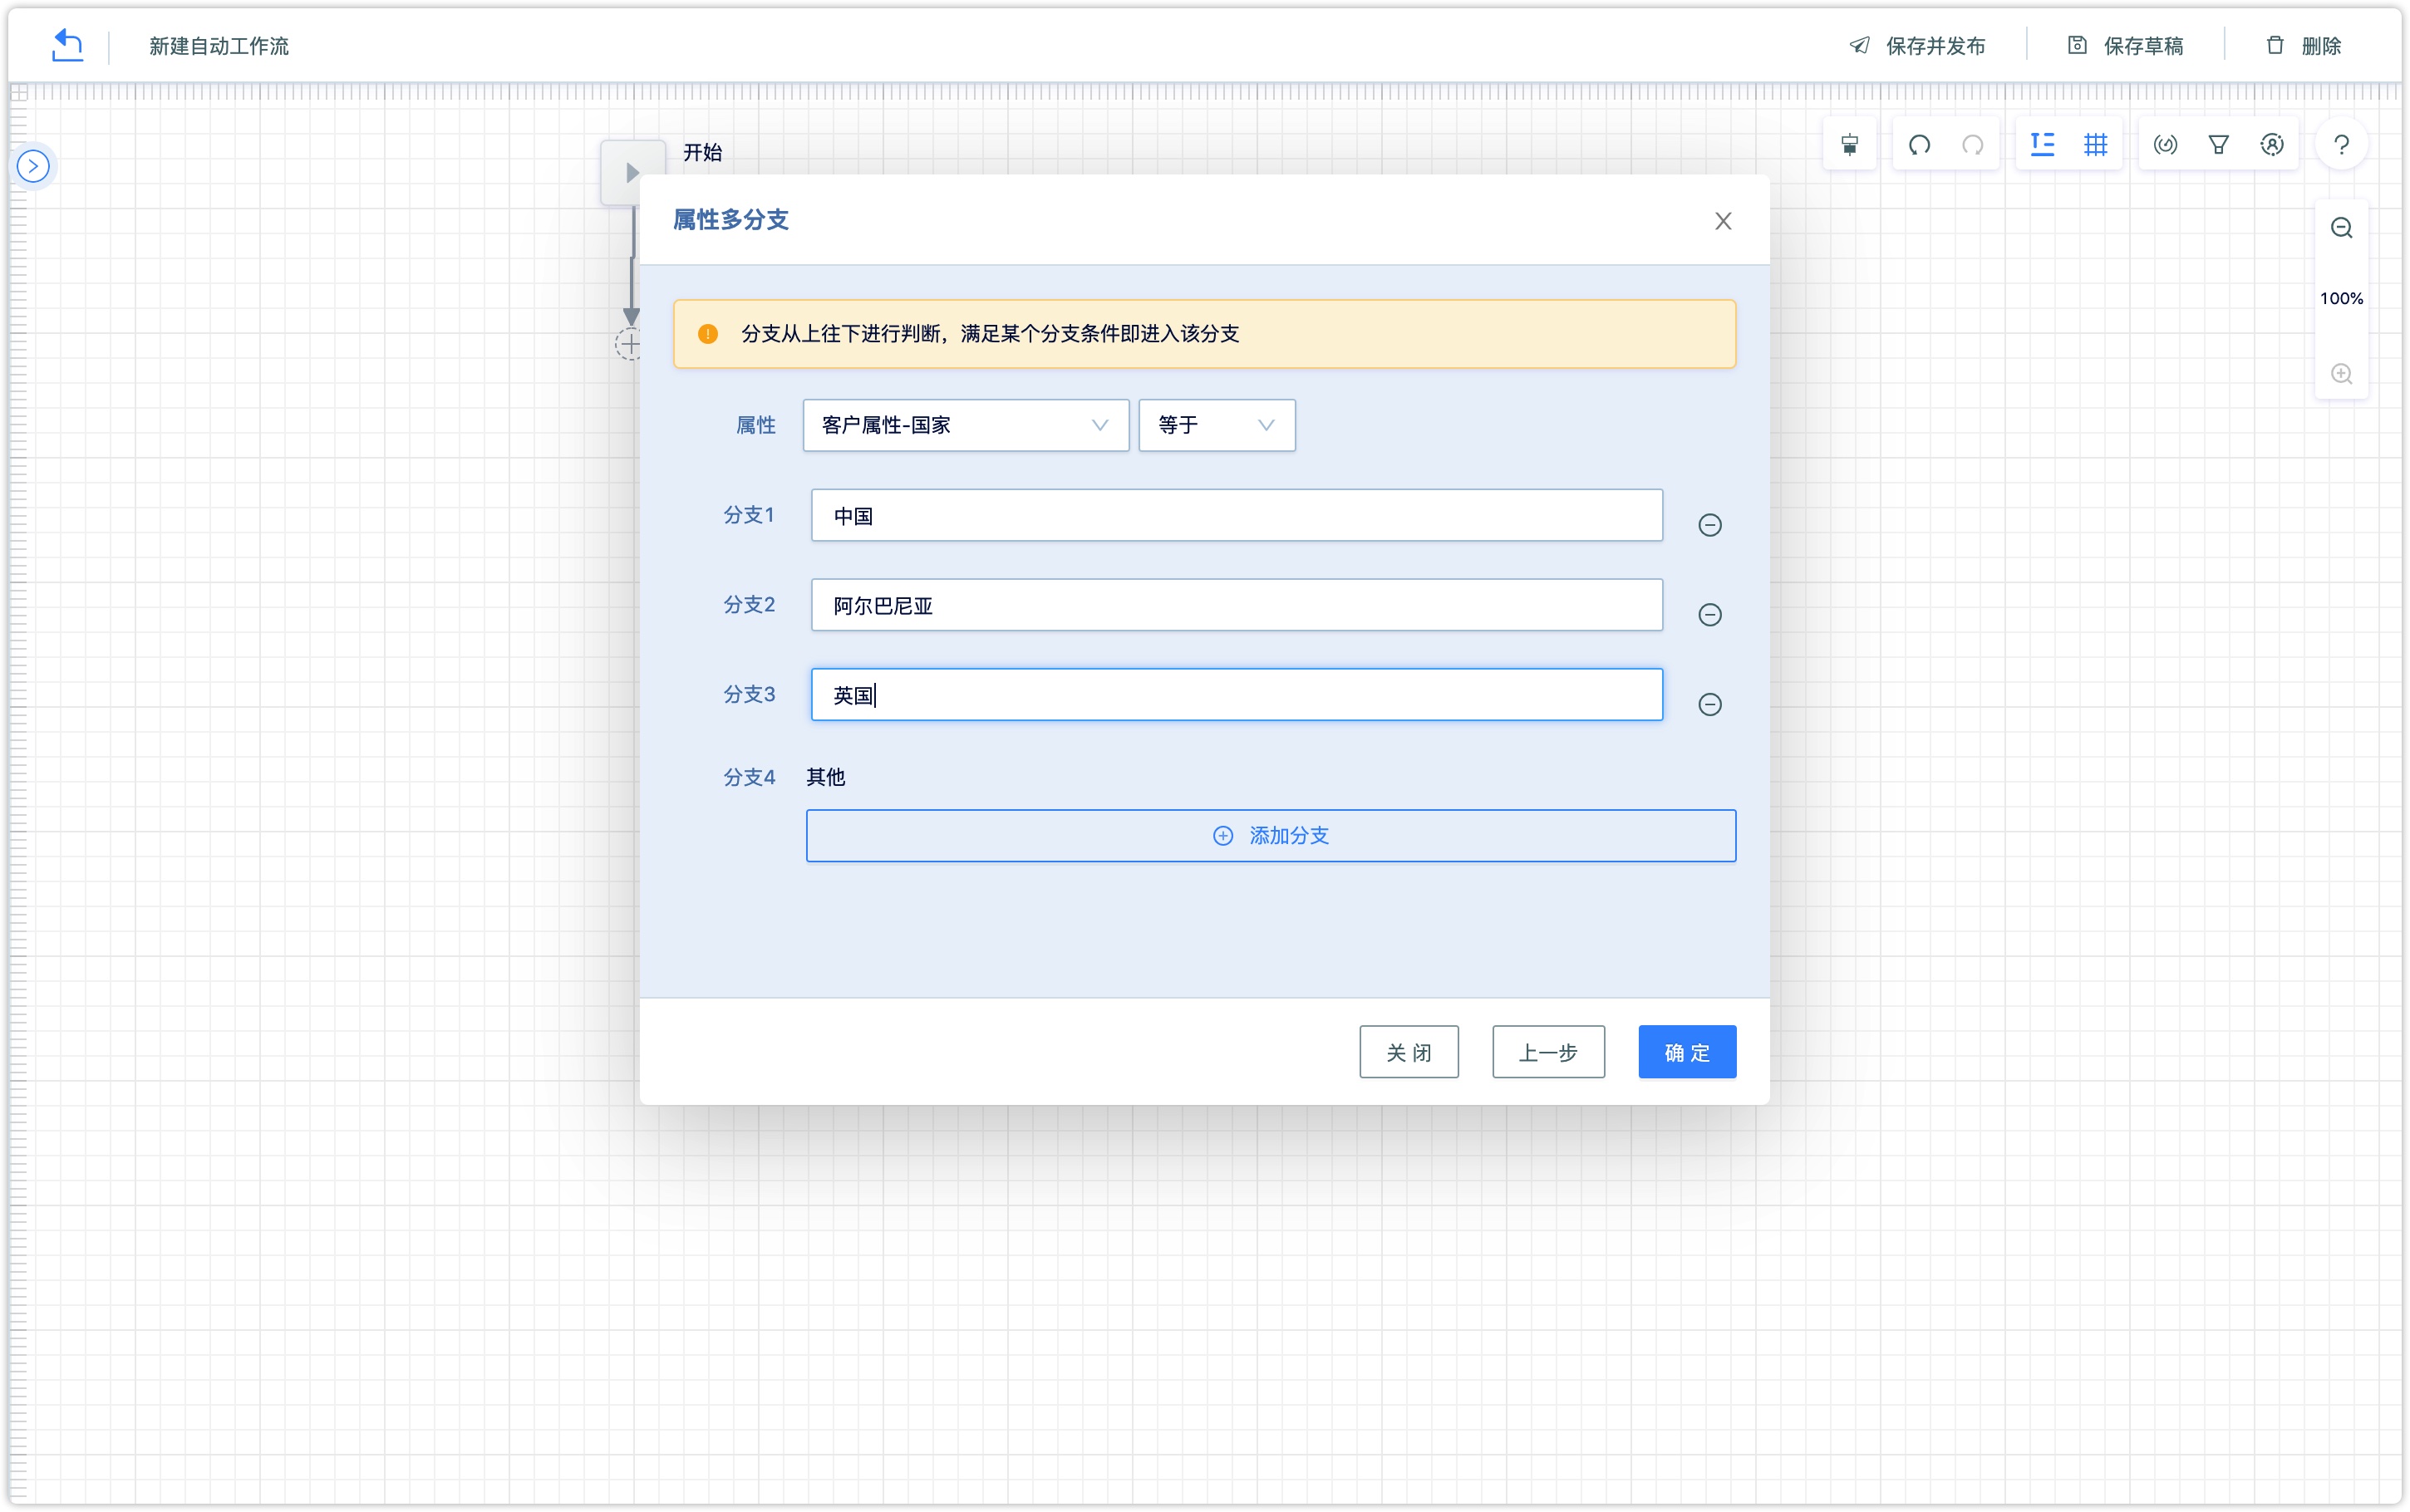
Click OK after the setting is completed, then judge the country attribute value of customers who enter the process. China, Albania, and the United Kingdom will enter Branch 1, Branch 2, and Branch 3 respectively, other countries except these three countries will go to other branches.
Label Multi-branch
Judge the different labels included by the customer, as set in the following image, click OK.
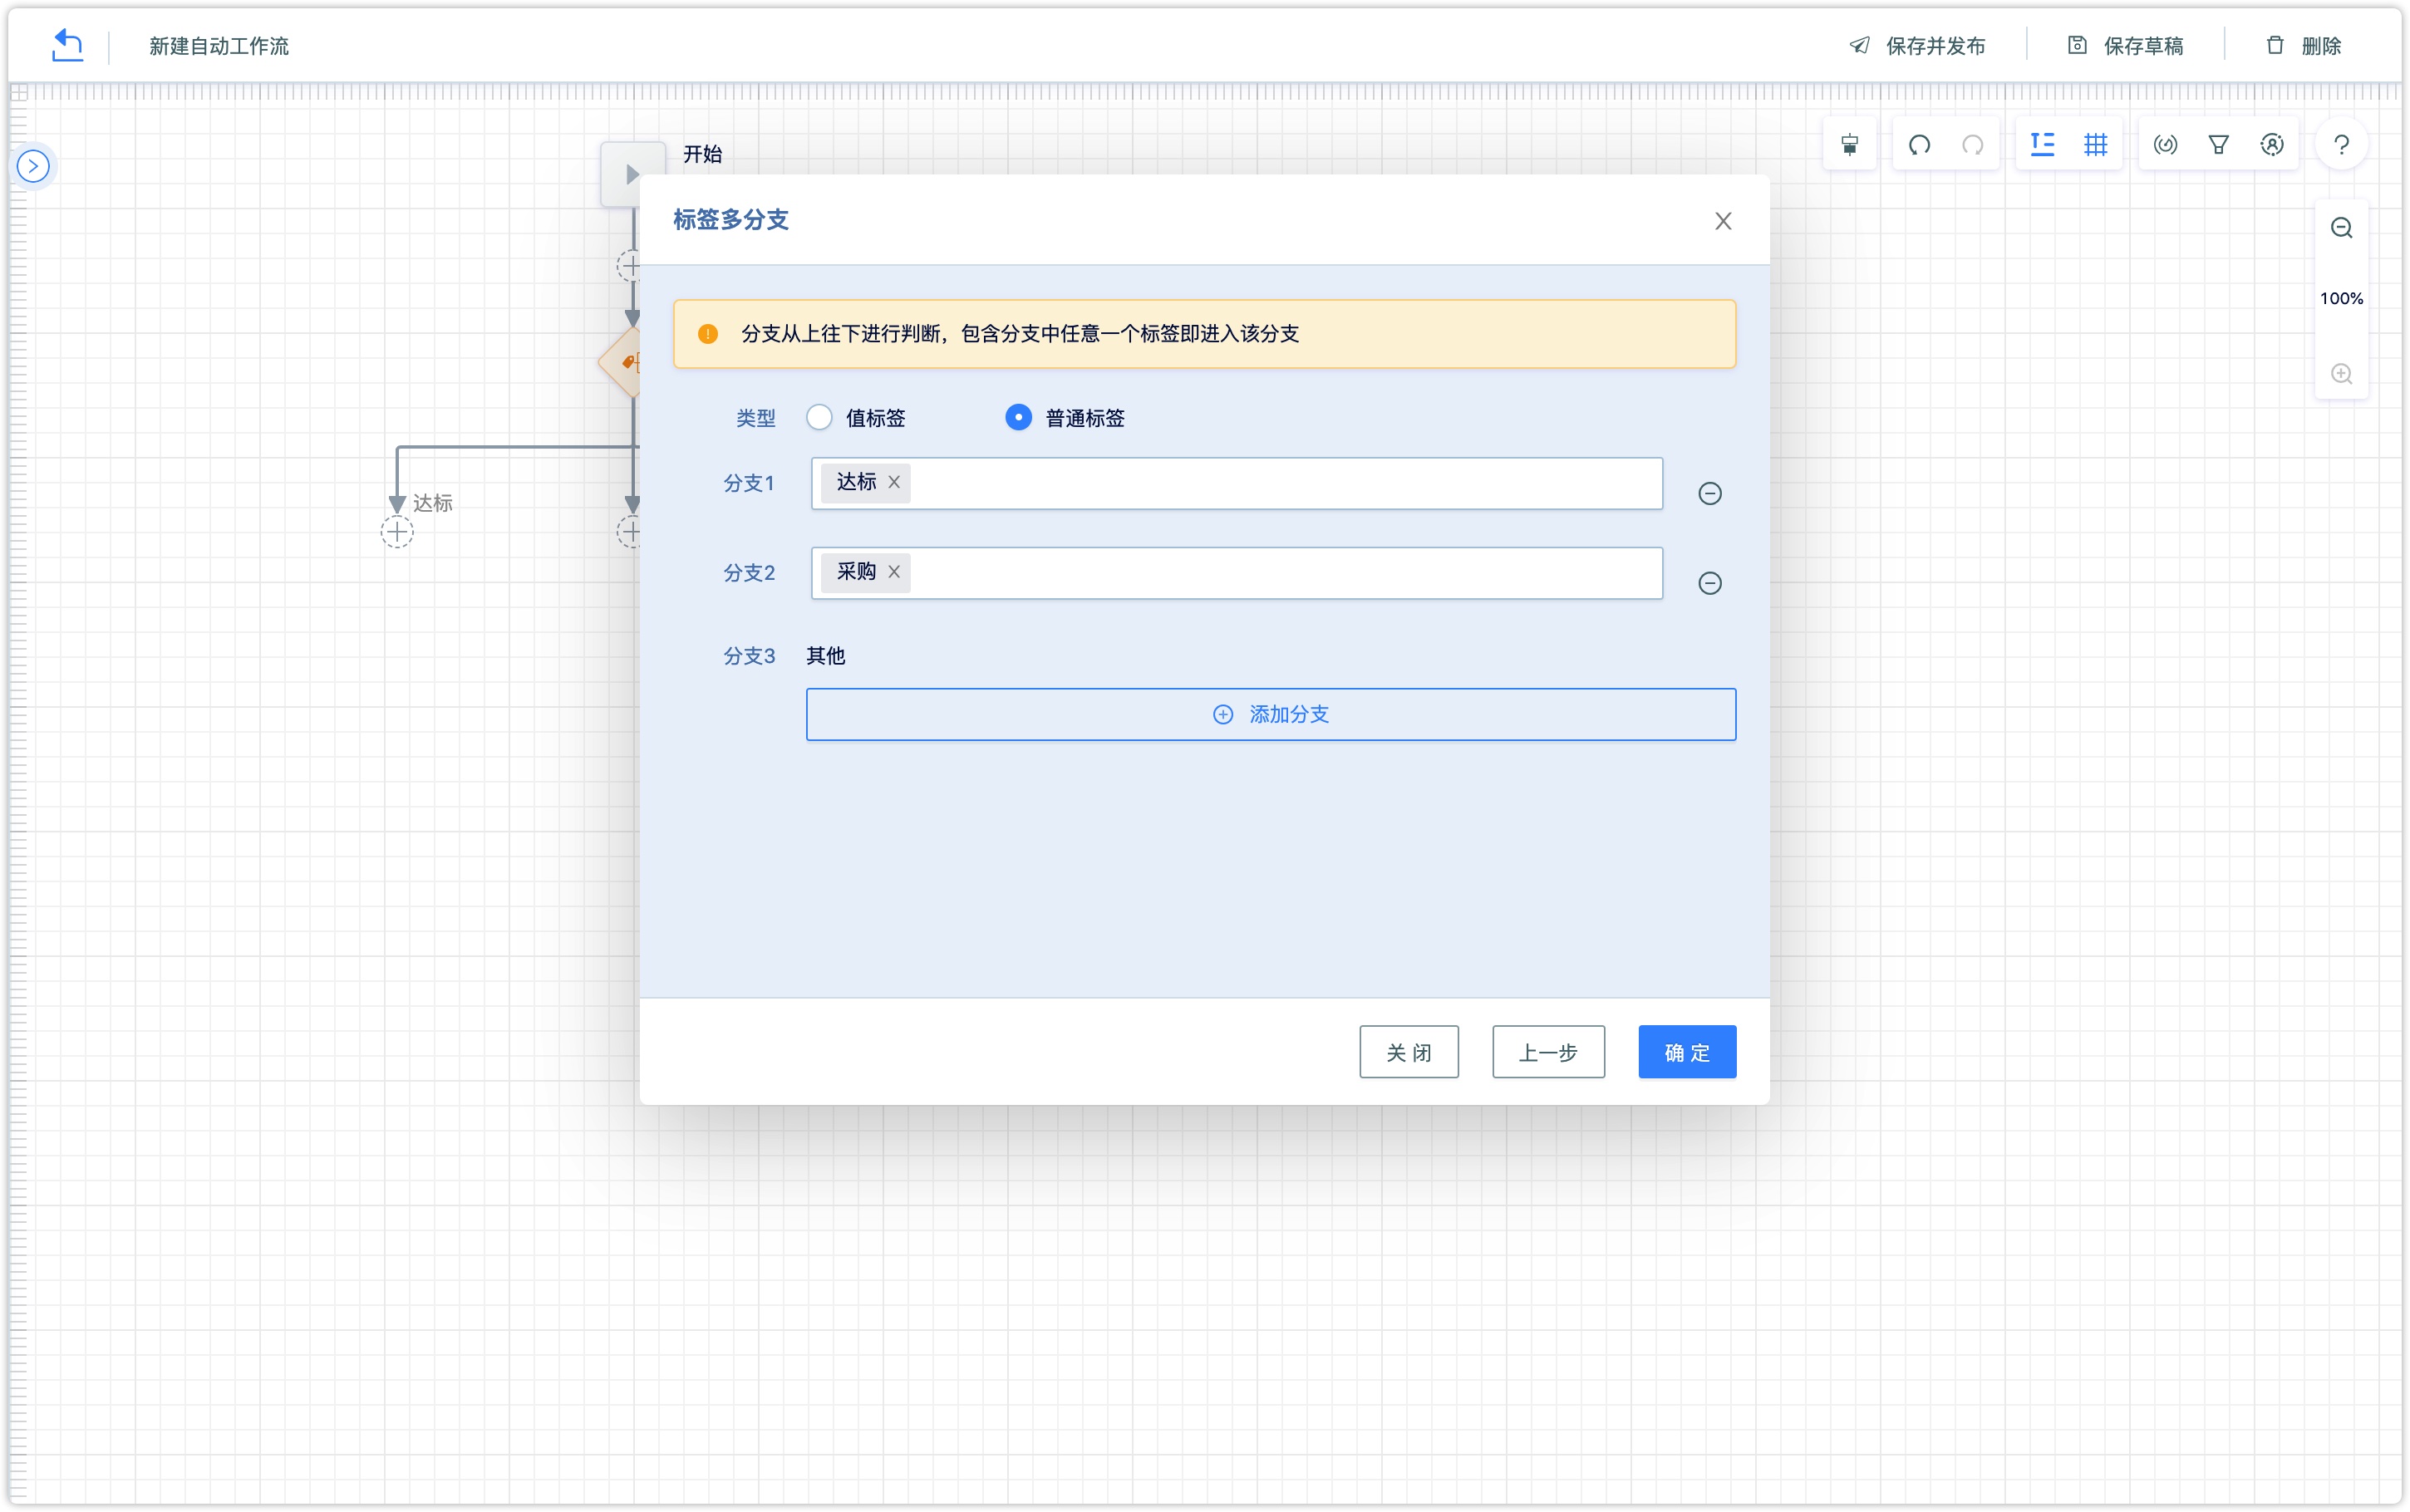
Among the customers who enter the process, the customer label includes the first branch of reaching the standard, the second branch of purchasing, if neither of them, will go branch of others.
2.3.3 Executive Control
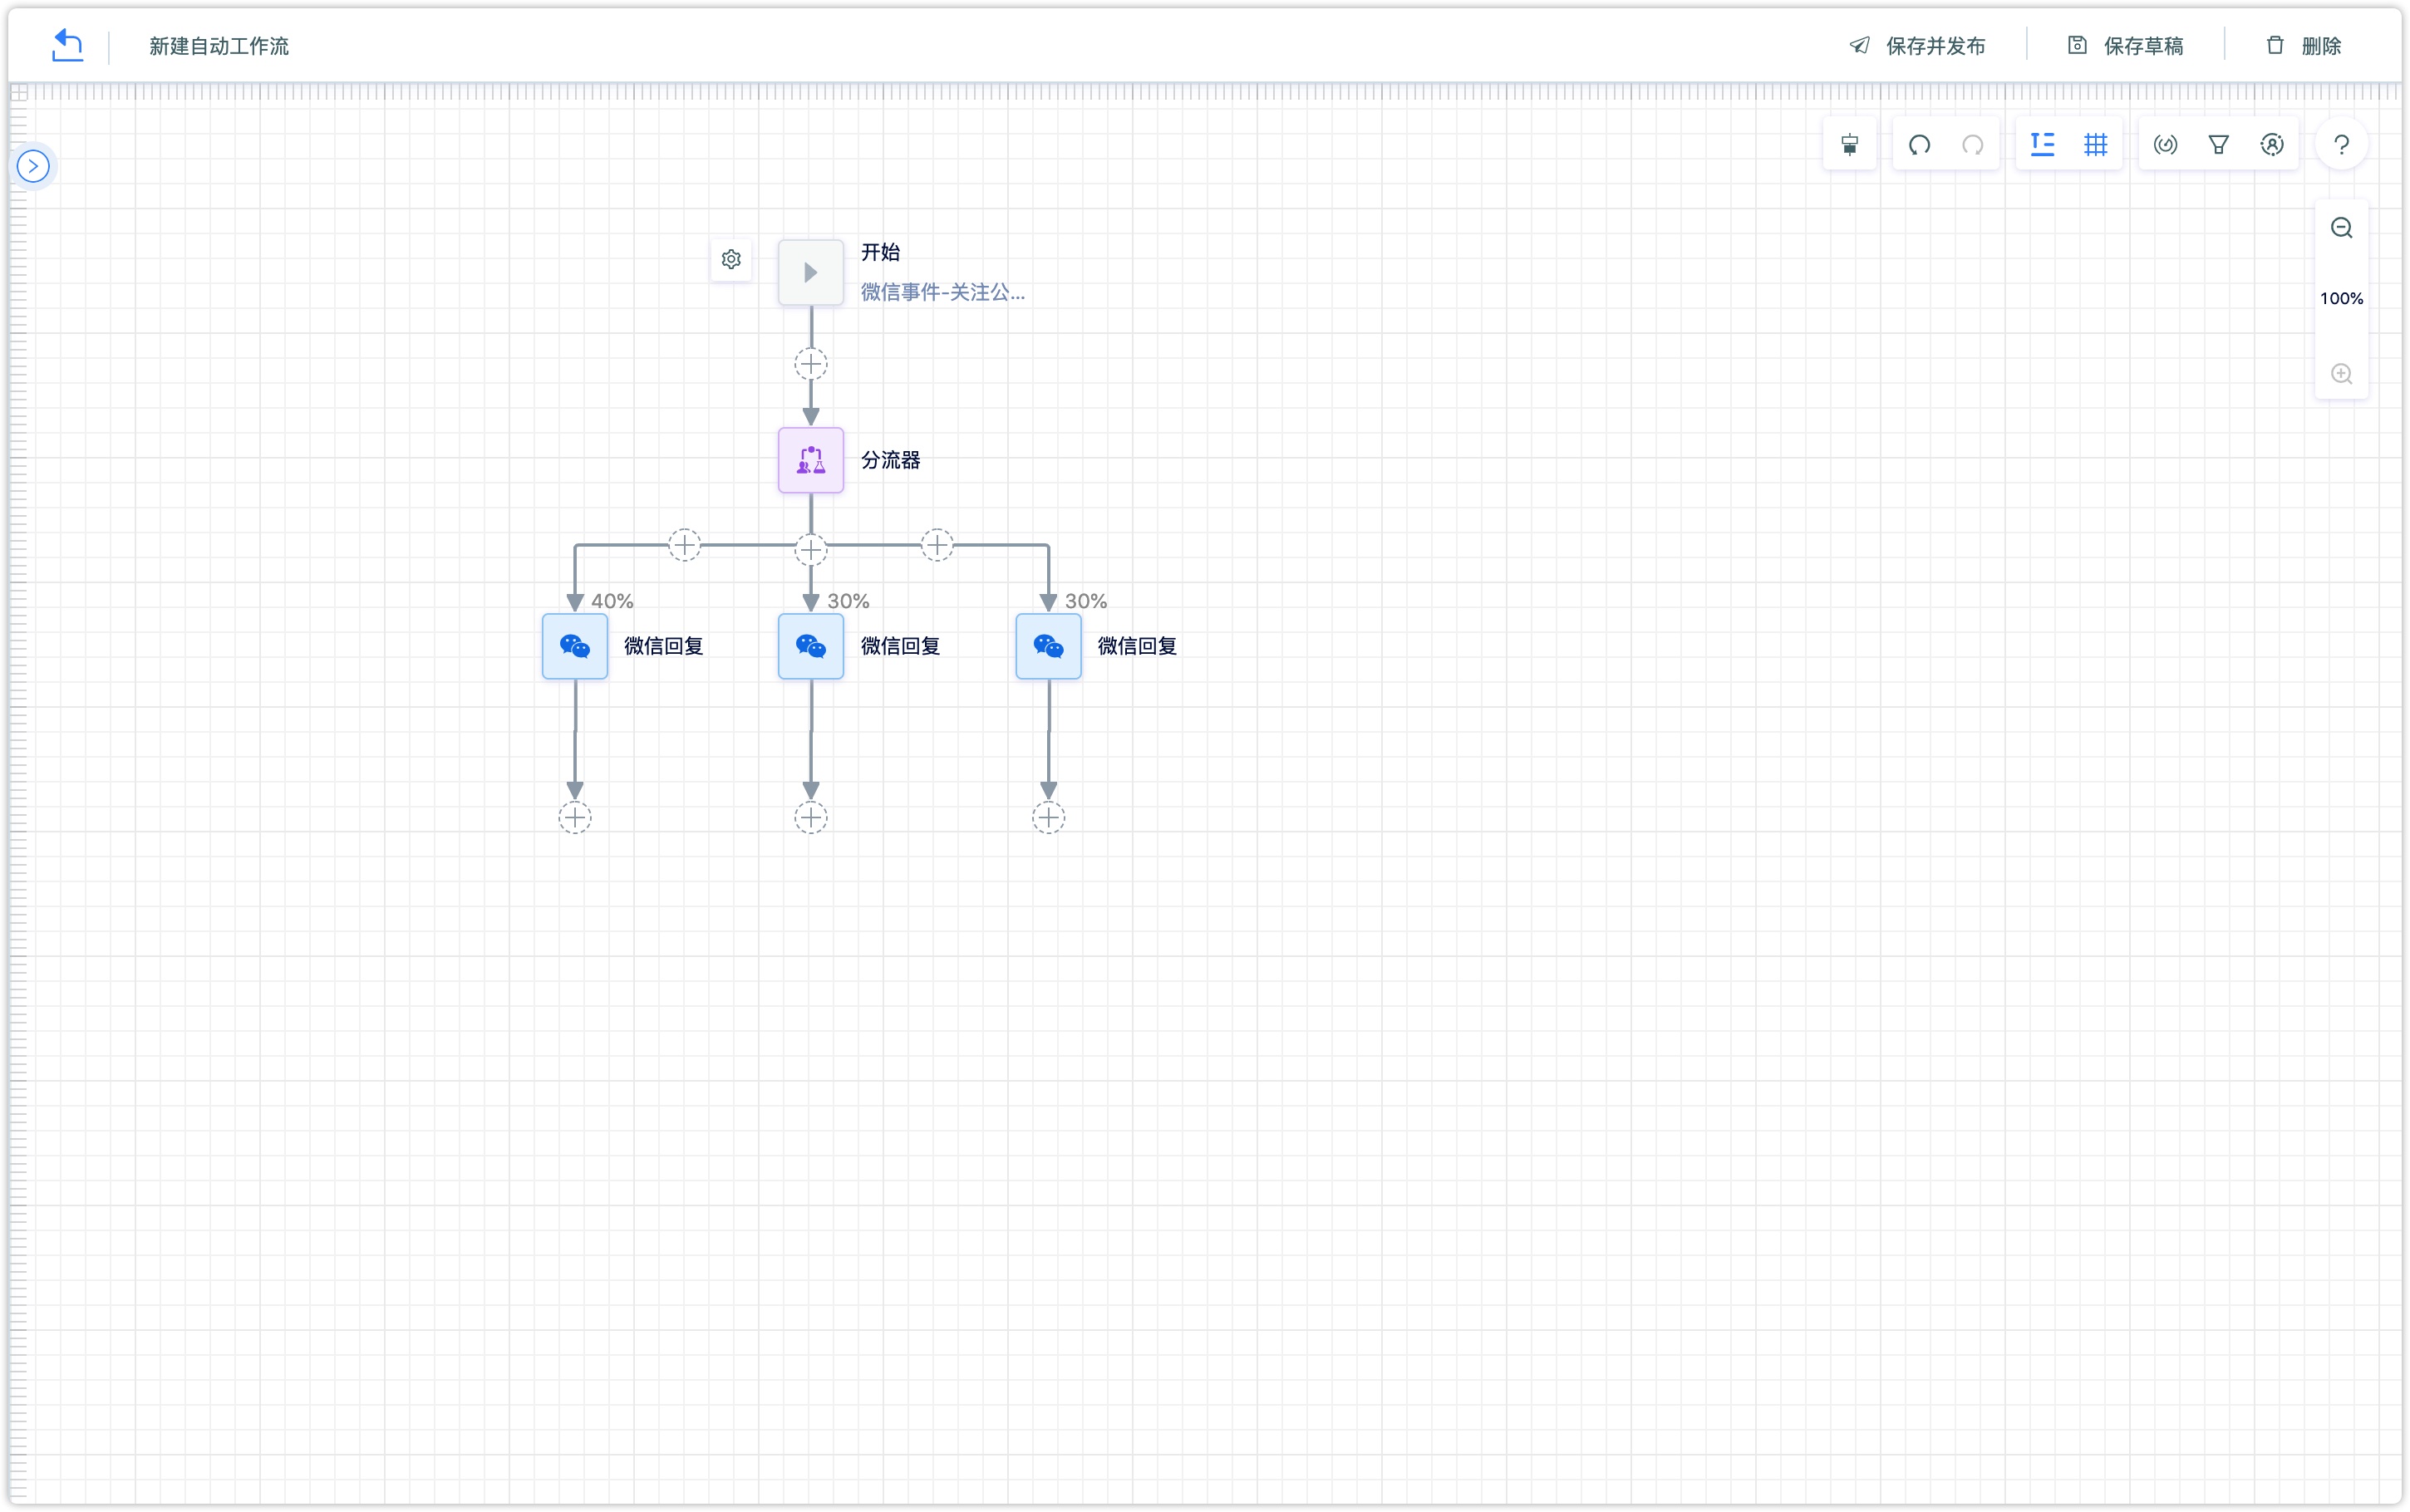
Shunt
As shown in the image, after a group of people enters the process, they will be randomly assigned to each branch according to the proportion of 40%, 30%, and 30%.
Workflow AB testing function
A/B test is a popular web page optimization method, which can be used to increase the conversion rate, registration rate, and other web page indicators. To put it simply, it is to make two plans (such as two pages) for the same goal and divide the user traffic of the product into two groups of A/B, a test group, and a control group, and the two groups of users have similar characteristics and run at the same time. After the experiment has been run for a while, the performance of the two groups of users is counted respectively, then the data results can be compared, which can help to make a scientific decision.
Perform an A/B test using the workflow AB test component: First of all, set up the steps before the AB test, such as start conditions, actions, etc.
Step 1: Add the AB test component to the workflow and set the relevant conditions for the AB test in the configuration window.
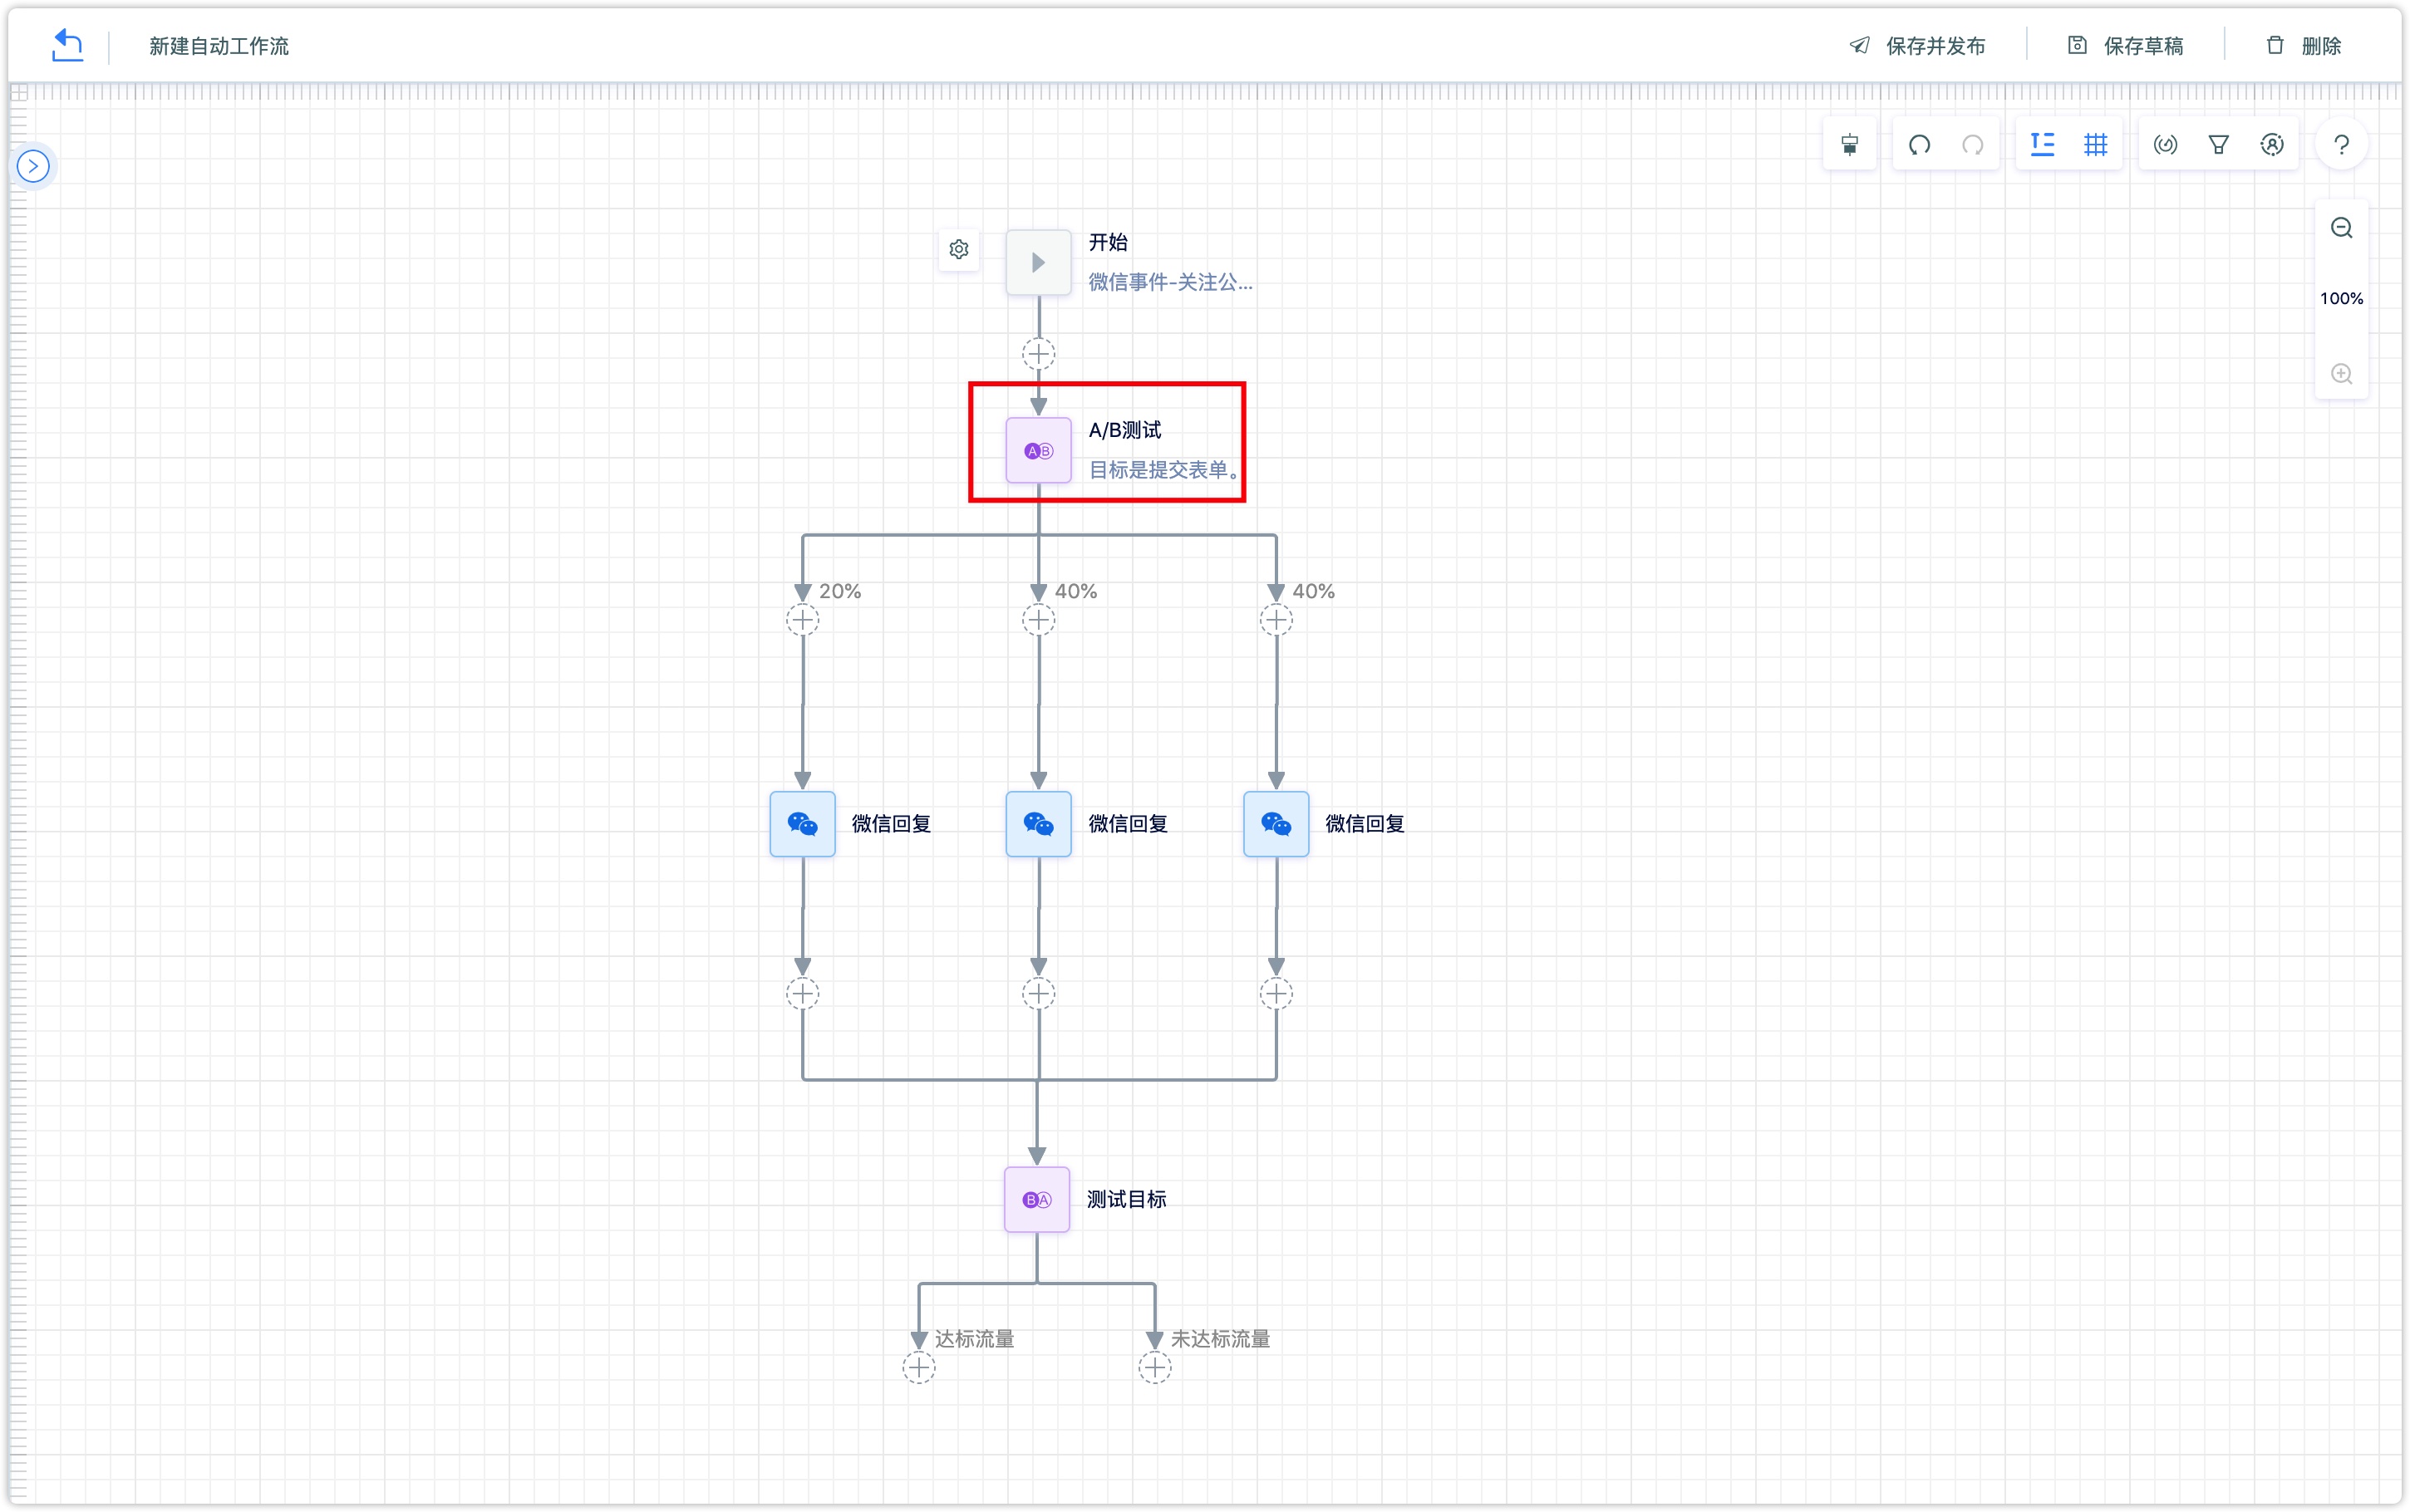
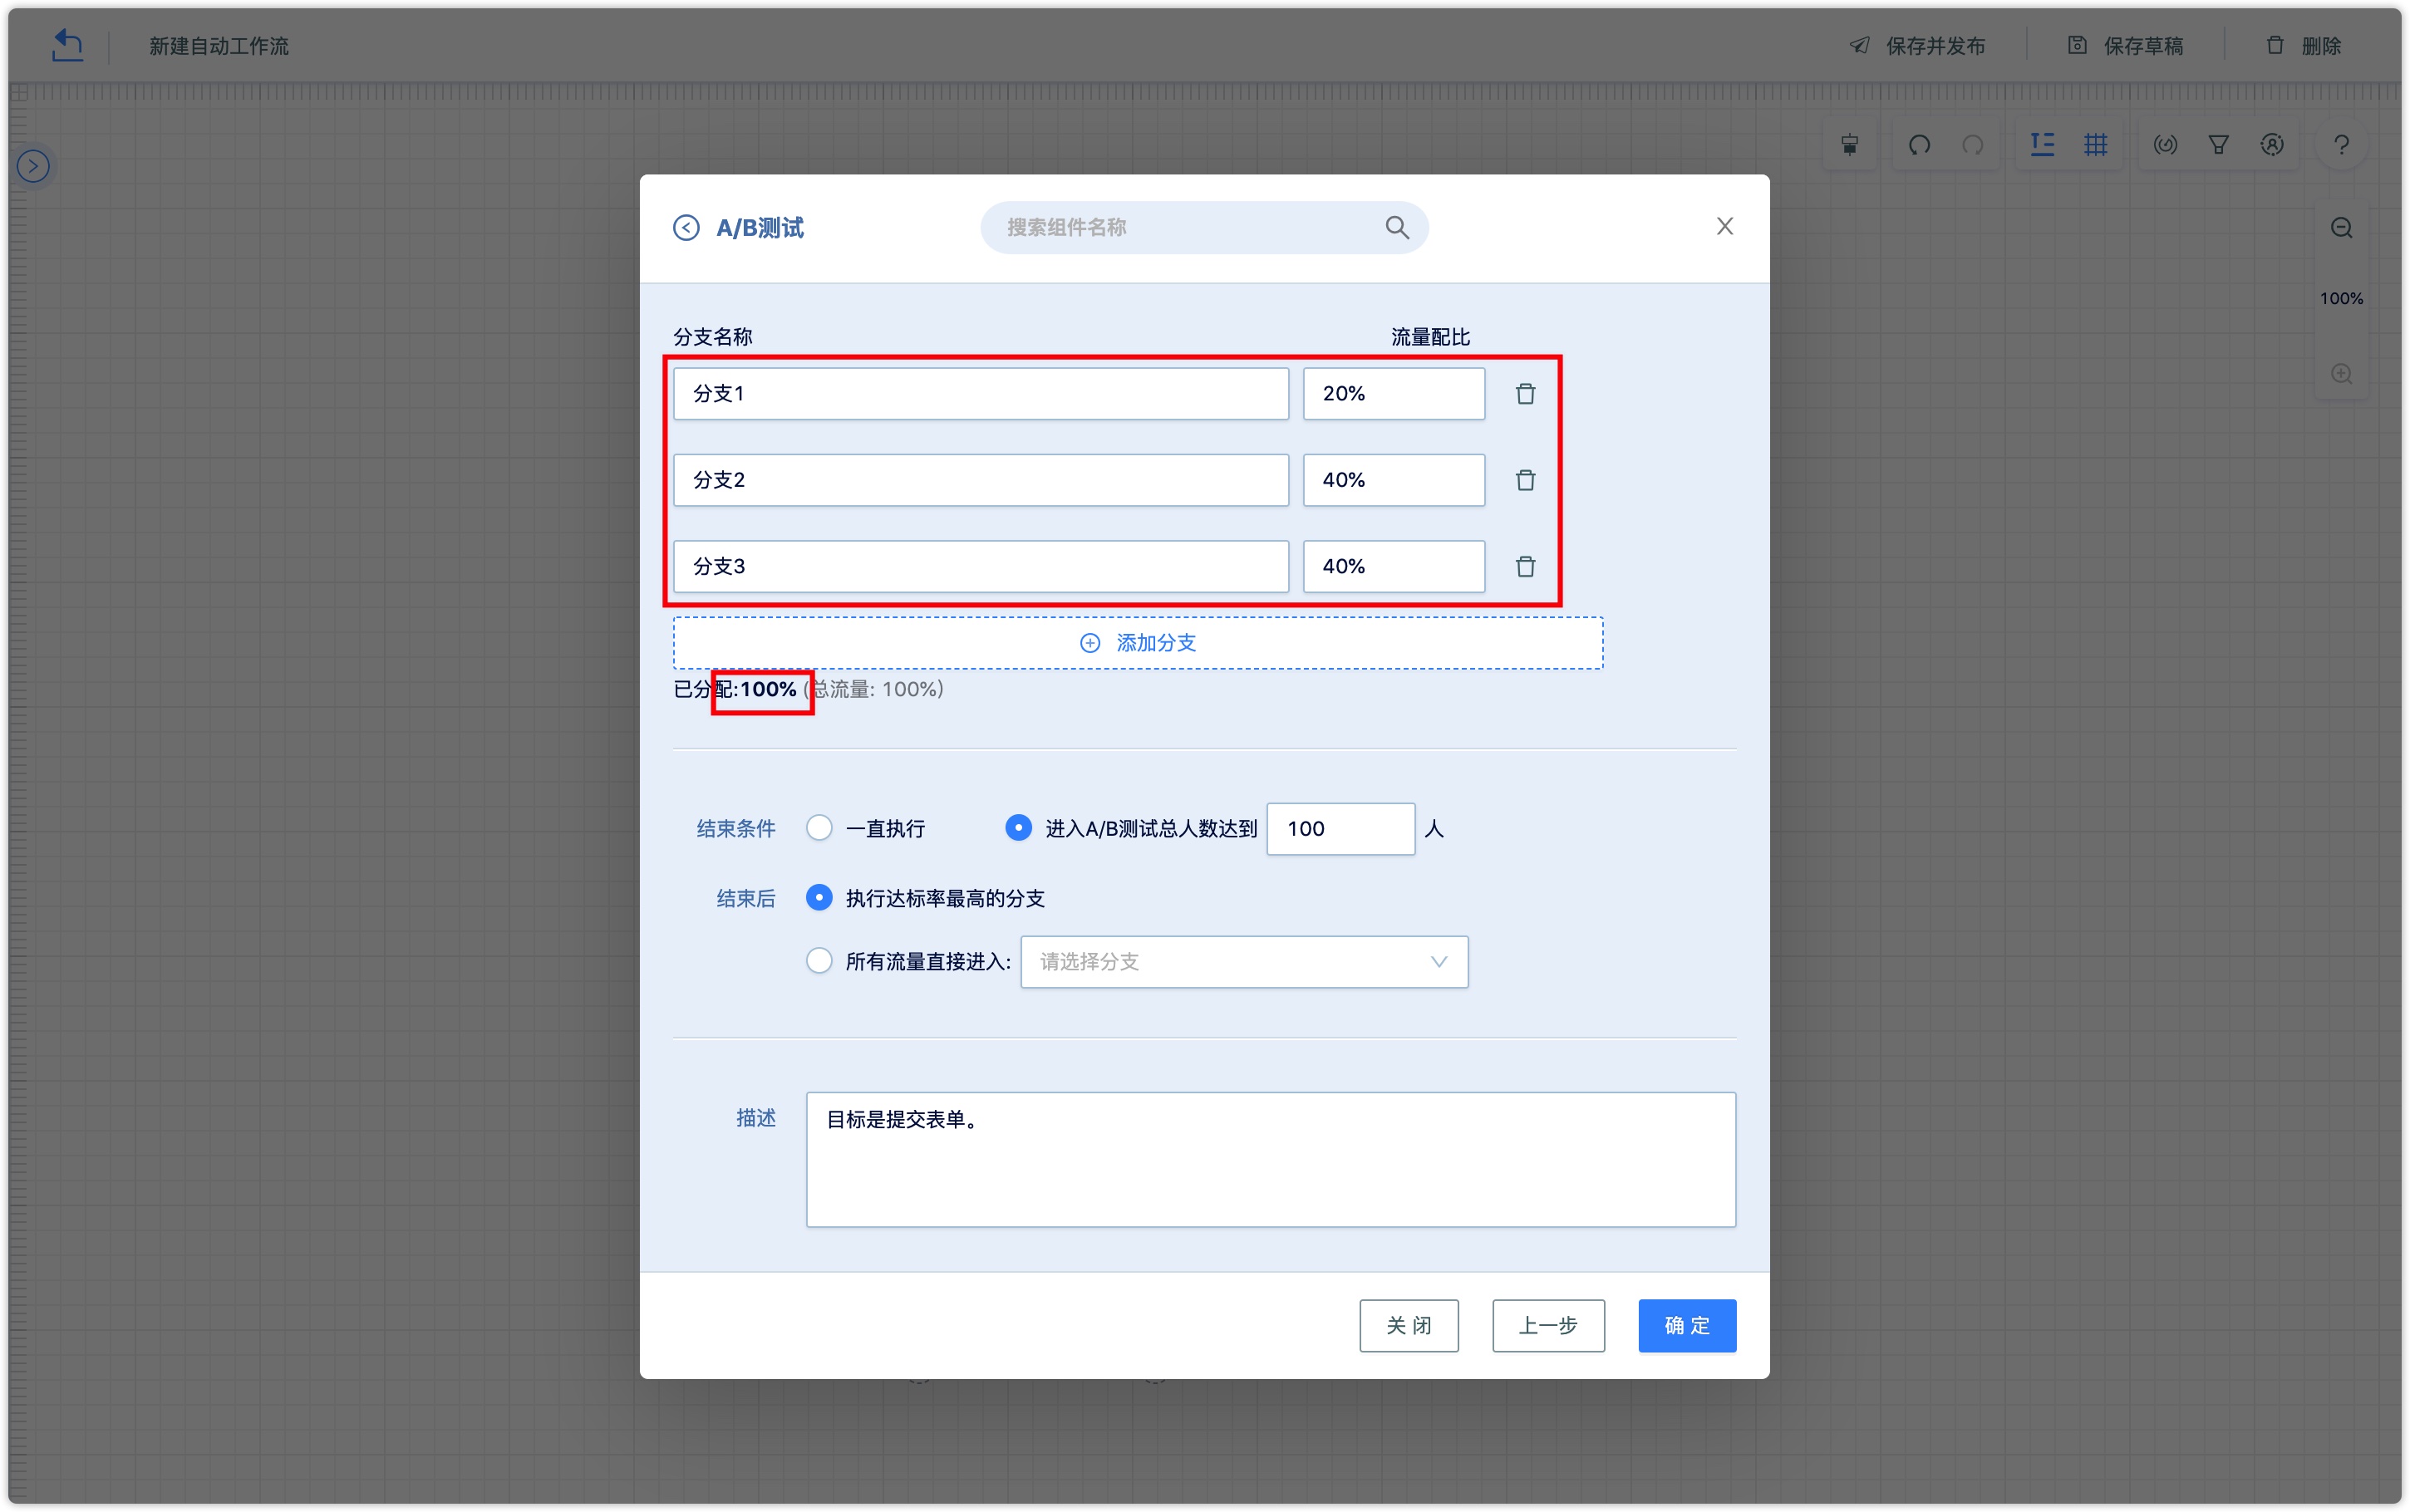
The AB test component needs to contain at least two branches. You can add multiple branches and assign traffic to the branches according to the needs of the actual scenario.
The branch name is presented by default in the form of "branch + number" and can be user-defined.
The sum of multi-branch traffic is equal to 100%. If the total of custom traffic is not equal to 100%, the configuration cannot be completed.
Ending Condition:
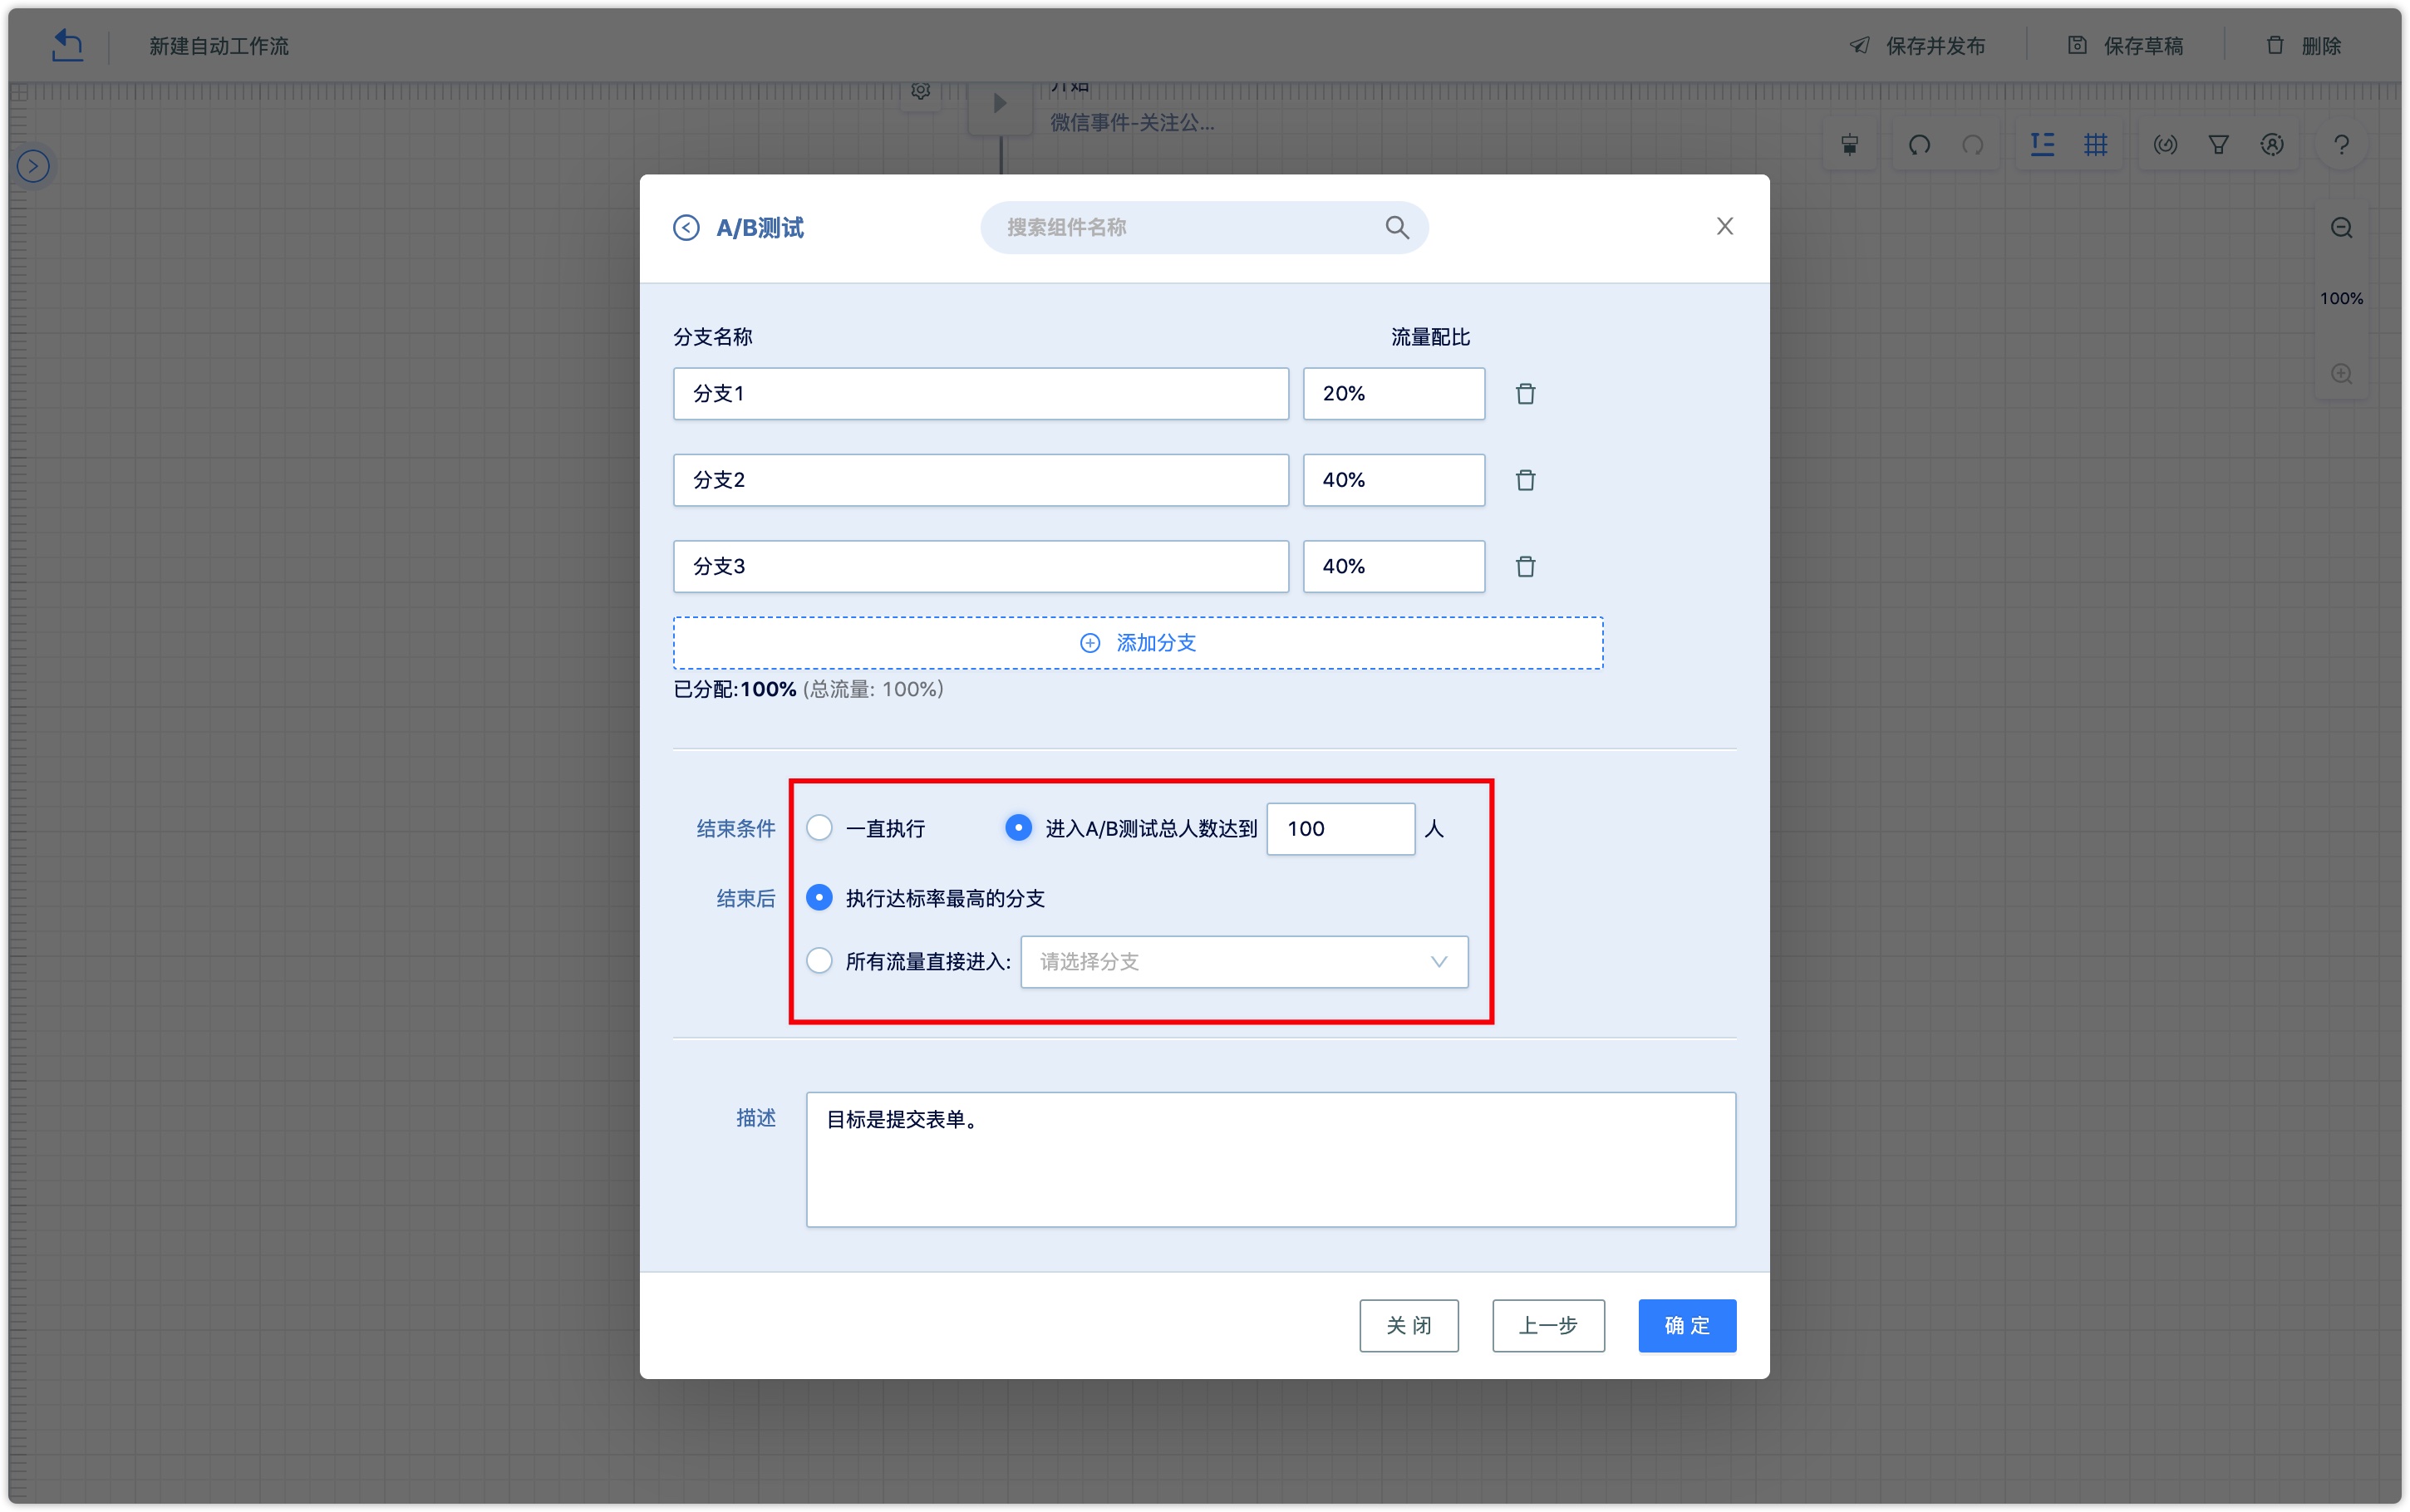
【Always On】: Subsequent customers who enter the workflow will continue to go down these three branches at random.
【The total number of people entering the A/B test reaches】: After the total number of people entering the workflow reaches the set value, you can choose the following customers who enter the workflow to go to the branch with the highest compliance rate or a specific branch.
i.e., if you need to collect 5000 questionnaires before an activity, you can choose to send 5000 questionnaires to customers in Branch 1 and Branch 2 respectively, and customers who later enter the process can be assigned to go to the branches with a high questionnaire submission rate to improve the quality and efficiency of the questionnaire activities.
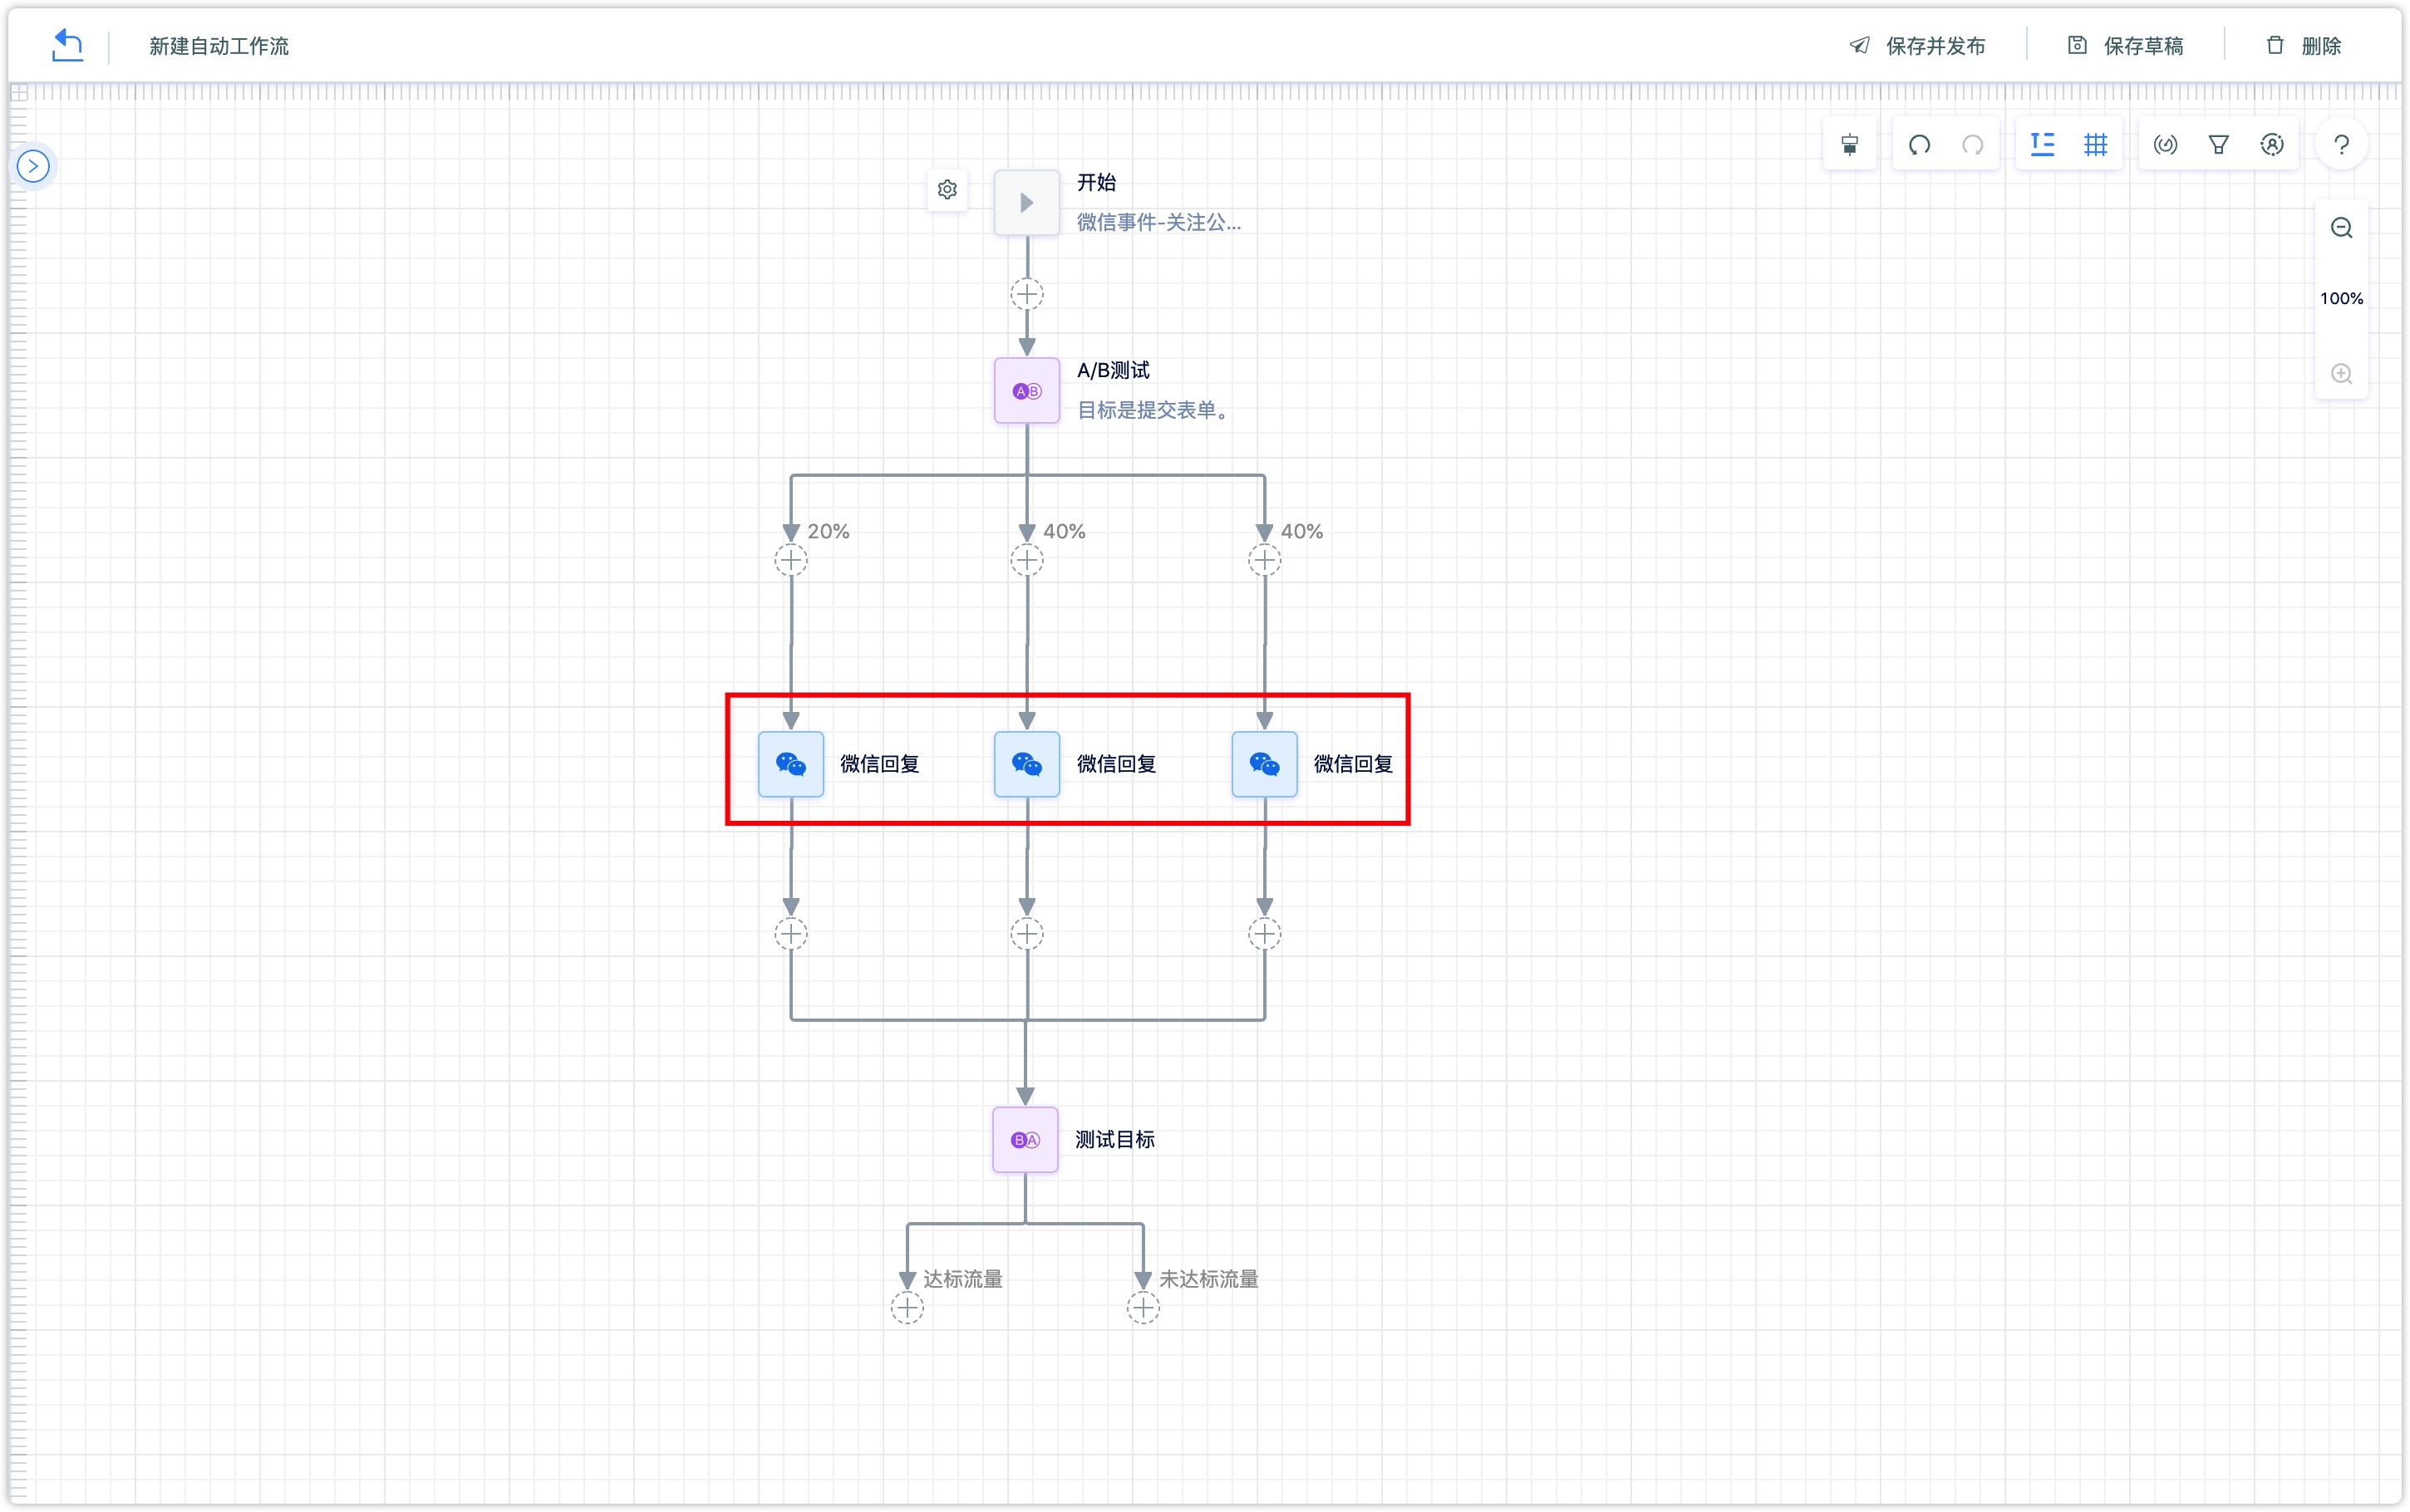
Step 2: You can set different responses for customers who enter the different branches.
Step 3: Click 【Test Target】 to set the judgment condition for each branch, which is judging from the action of the last step on each branch. According to the action judgment, the customer whose result is "yes" will be divided by the total flow of the branch, then you will have the success rate effect of the branch.
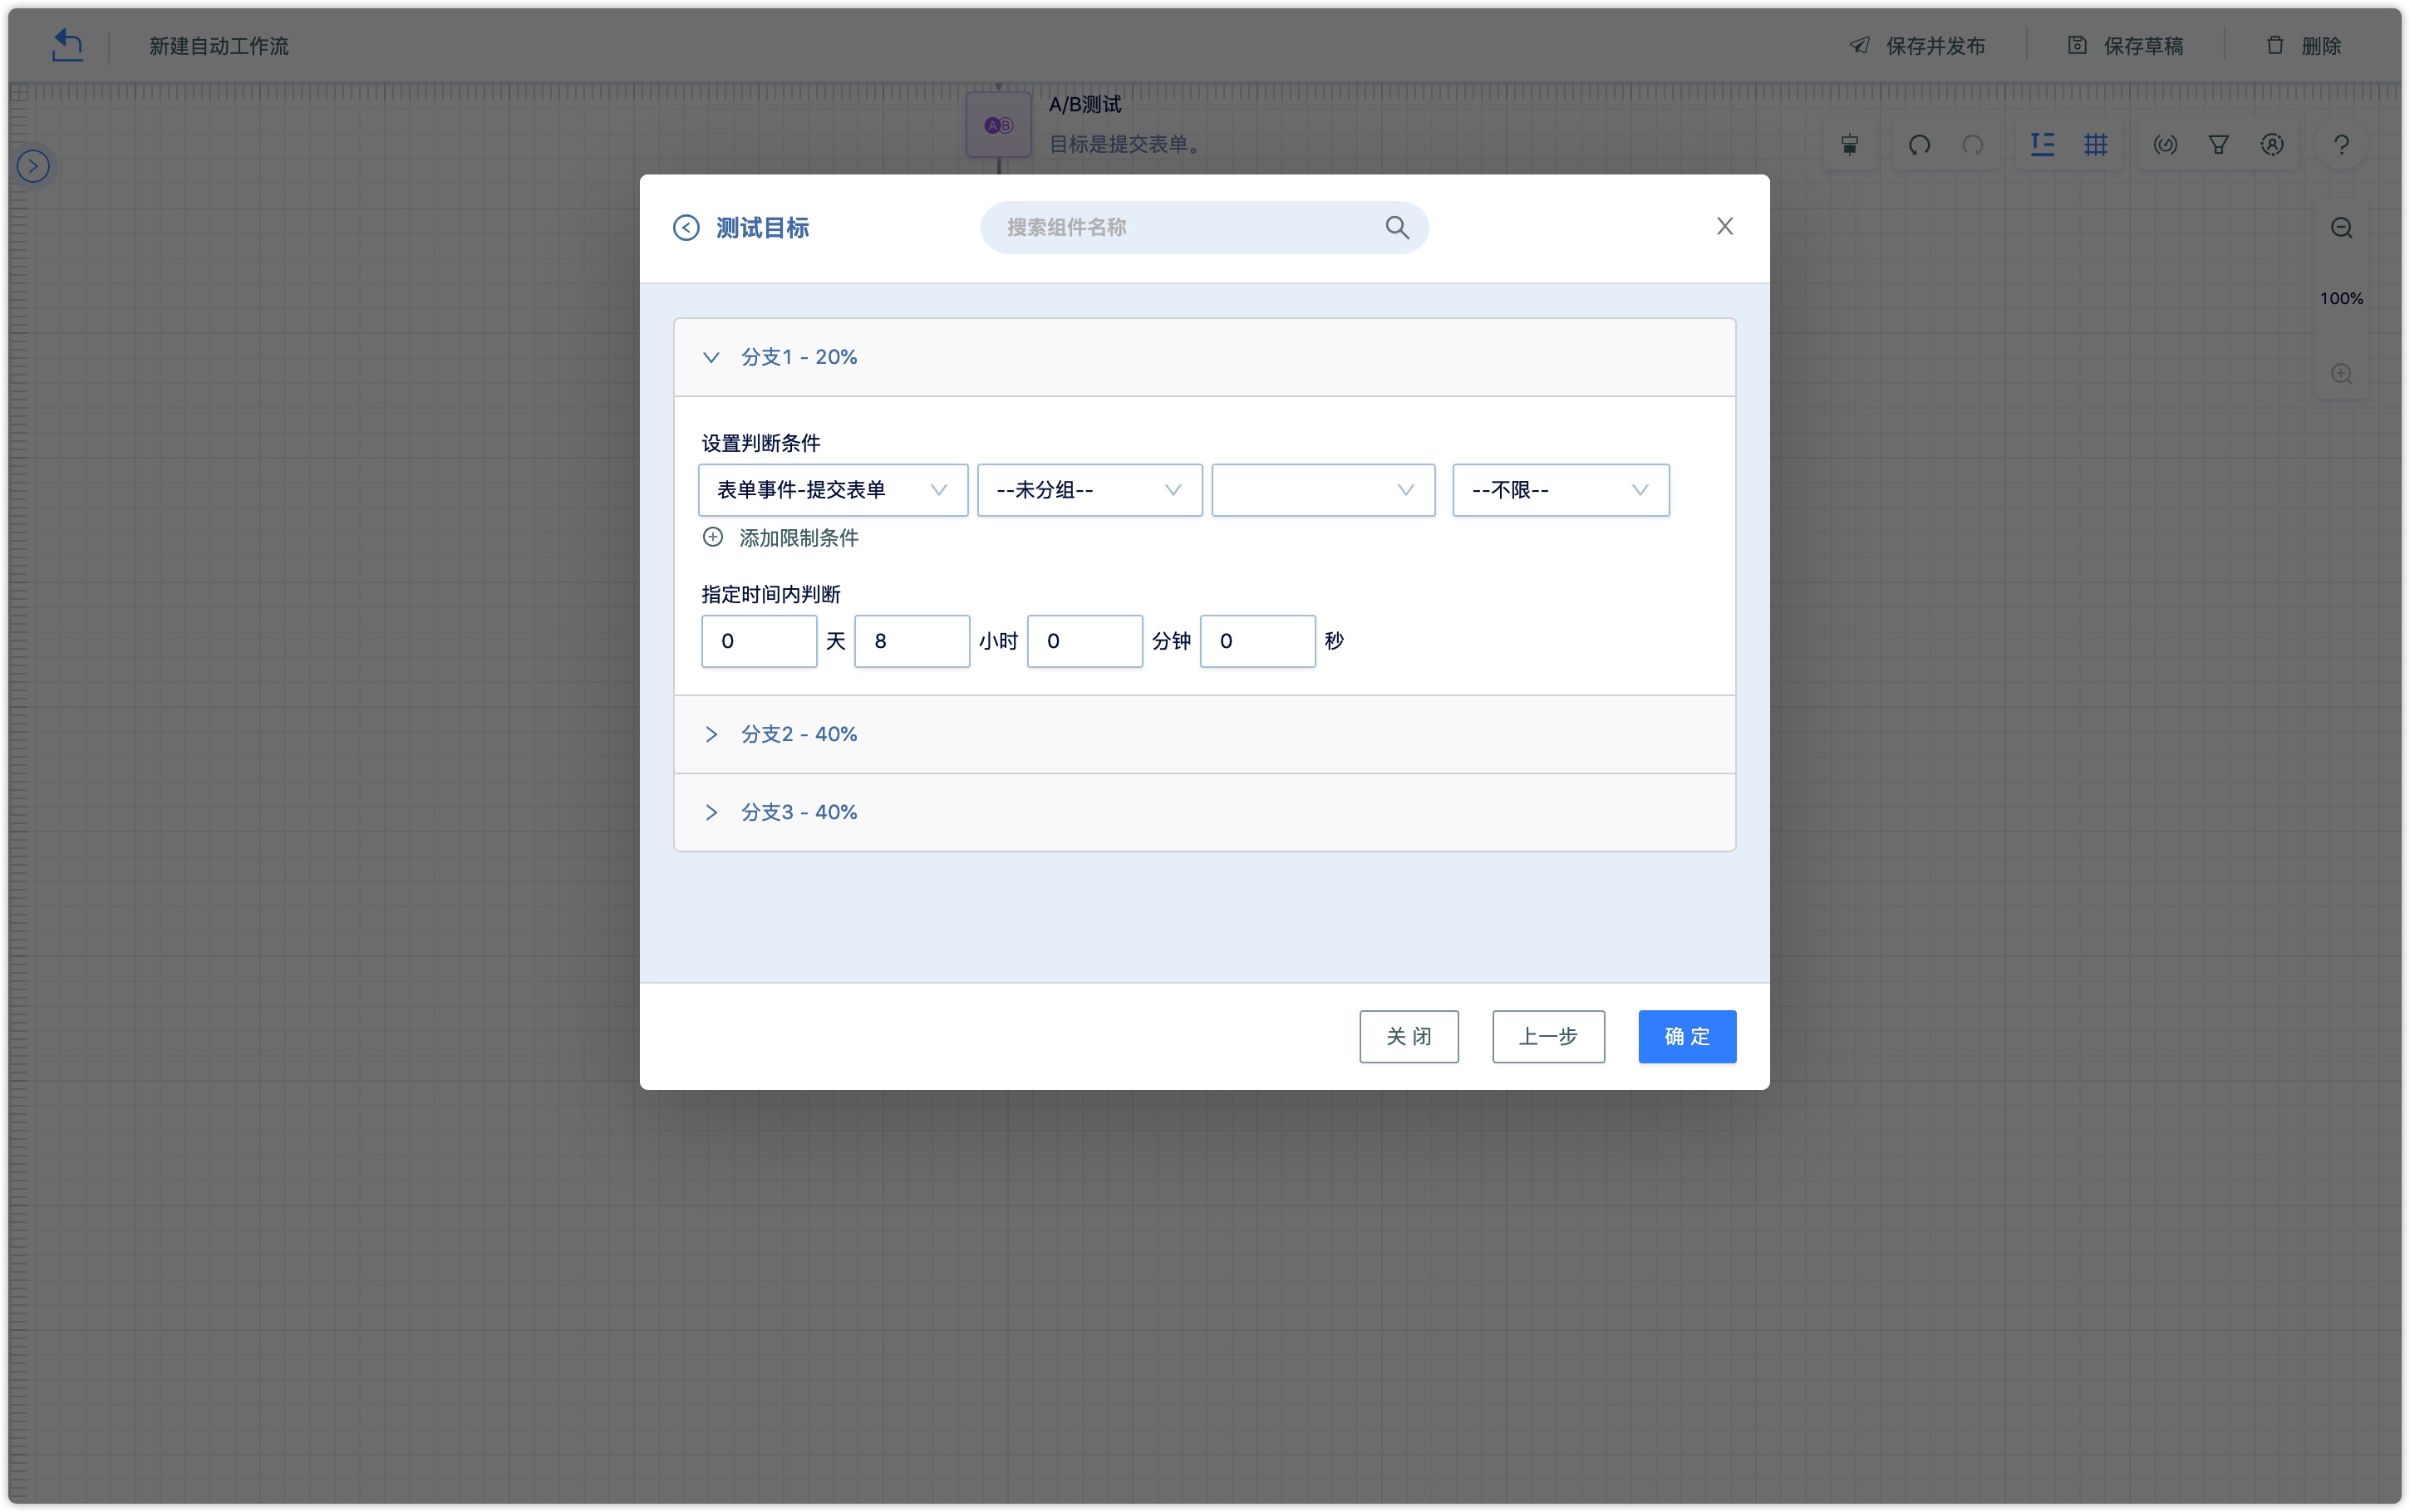
By comparing the success rate of multiple branches and judging the results of the AB test, the branching scheme with a better conversion rate can be selected.
Step 4: Set up the branch steps that success and unsuccess.
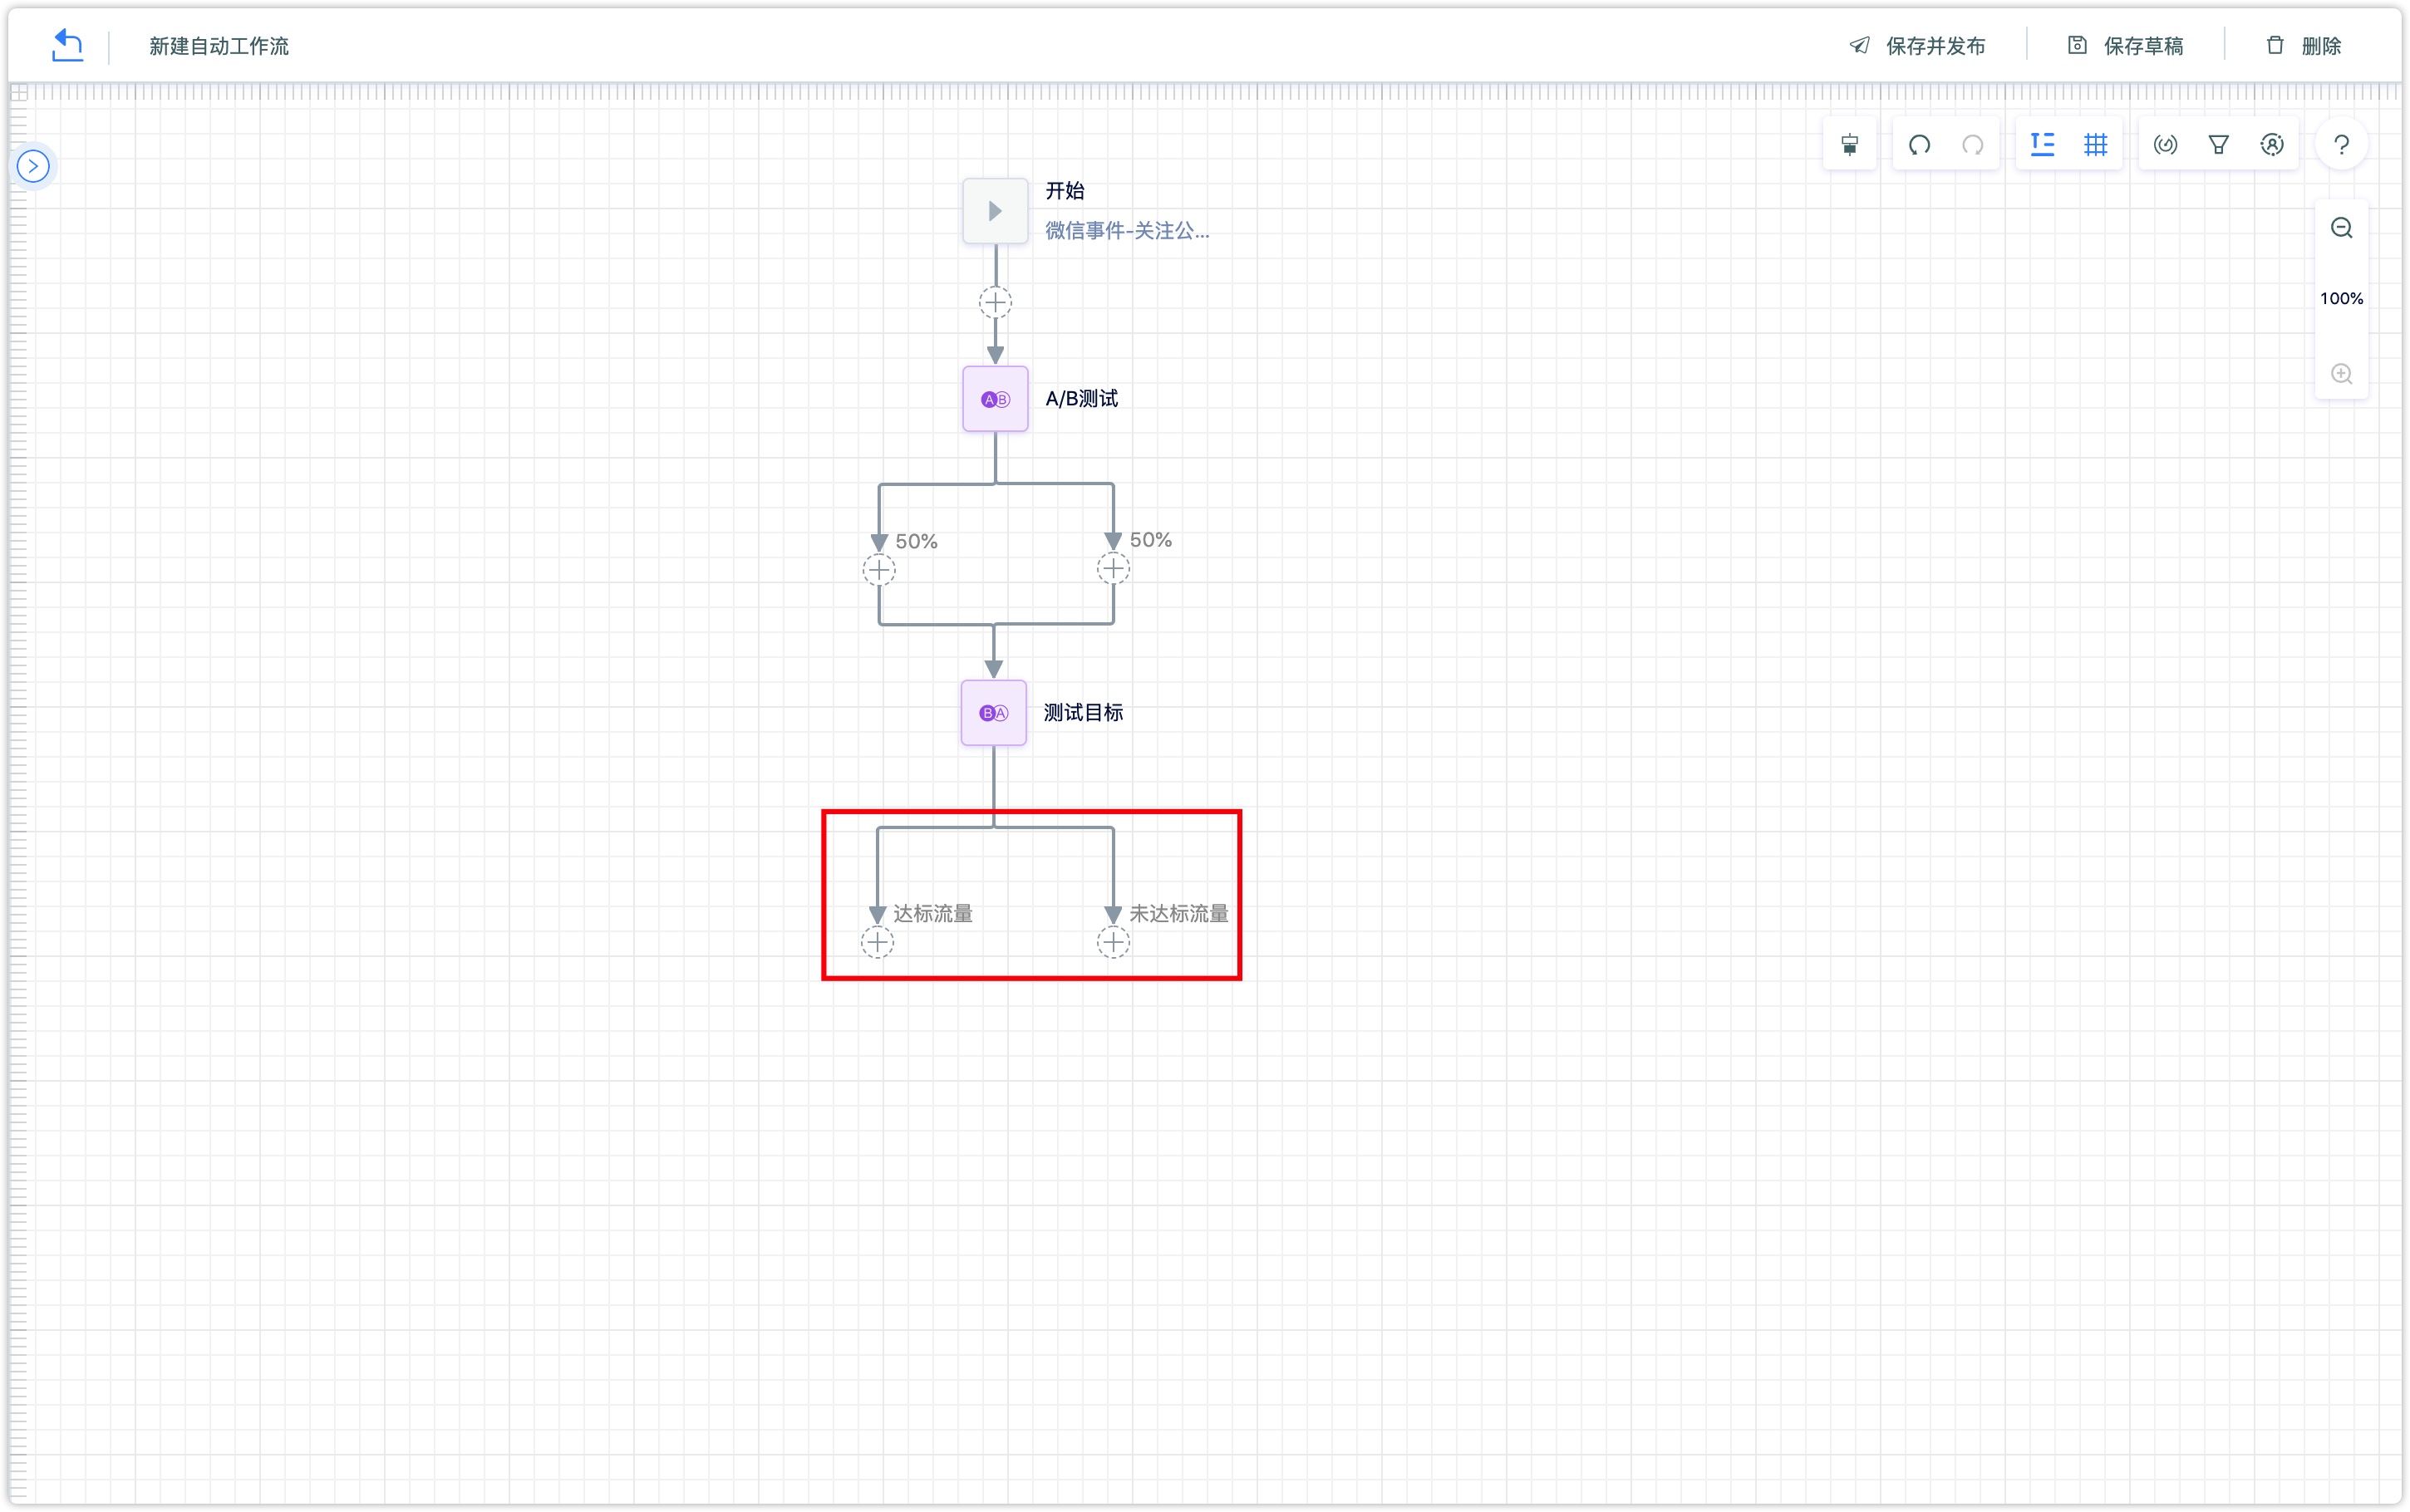
In this way, the AB test of a process is built.
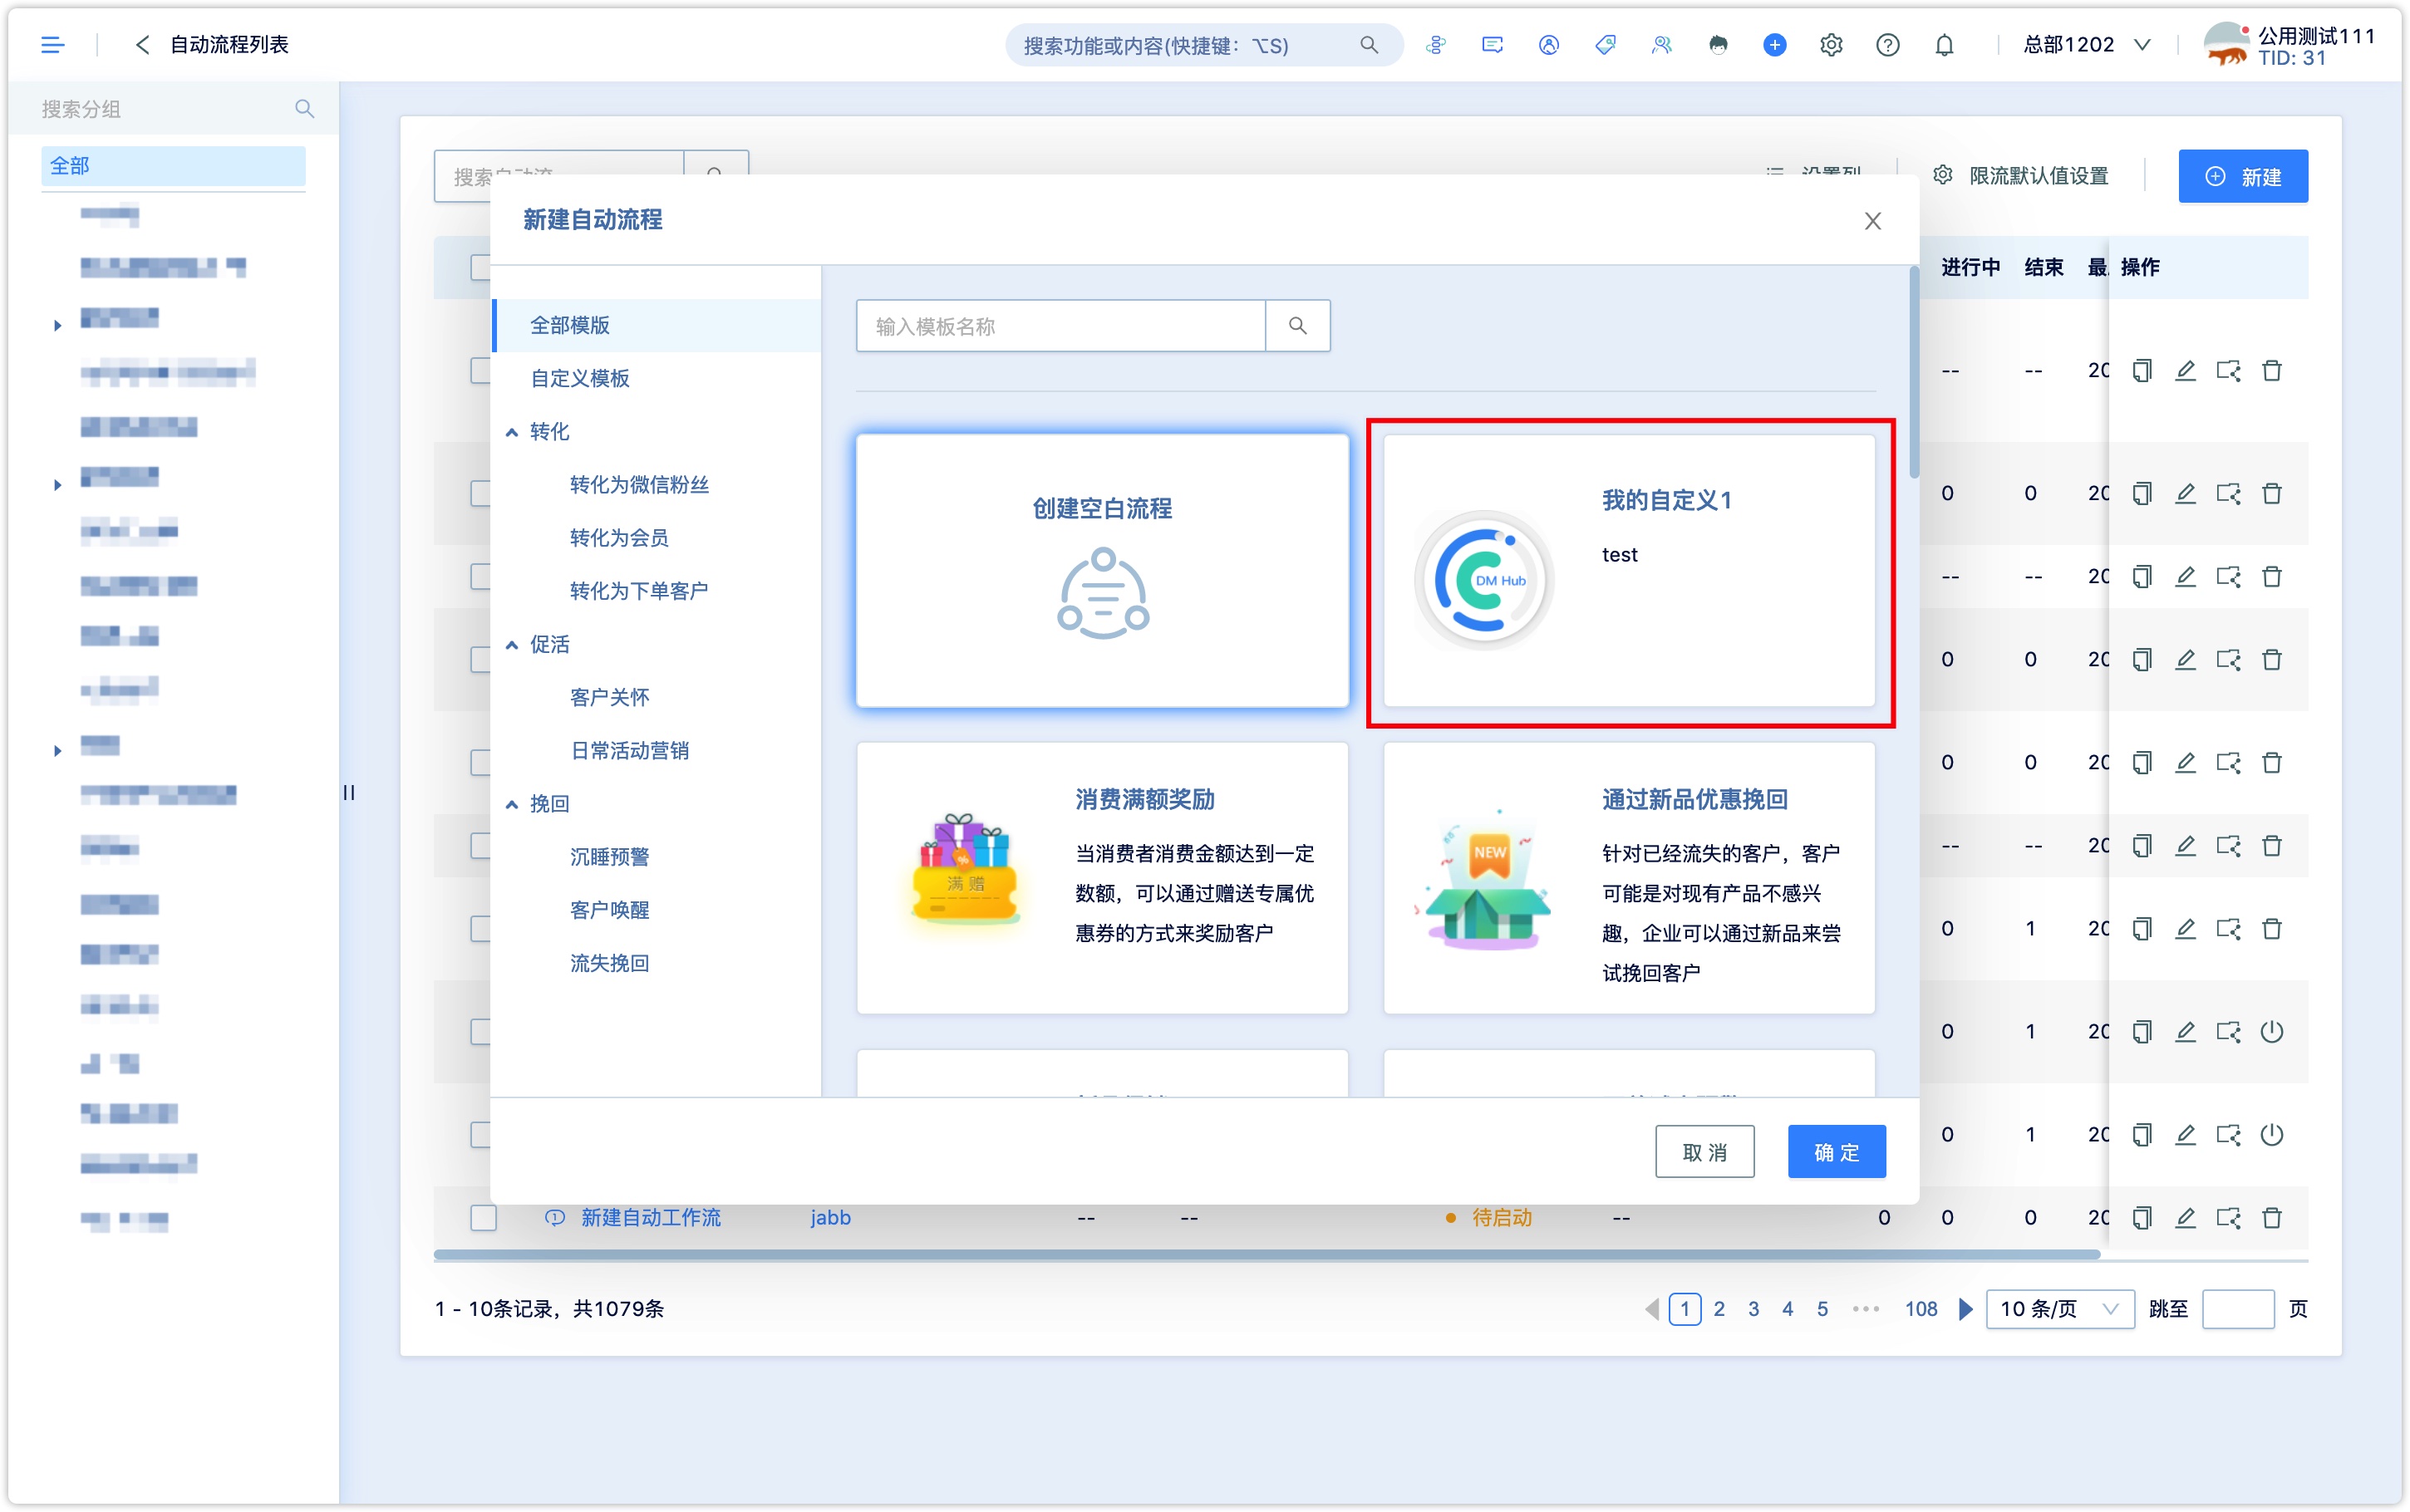
For frequently used workflow settings, you can click the "my Custom" template to create a workflow and save it as a template.
3.View Workflow data and reports
3.1 View customer data in a workflow
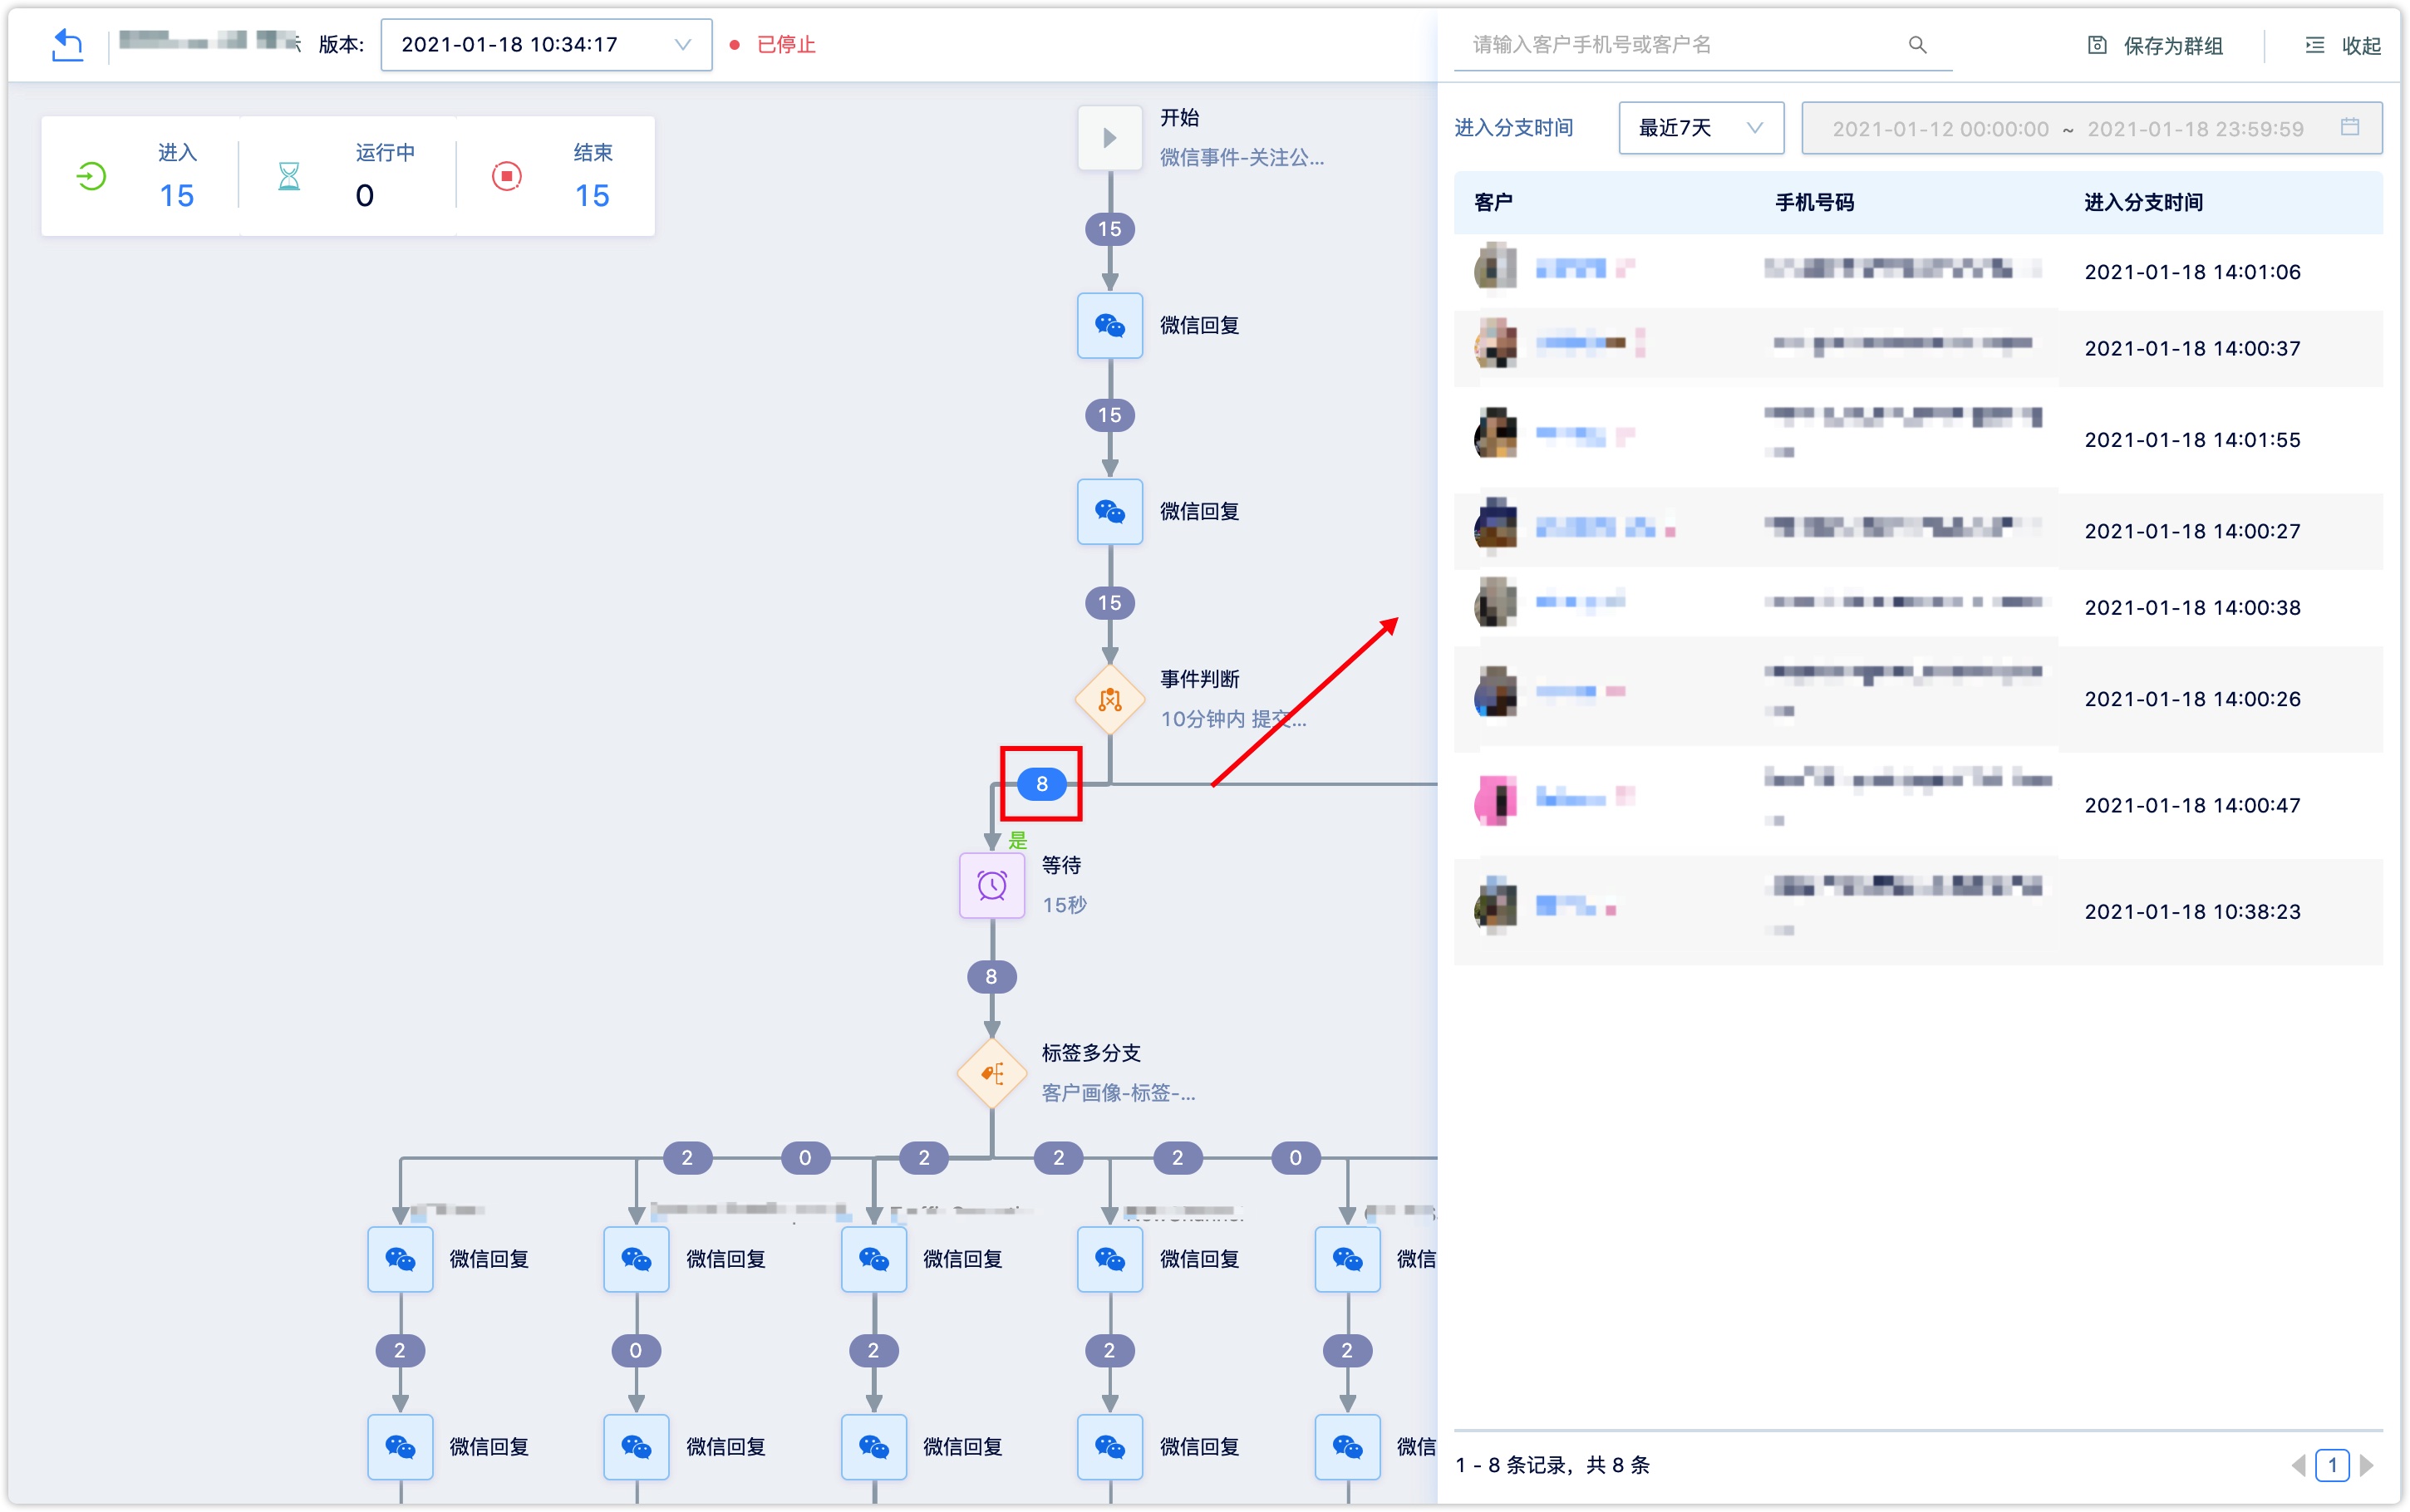
In the workflow list, click the name of the running or stopped workflow to enter the process page, select the version, and you can see the workflow of this version.
Click a specific customer on the right to enter the process to view the flow path of that customer in the process of this version (identification by the orange line).
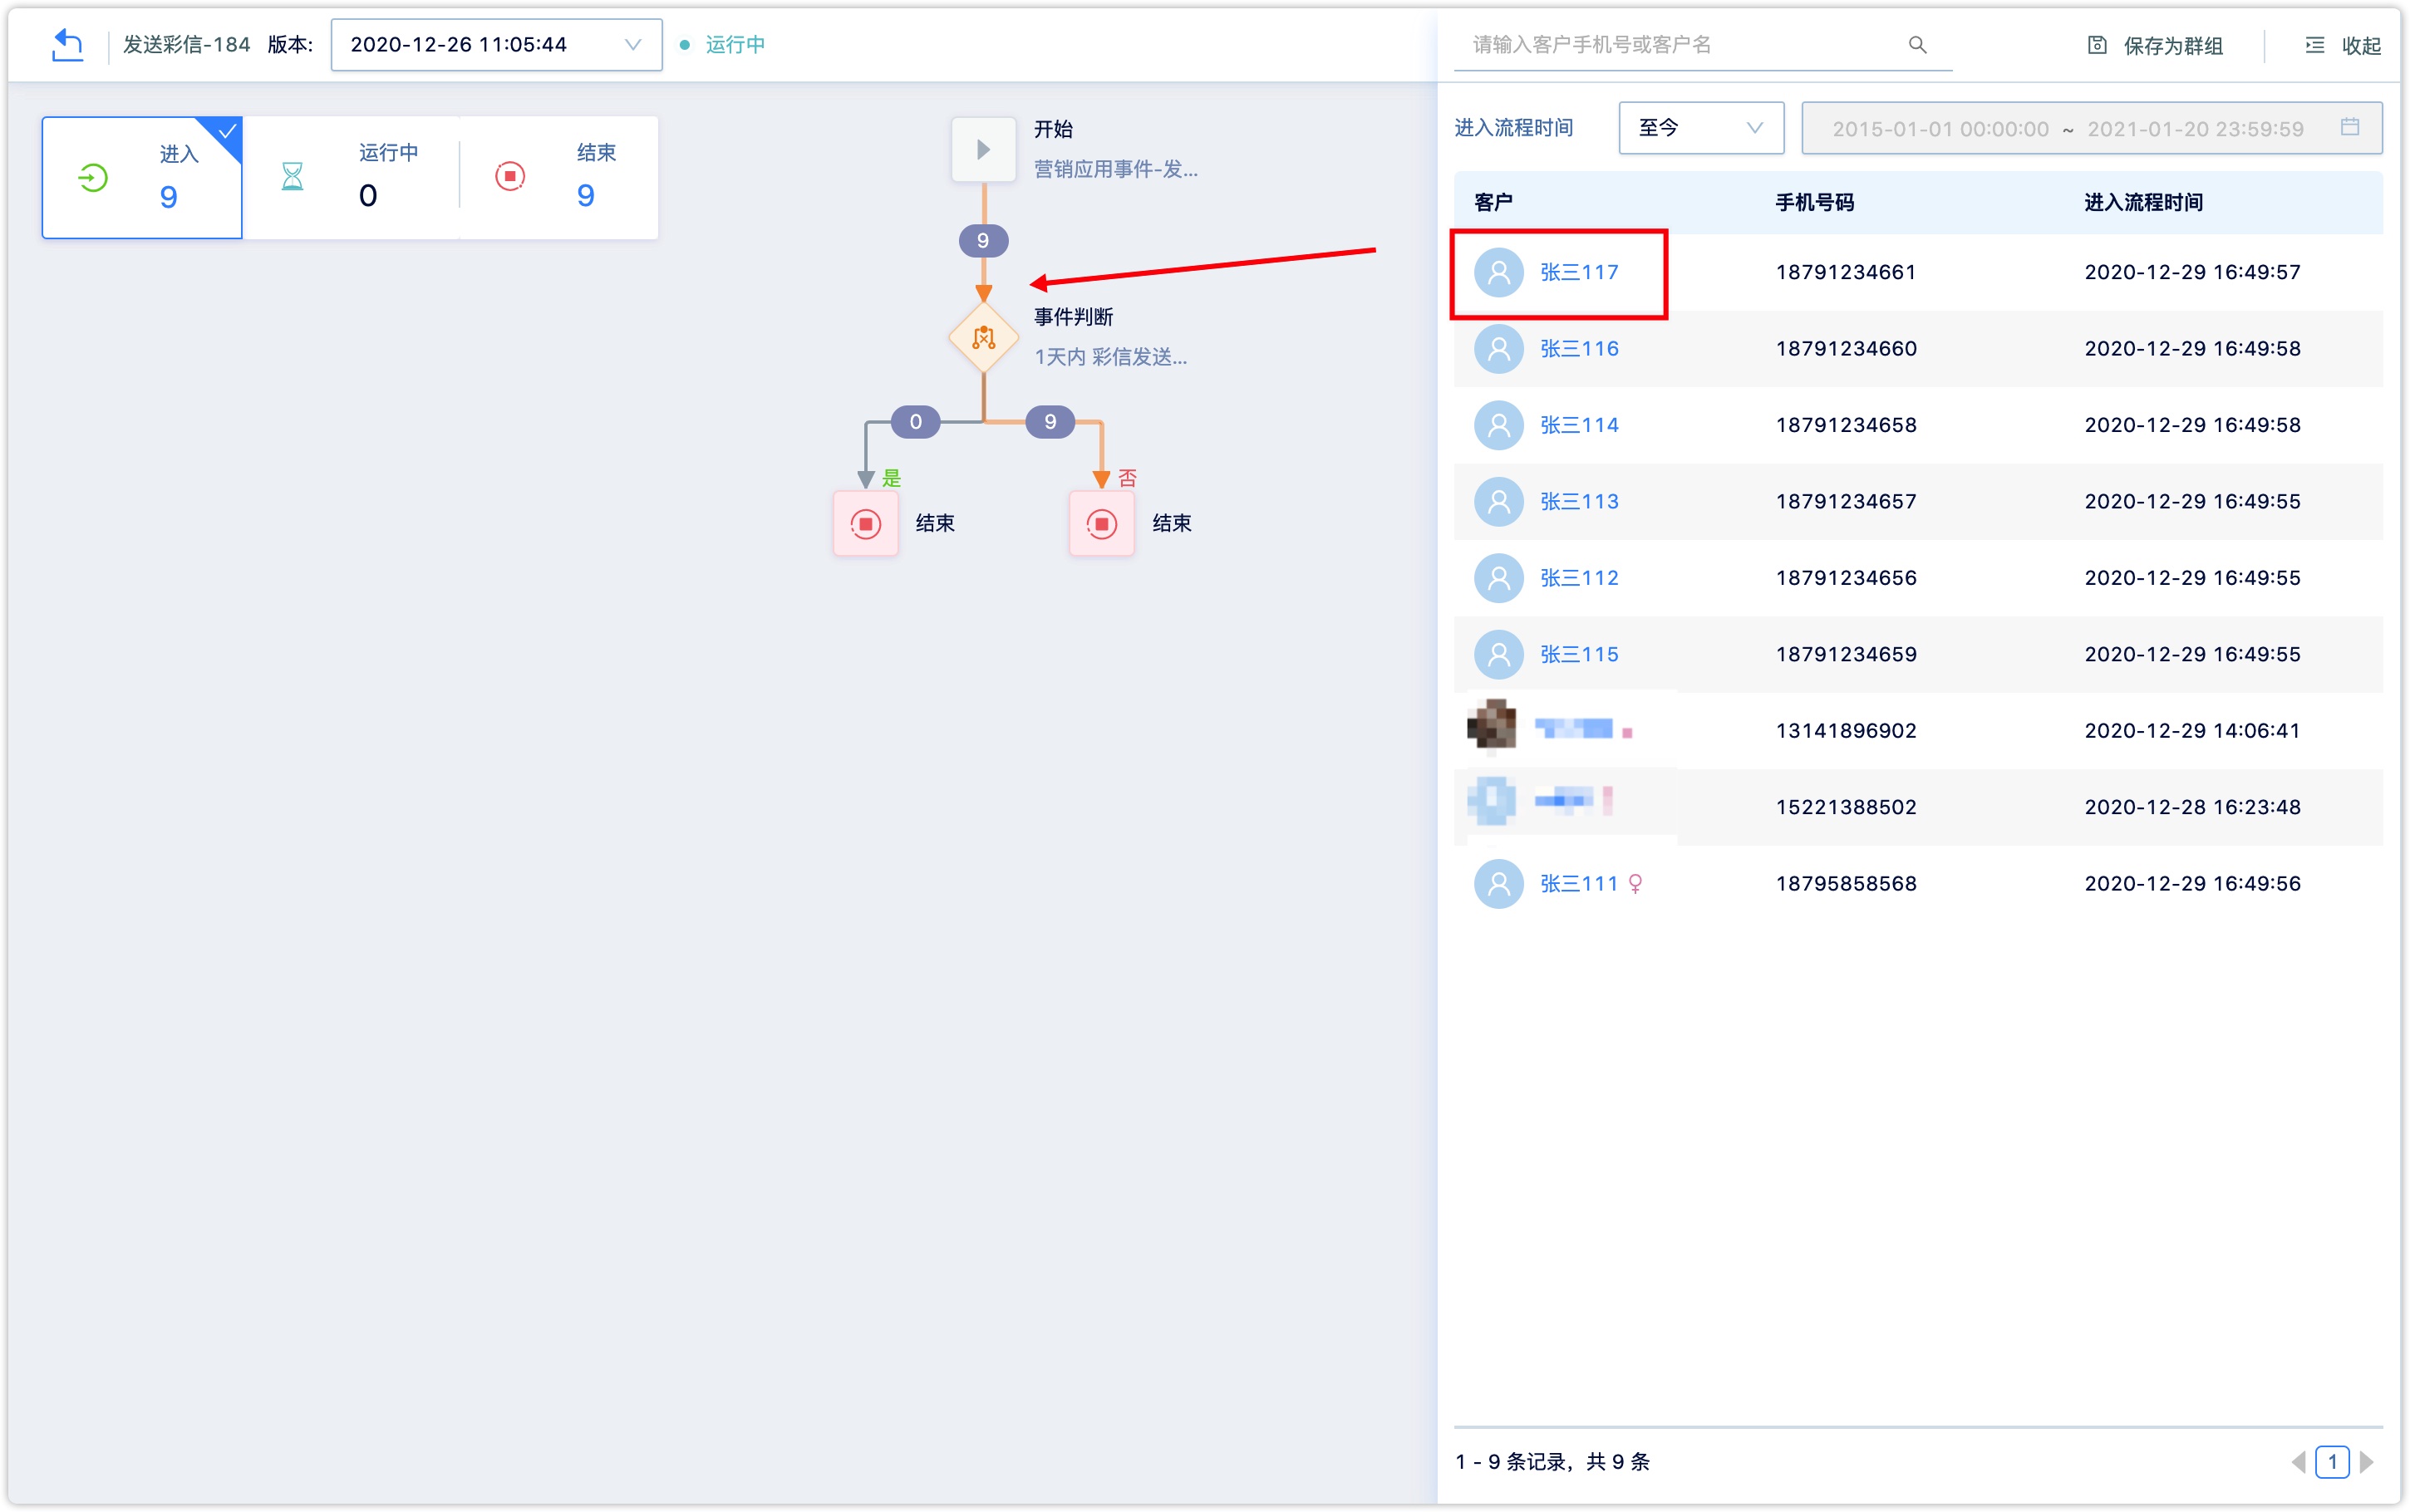
Click the number in the process branch to view all customers who entered this branch.
3.2 View the reports in a workflow
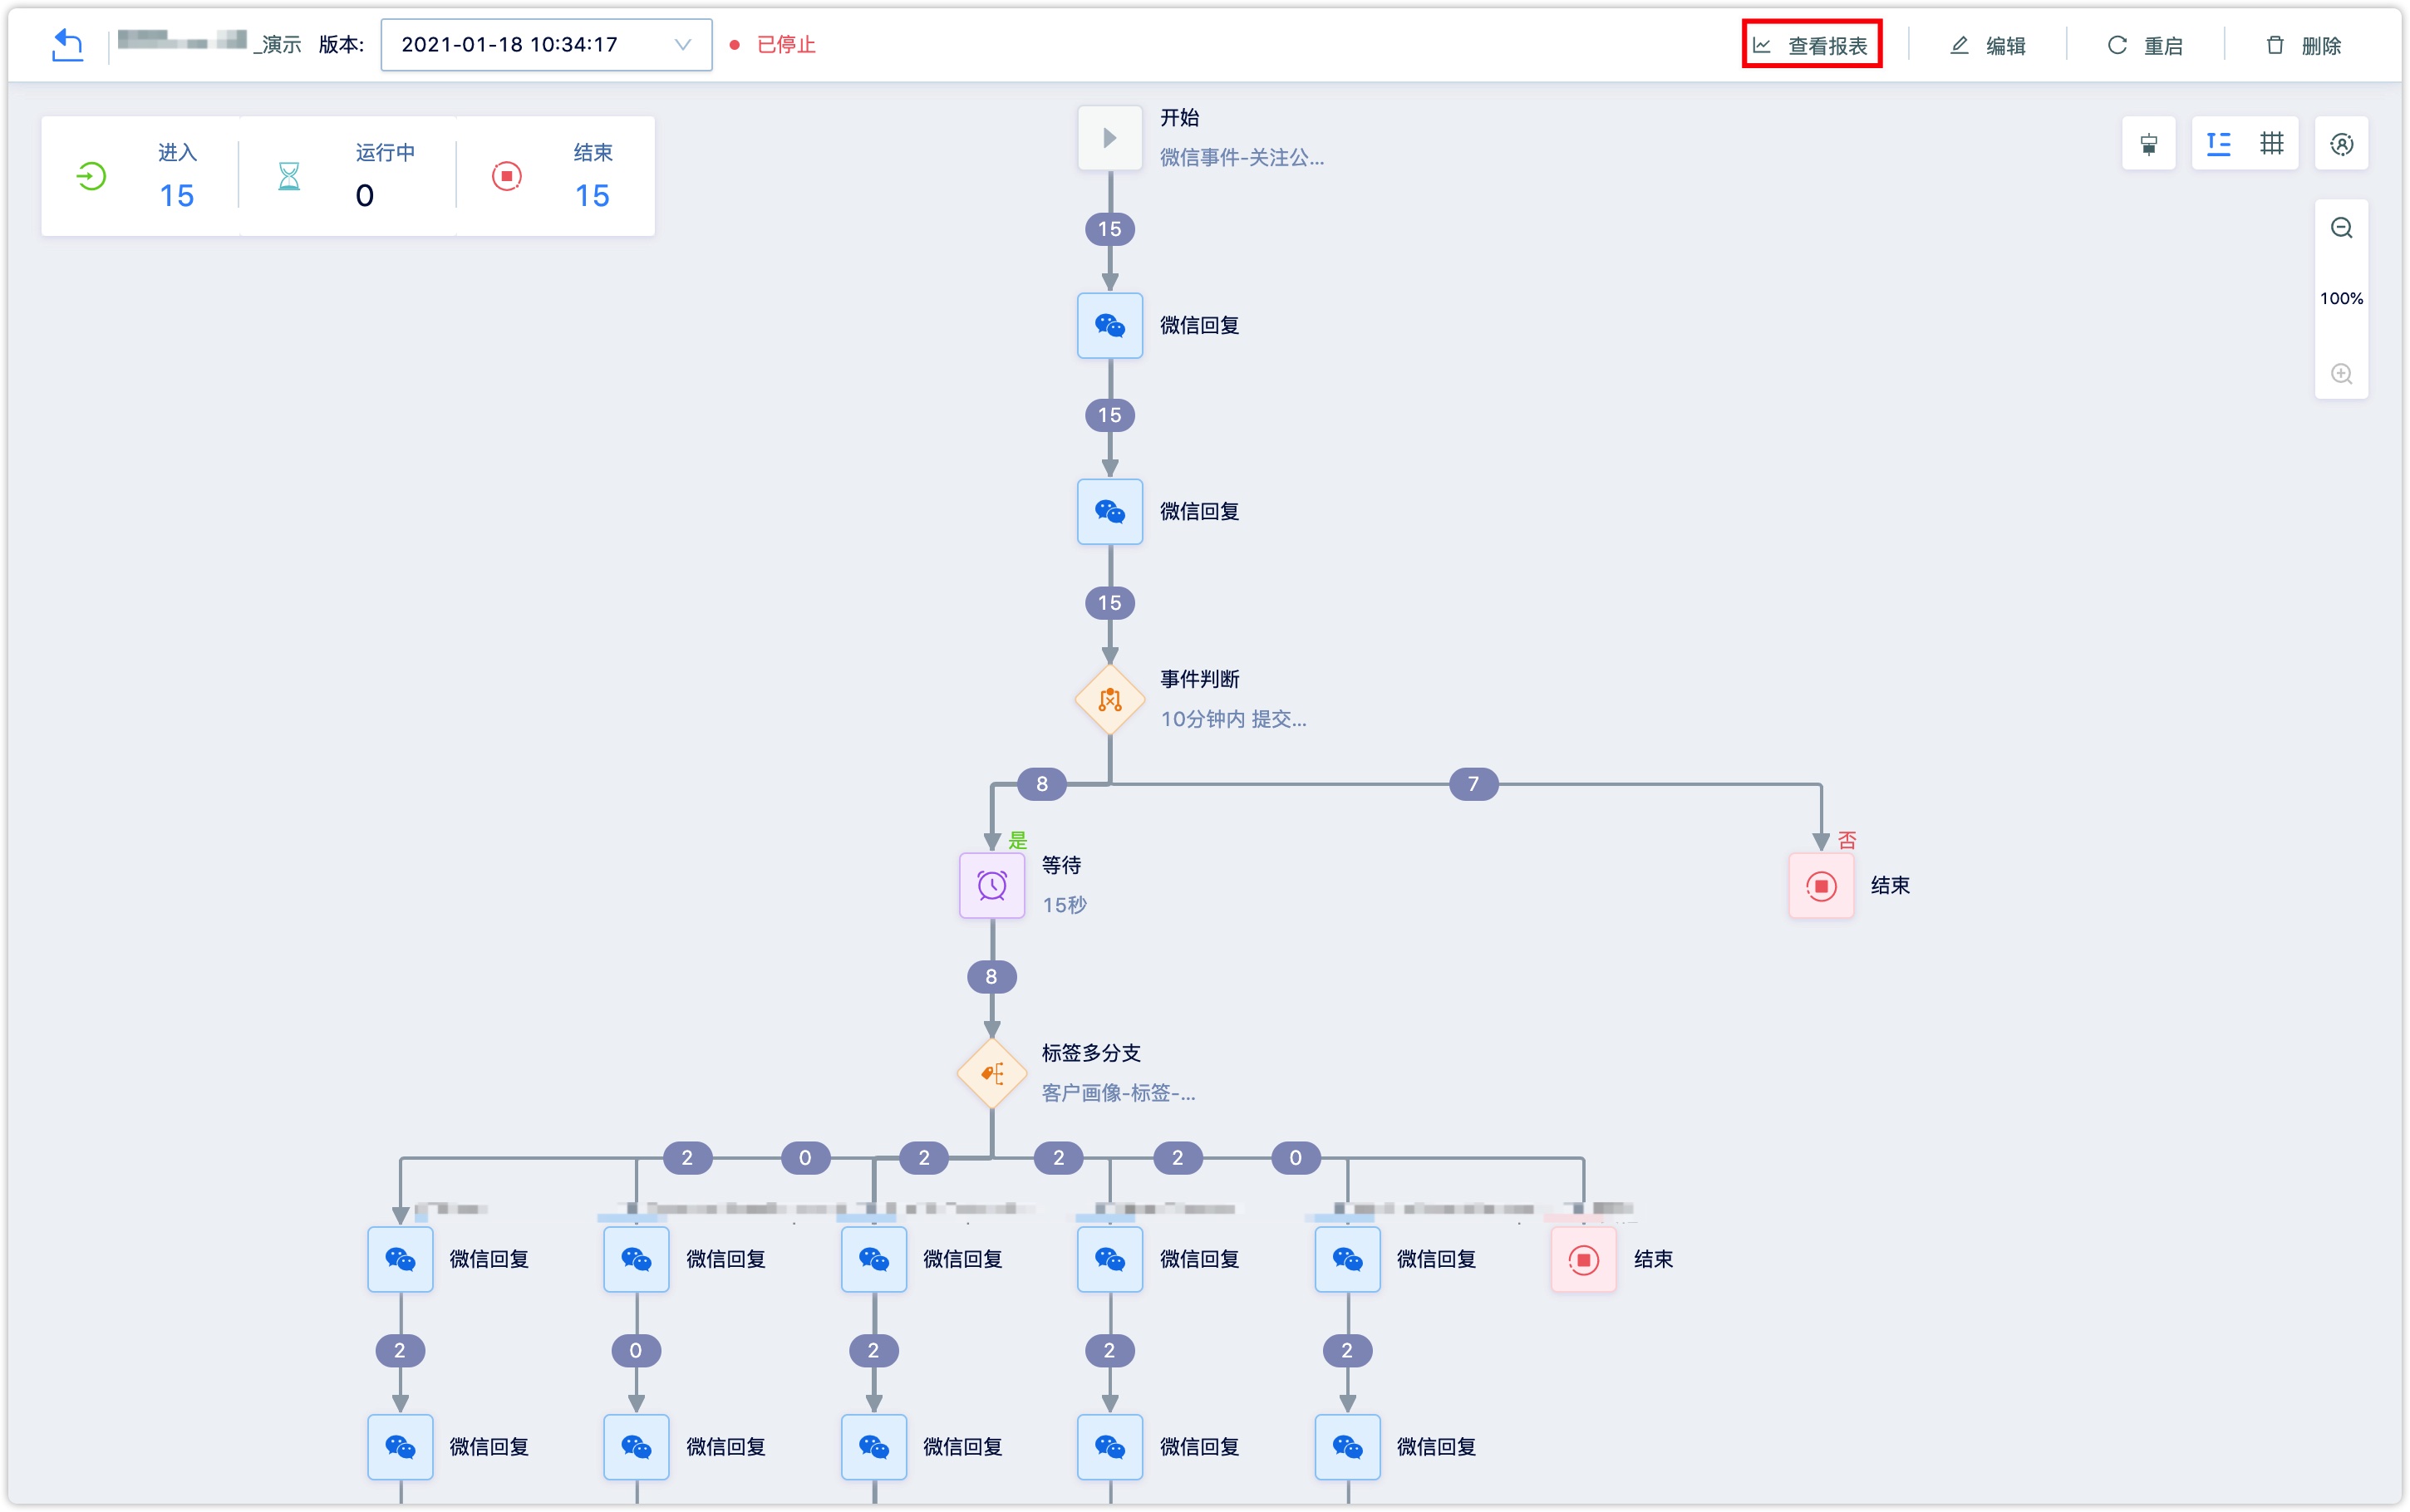
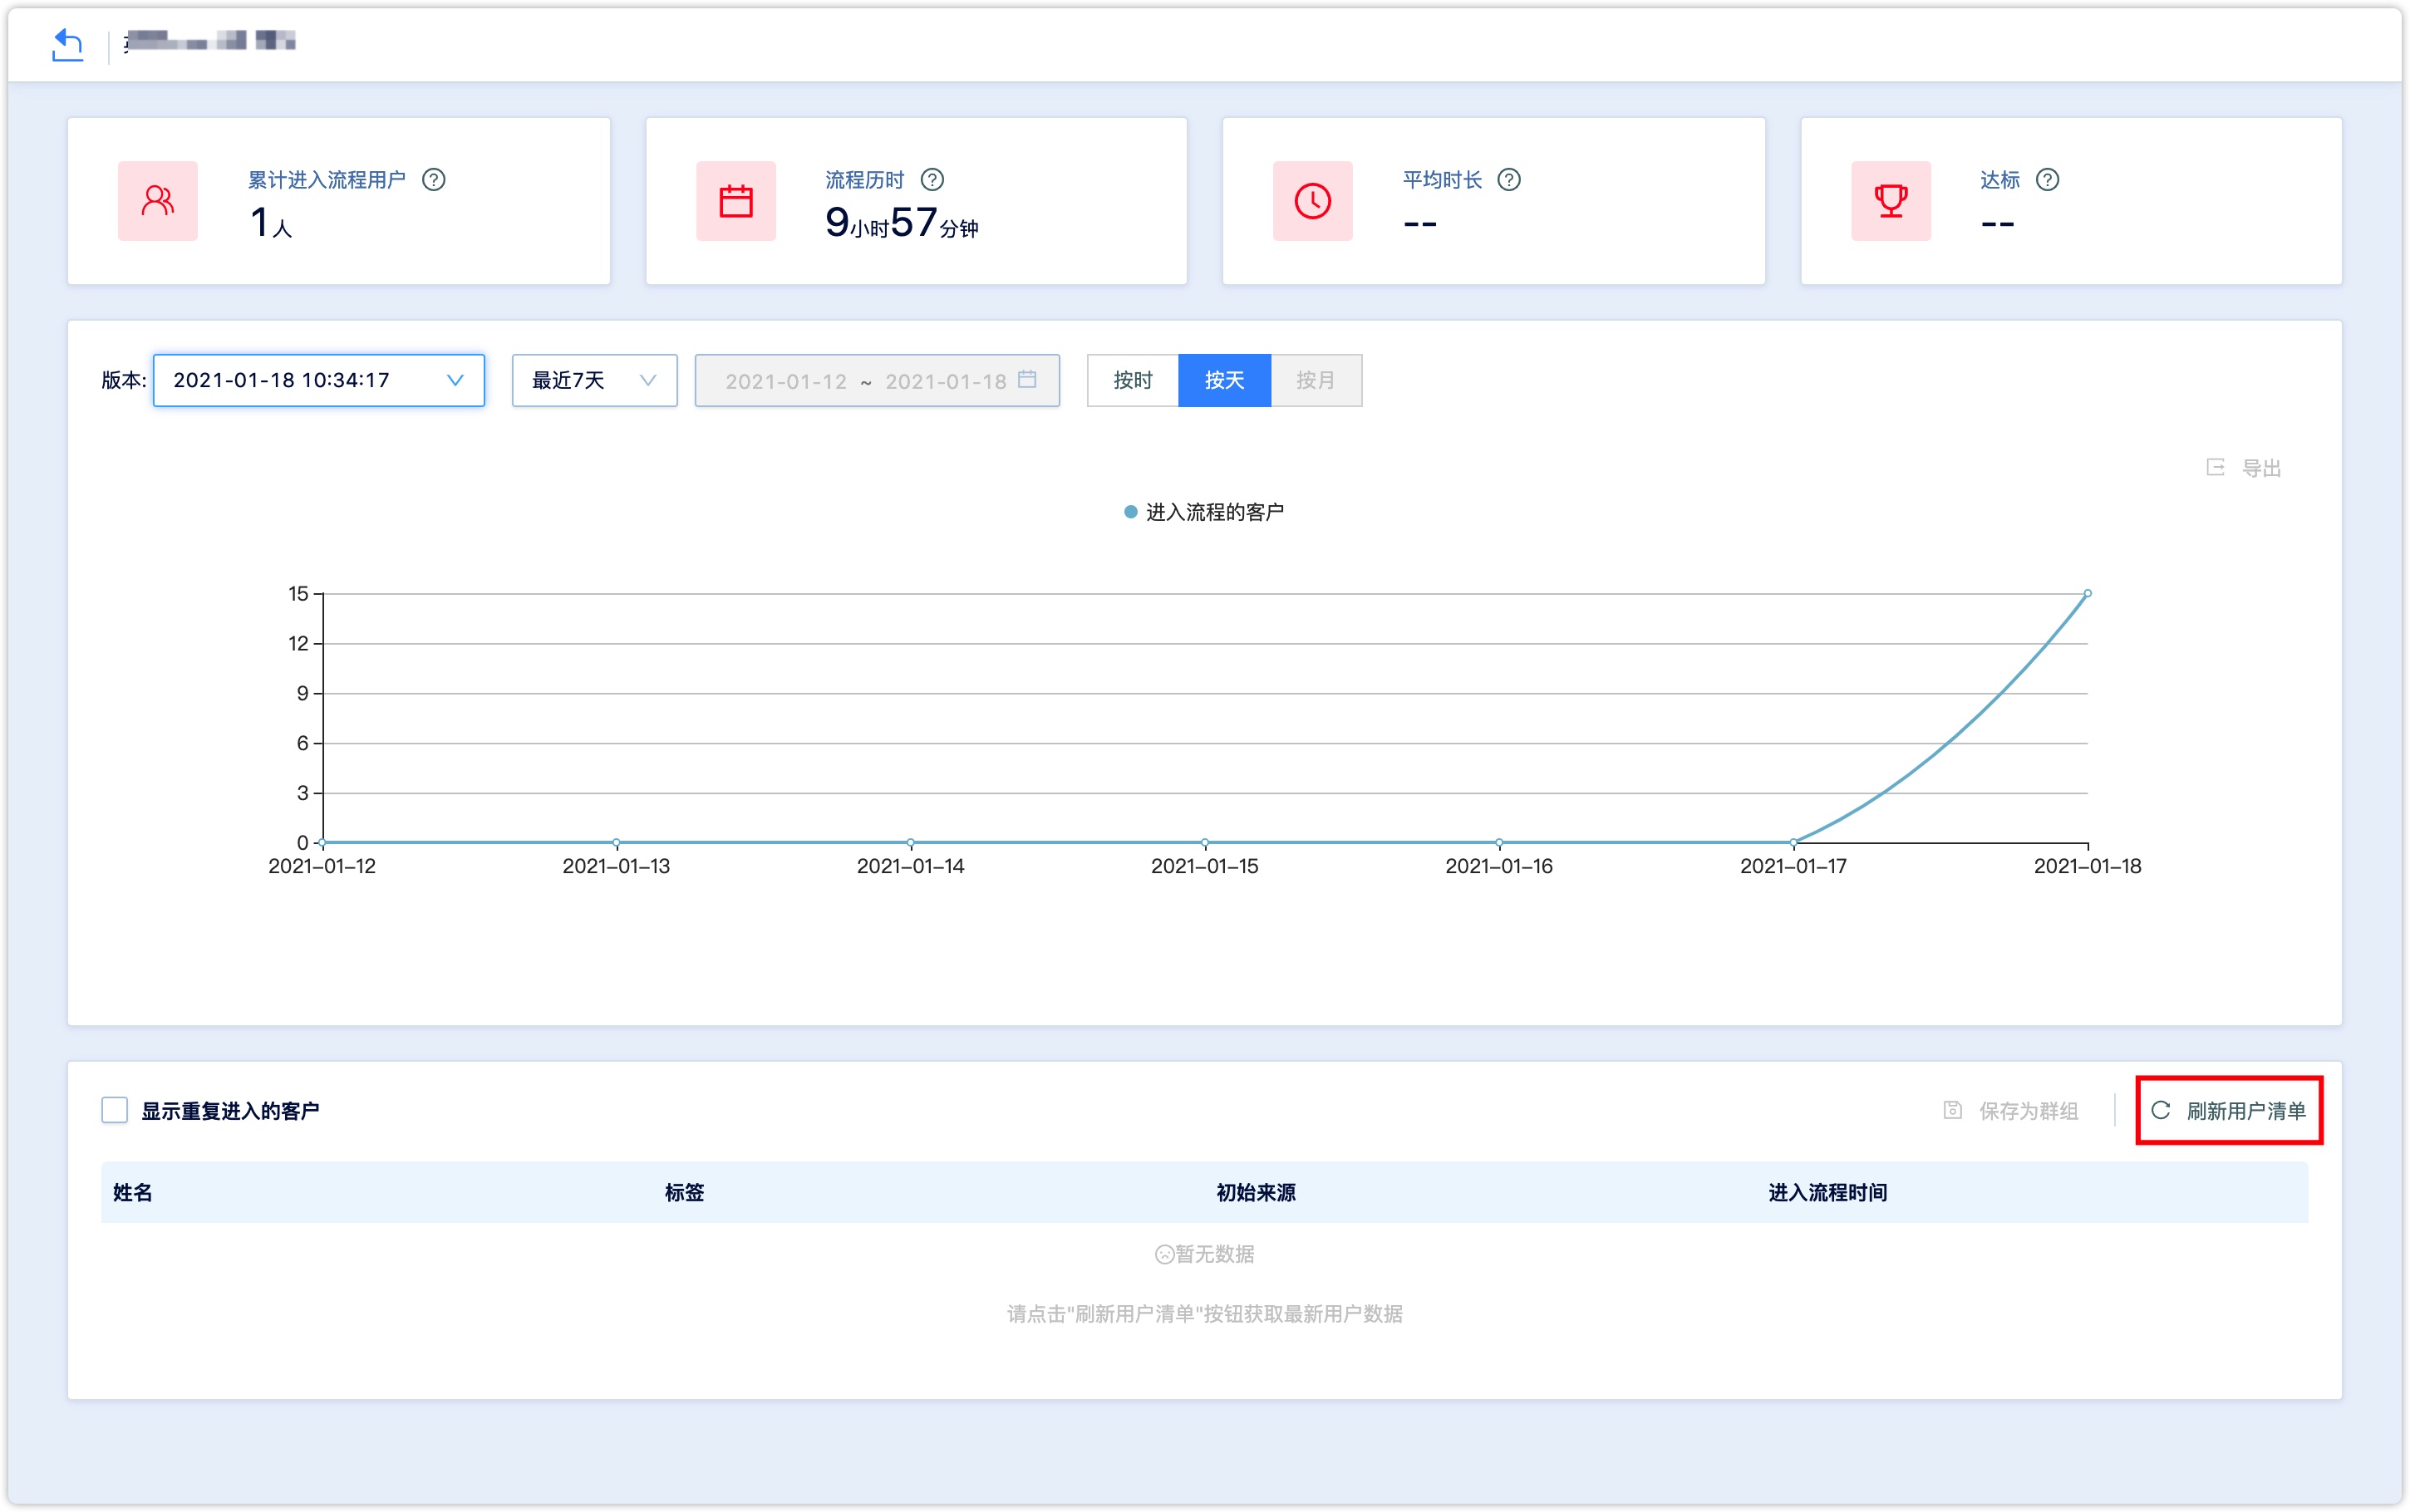
In the workflow list, click the name of the running or stopped workflow to enter the process page, and click 【View report】 in the top column to view the operation of the process, specific customers entering the process, and other data reports.
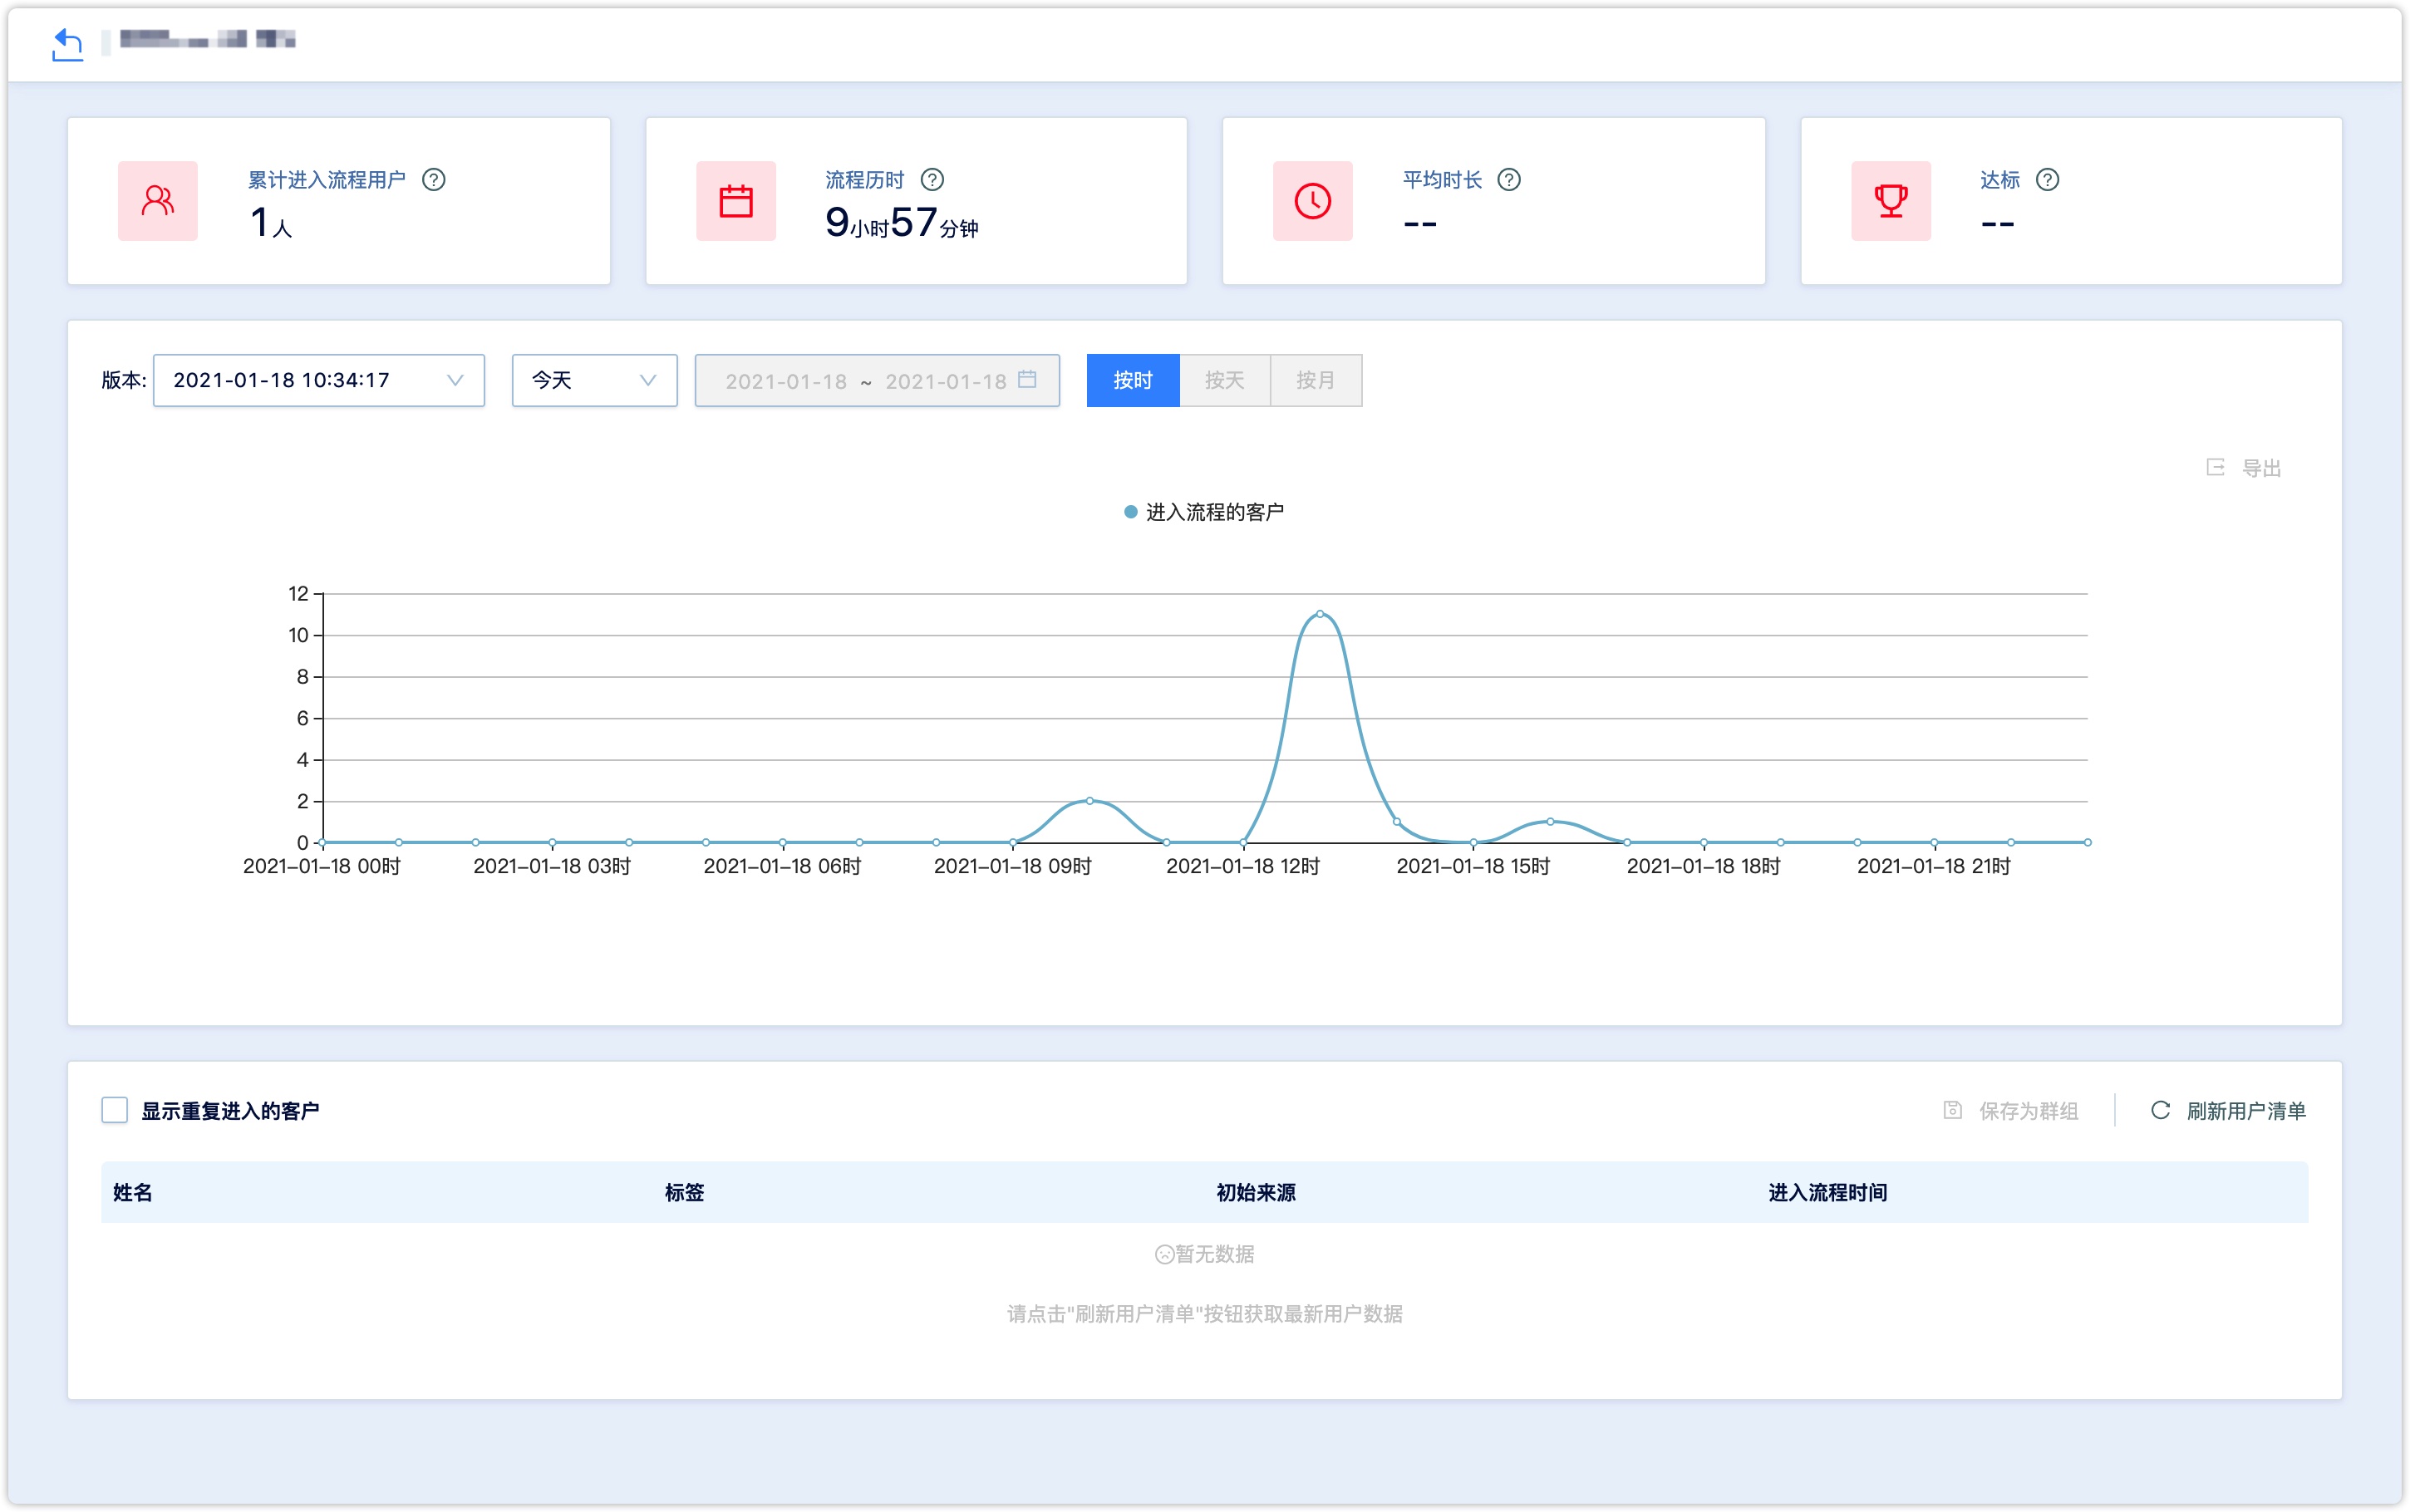
The following metrics can be seen on the report page:
The cumulative number of users entering the process: The total number of users who entered the workflow from the start to the current time.
Process duration: The total time from the start to the current time of the workflow.
Average time: The average time taken by a single user from entering the workflow to the end.
Reach the standard: The number of funnel users entering all the last layer divided by the cumulative number of users entering the process.
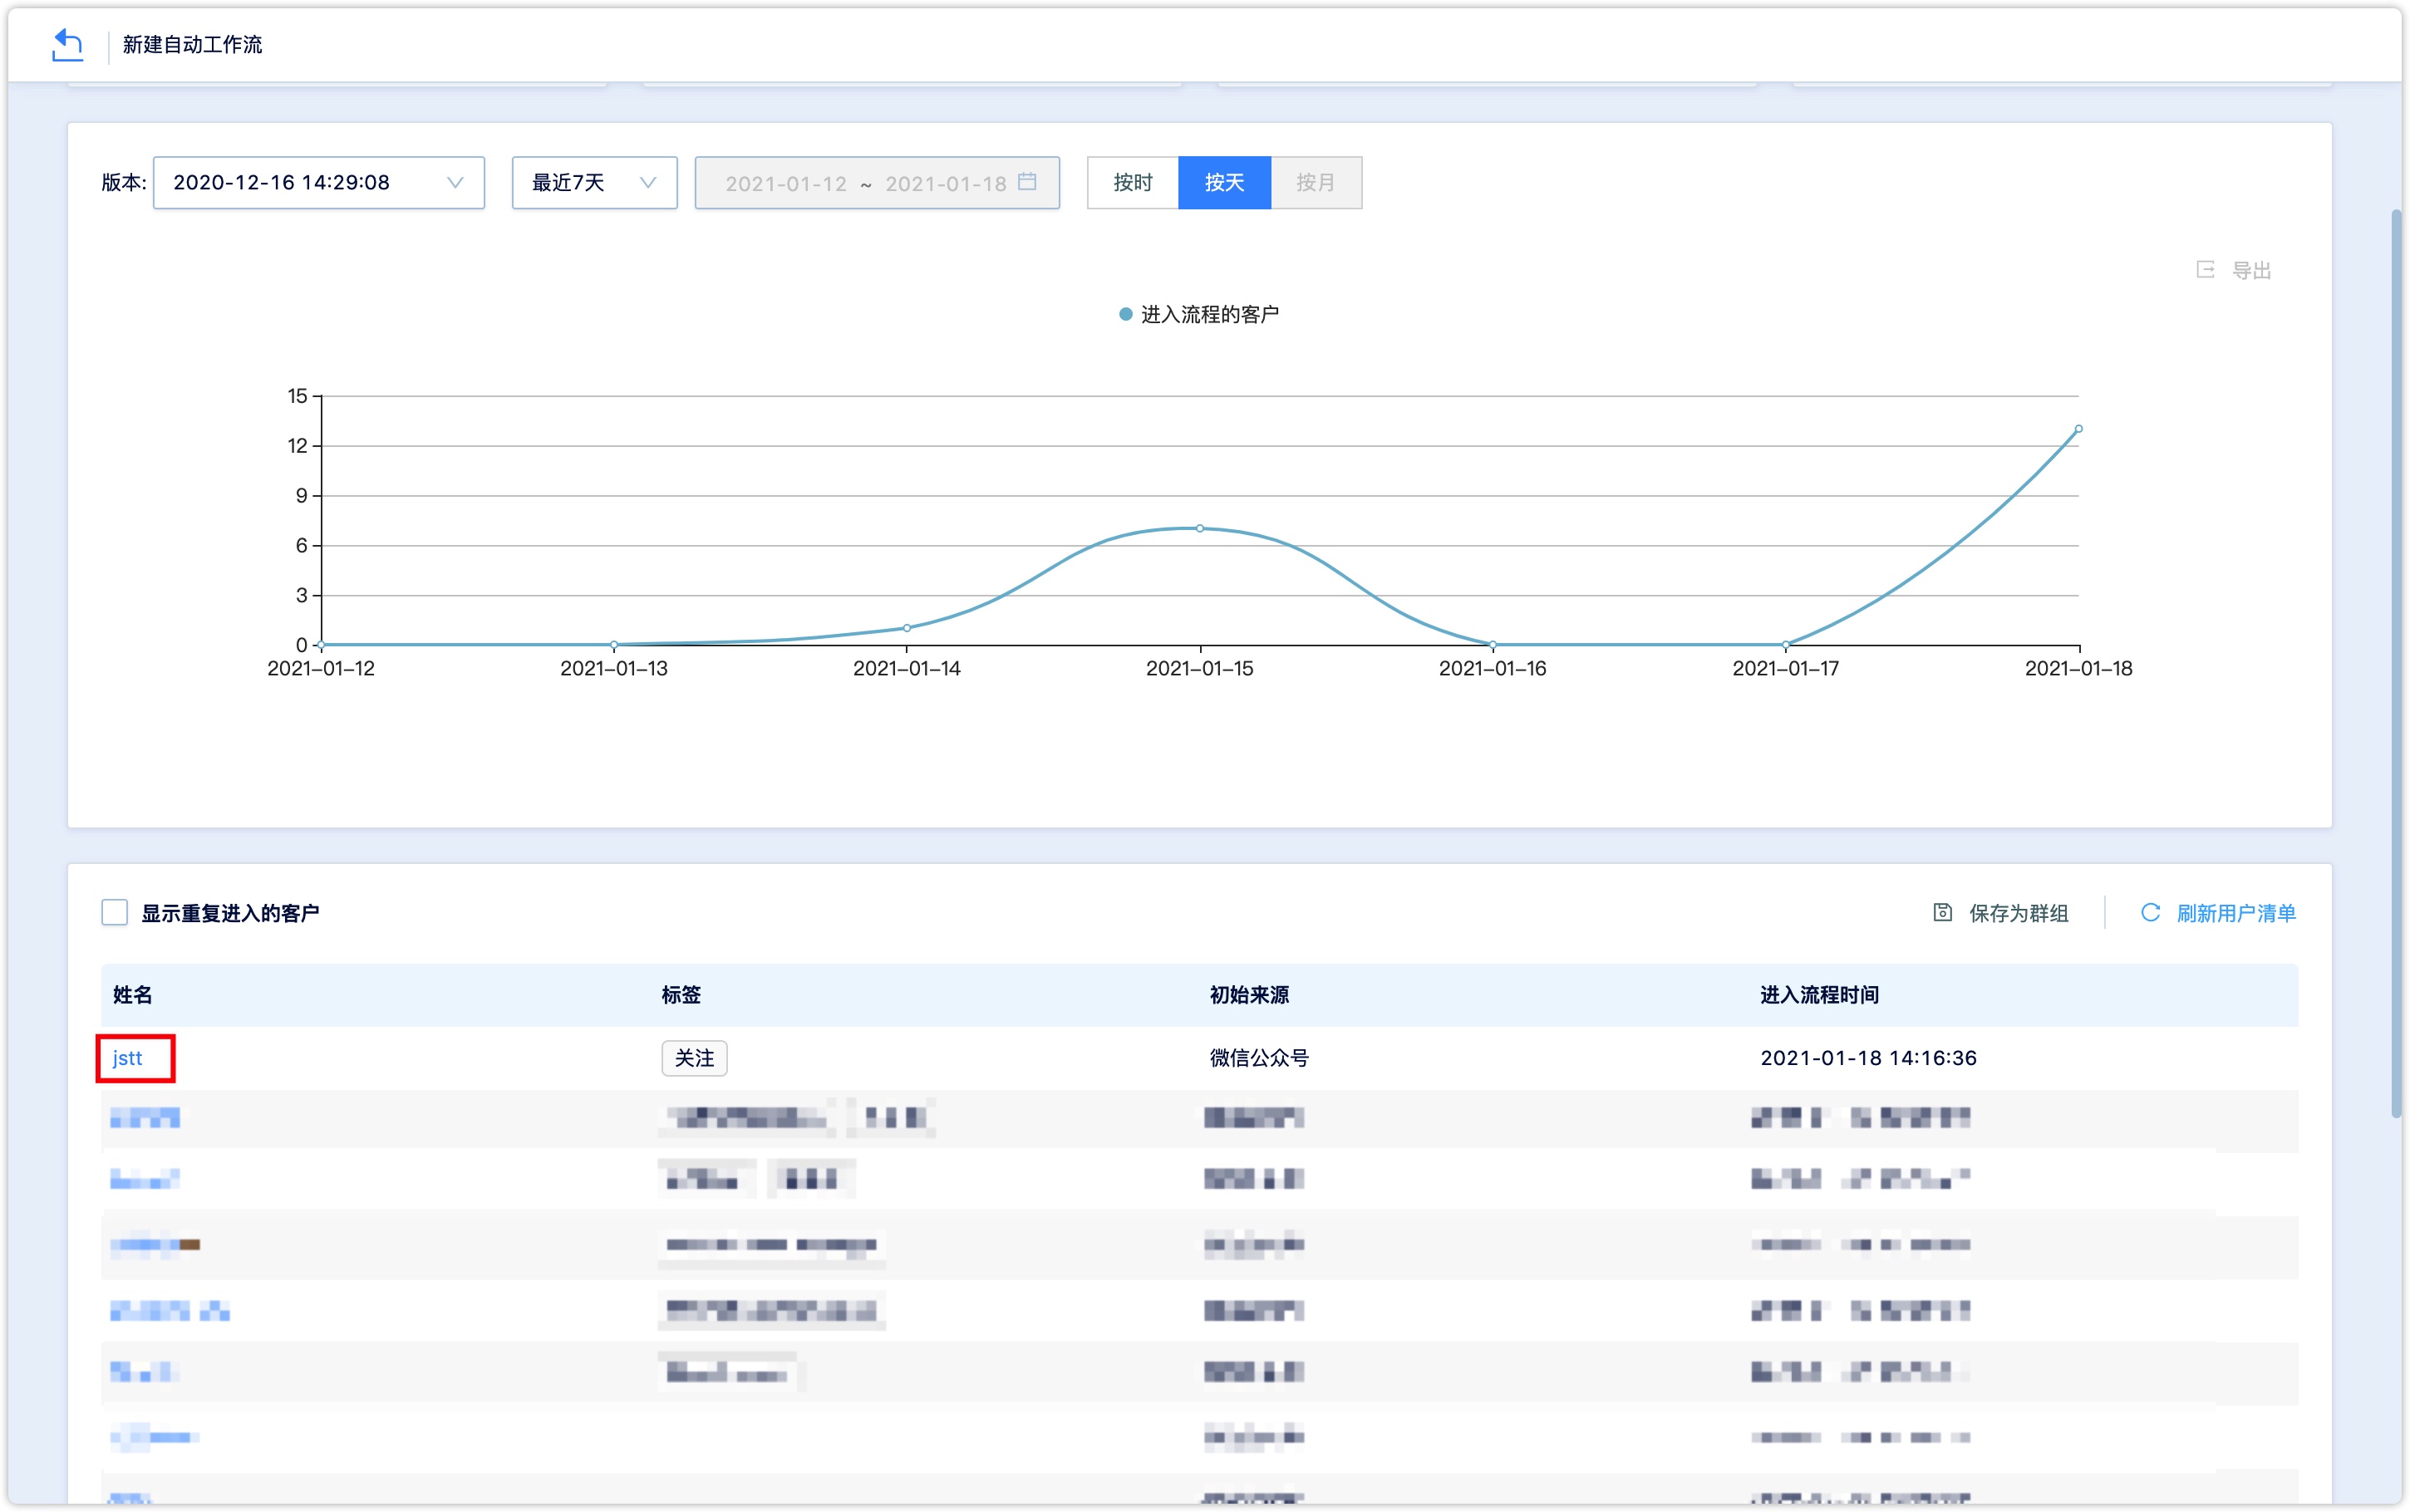
In this cumulative user, process duration, average market, under these three indicators, can be divided into versions, the number of customers who enter the process at different times.
As shown in the following image: there are two versions of this workflow. Select the latest version, then look at the data for the last 7 days. You can see that in the last 7 days, one customer entered the process on the 24th.
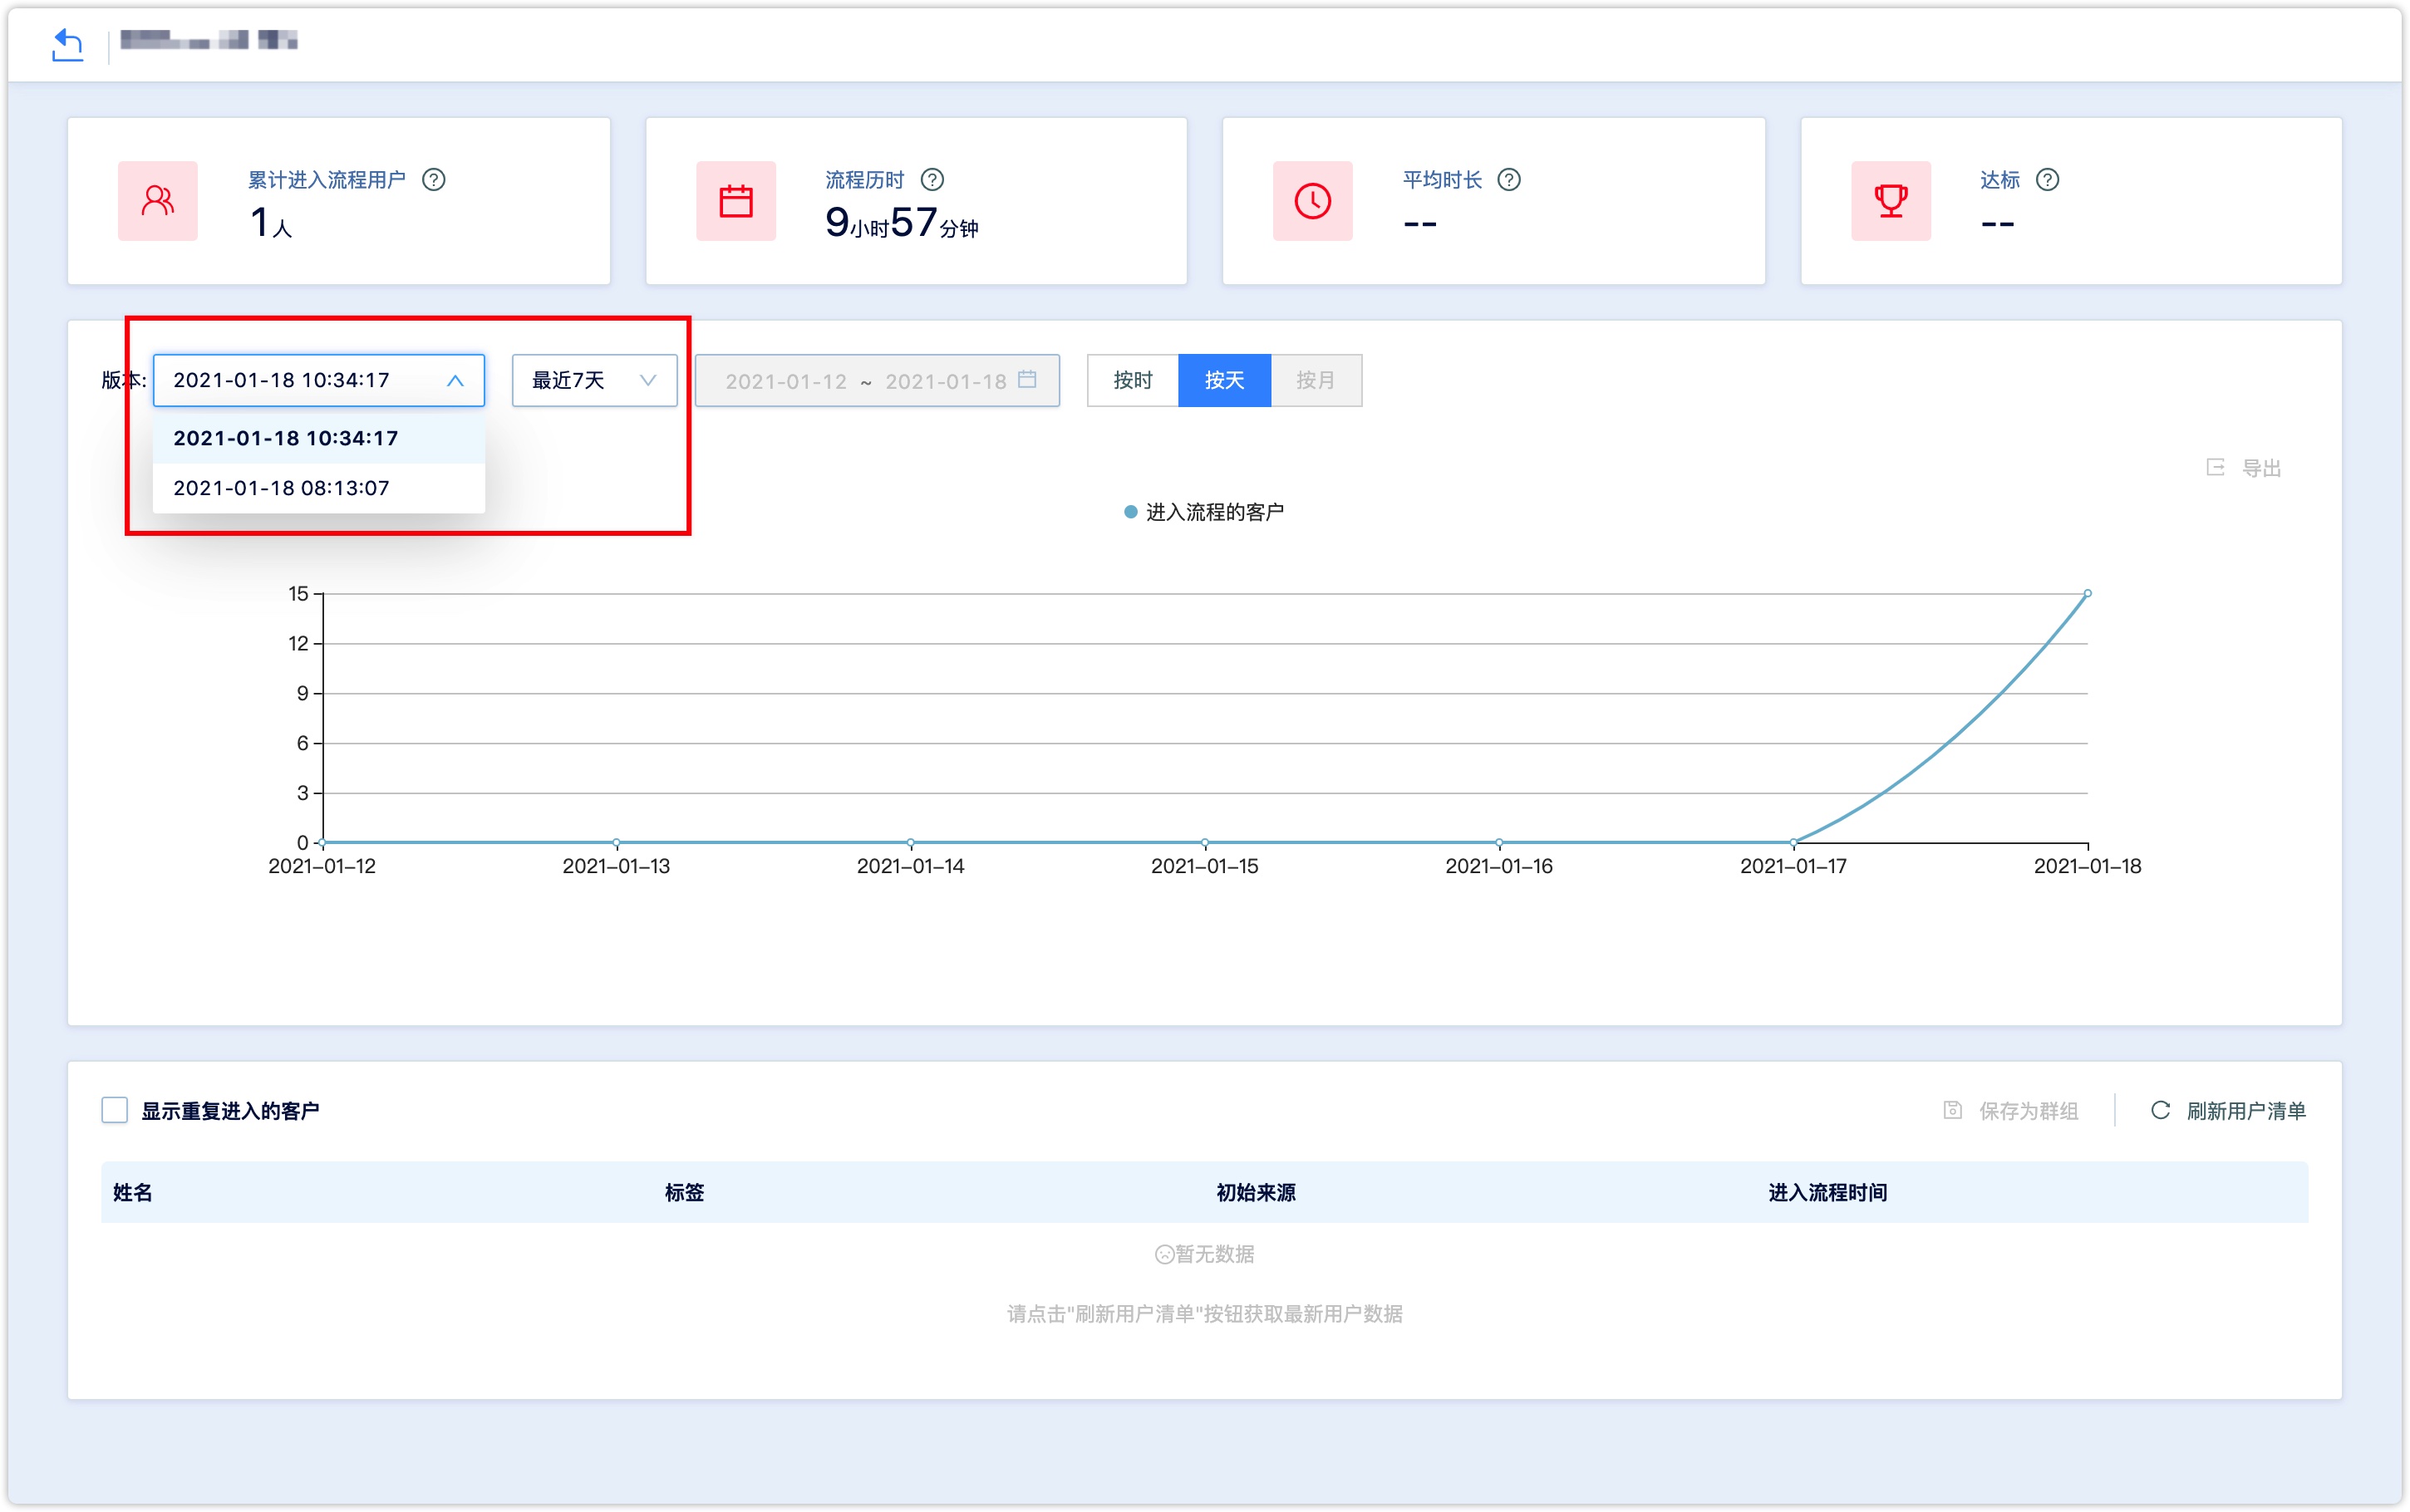
Click the lower right corner to refresh the user list and you can see the customers who have entered the process and can be saved as a group.
So the total number of customers entered by different versions of the process is the cumulative number of customers entered by this workflow.
After viewing the user list, click on the customer name below to view the customer details of this customer.
For some processes that include sending emails and text messages, you can see how many emails and text messages are sent by this process directly on the process page.